In Issue 45, I introduced Software-Defined Radios (SDRs) using the popular RTL-SDR dongle and the open source Gqrx software for receiving a variety of analog voice transmissions on multiple different bands for simple gathering of signals intelligence (SIGINT) and news. However, SDRs aren’t necessary to do most of that work. My Yaesu VX-6R handheld transceiver, for instance, is capable of receiving high frequency (HF) bands for shortwave listening, as well as AM air bands. SDRs really shine as a result of:
- Their relatively inexpensive price point
- Their flexibility when paired with the appropriate software
That flexibility is especially evident when dealing with the wide array of digital communications that they’re capable of receiving and decoding. The low cost of the hardware and the zero cost of most of the software is what makes them such an excellent tool in the toolbox for monitoring and analyzing the RF signal cloud around us on a daily basis.
In this issue, I’ll explore some additional ways in which software-defined radios help level the playing field with amateur SIGINT, specifically:
- Monitoring and tracking aircraft via ADS-B
- Monitoring and decoding trunked and digital voice communications
- Coupling SDRs with Android devices
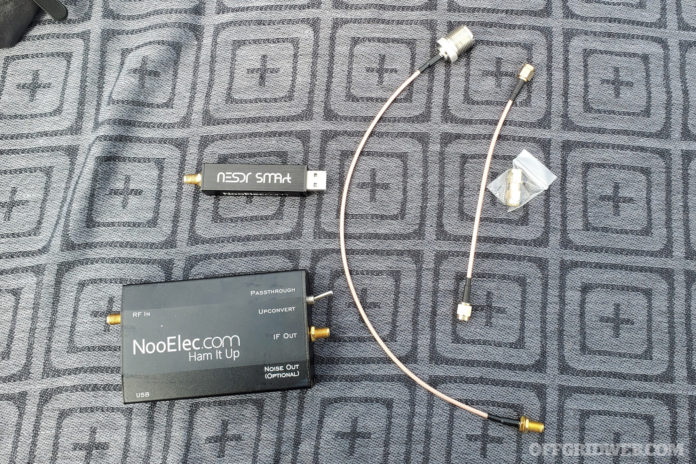
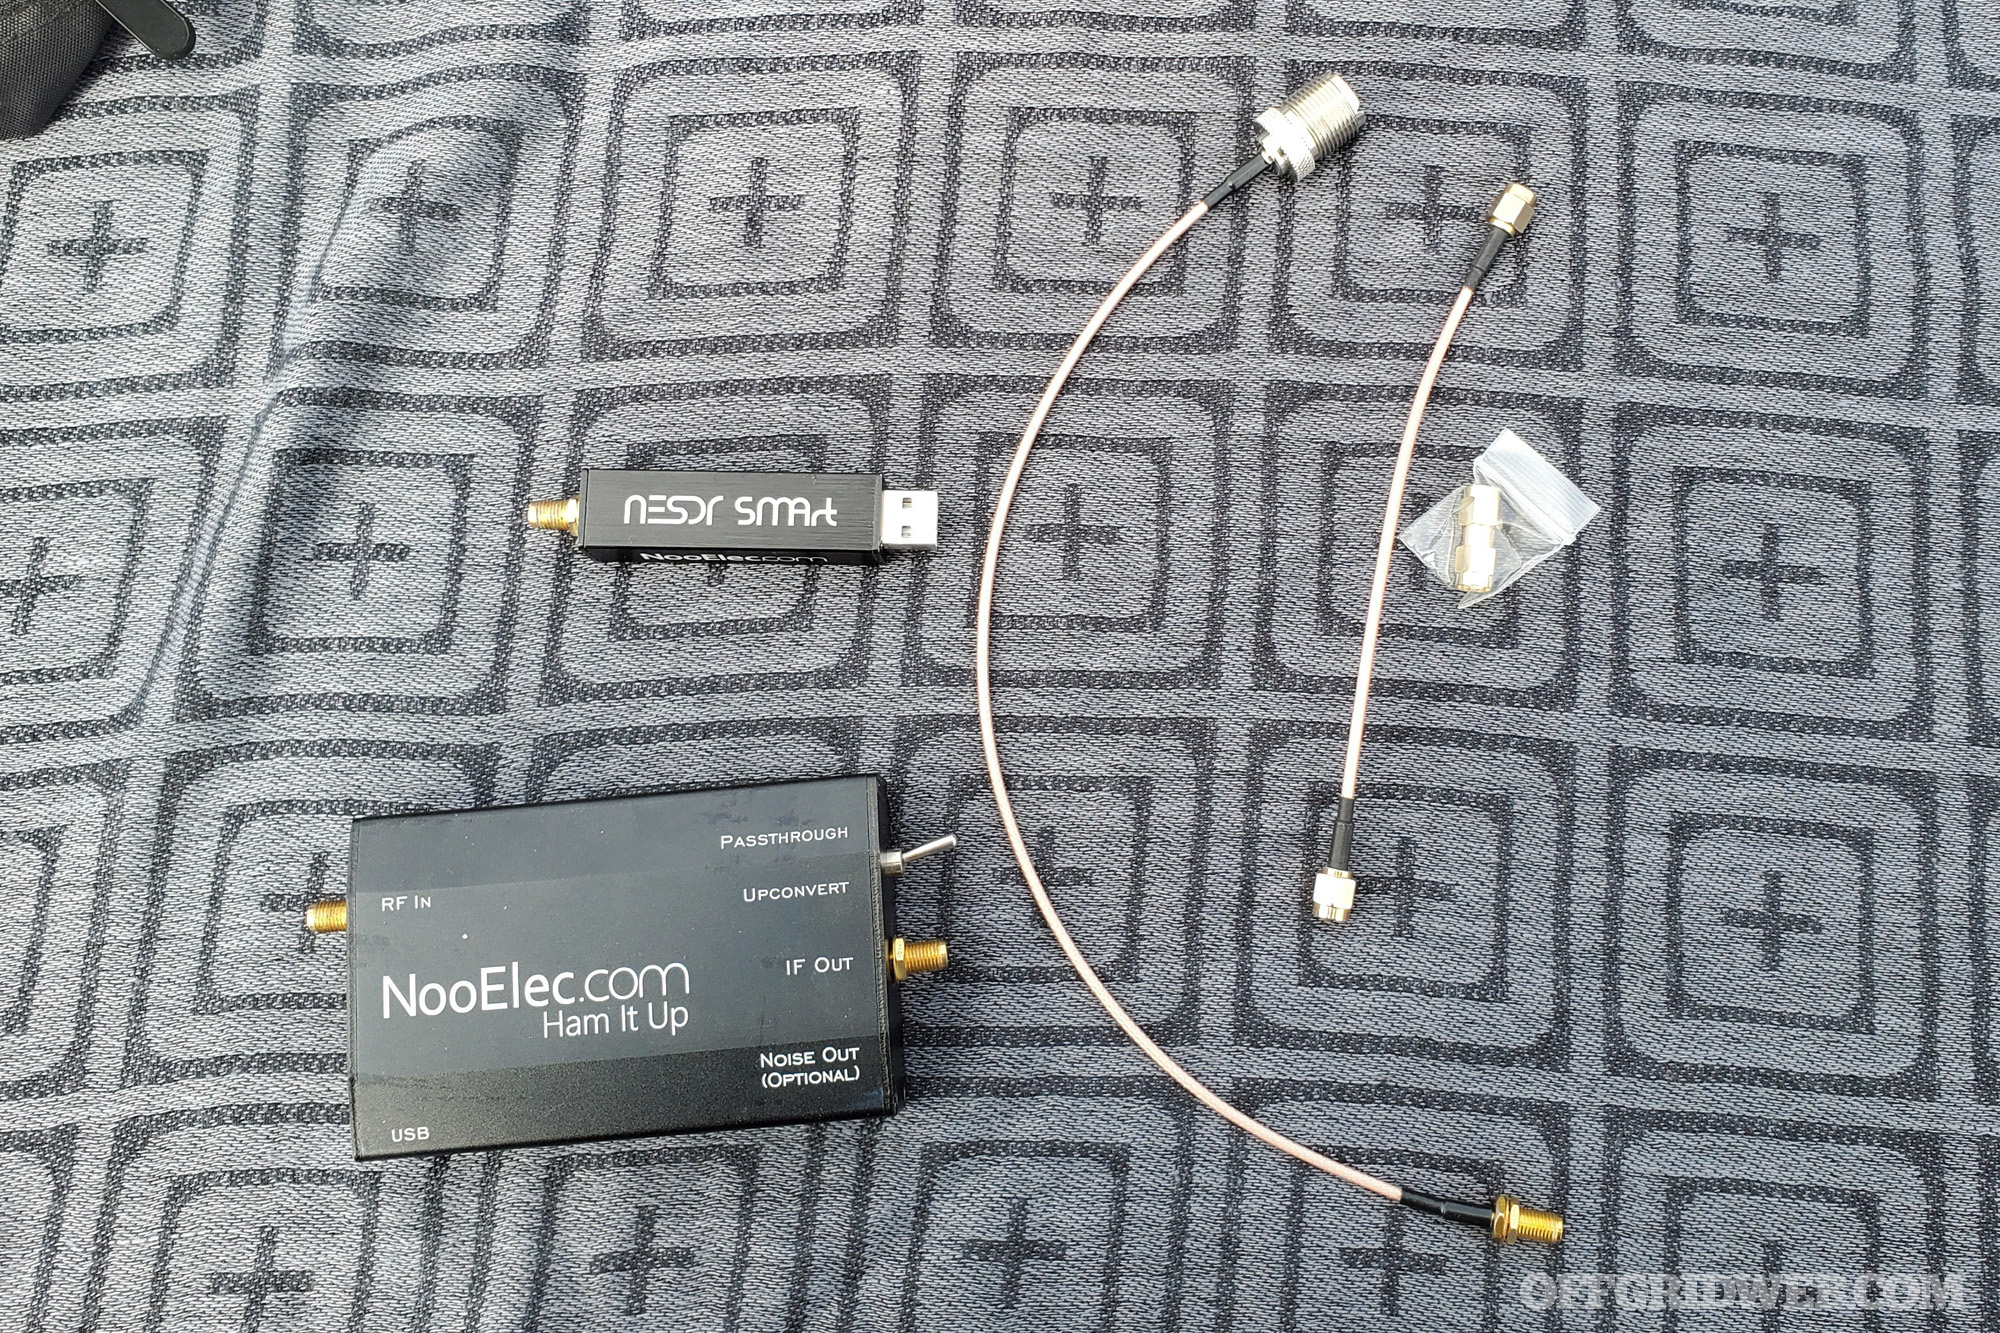
Above: The Nooelec RTL-SDR bundle is a common, inexpensive way to get into SDR, including the ability to access HF bands with the Ham It Up up-converter. Depending on the antenna you want to use, you may need different cables. SDR equipment and antennas can pack small. Often, the largest piece of equipment is going to be the laptop. You may consider an Android tablet or phone as well.
Aircraft Monitoring with ADS-B
Modern air traffic control doesn’t really rely solely on radar. Instead, air traffic control systems make use of advanced digital transponders, which report on various relevant aspects of the flight and its position. This information is provided by a system called Automatic Dependent Surveillance-Broadcast (ADS-B).
ADS-B data packets are broadcasted periodically by the transmitter on equipped aircraft and include data such as:
- Transponder squawk
- Flight or tail number
- Altitude
- Heading
- Speed
- Current lat/long
There are many people who make a hobby out of flight watching, and services such as FlightAware gather this information and make it available online to interested parties, combined with other information about flight plans or the aircraft. There’s at least one popular “conspiracy” oriented YouTube channel that gets its material from tracking civilian and military aircraft through this method.
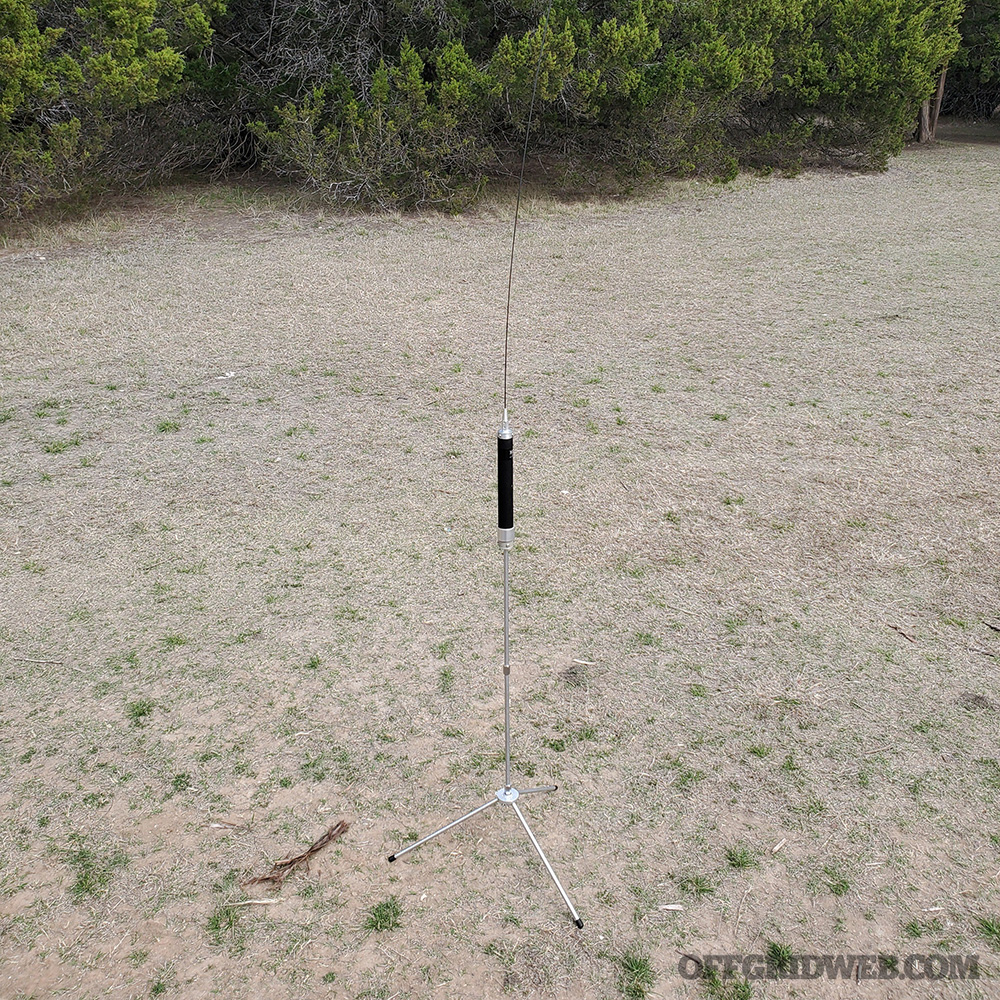
Above: The SuperAntenna MP1C is a portable antenna system utilizing a loaded coil system for tuning the antenna. This same antenna can be used with a standard transceiver such as the popular Yaesu FT-891.
So, what’s the actual benefit for “preppers?” First, knowing what’s normal is key to knowing what’s abnormal; understanding what types of aircraft are operating nearby is therefore helpful. From a civil liberties perspective, cities such as Baltimore, Maryland, have in the past run aerial surveillance programs, flying planes equipped with signals intelligence and high-resolution imagery equipment over the city. The increased availability of drones and their entry into regulated airspace means that drone monitoring of the domestic population is likely to become an increasingly common state, making the value of citizen monitoring of aircraft in regulated airspace an important part of threat-awareness.
Getting Set Up
The same hardware setup from Issue 45 is all that’s needed to get started, though you’ll want an antenna that’s resonant on 1090Hz. Common VHF/UHF antennas will work alright, and there’s no need for a high-gain antenna. Just a vertical or dipole will do. Make sure you have a decent ground plane for a vertical; a simple baking sheet coupled with a mag-mount vertical antenna will work just fine.
The key here is the software, in this case a program called Dump1090, which uses the RTL-SDR to receive Mode-S ADS-B packets and decode the data. It can display the data live, record it for later review, or both.
On Ubuntu or Debian, you can install the package dump1090-mutability. Otherwise, you’ll need to get the source code from GitHub to build and install. I’ll assume that you’re using Ubuntu or similar, such as Raspbian on a Raspberry Pi.
You may install simply with: sudo apt-get install dump1090-mutability
You can check that everything is installed correctly and begin to see some data by running: dump1090-mutability–interactive
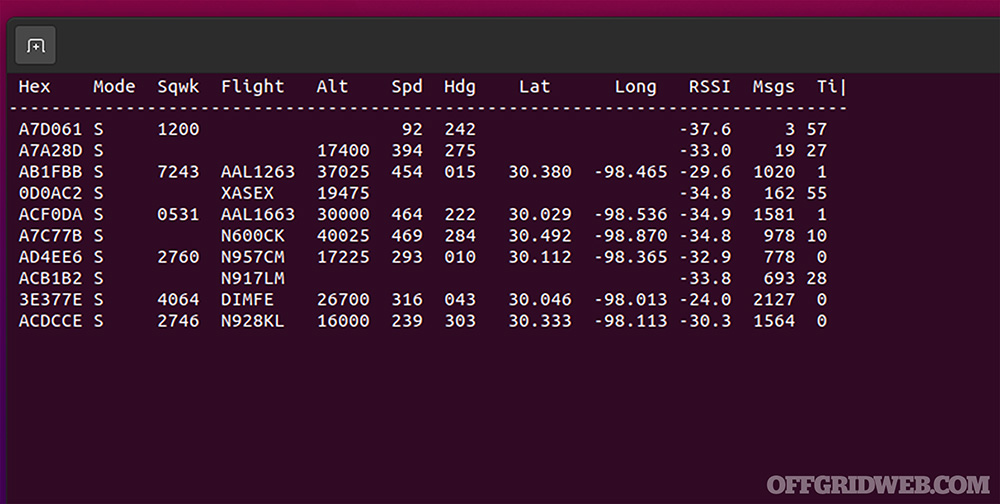
And then you should begin to see data like this:
Above: Dump1090 can run in a Linux or Mac terminal, providing real-time updates to data it decodes.
The output will refresh about once a second. From here, you can use websites like FlightAware or Radarbox to look up some information. For instance, if I select N957CM:
Above: It’s possible for flights to have public tracking and flight plan information blocked. In cases like this, if you’re not tracking the plane, you’ll never know who it is.
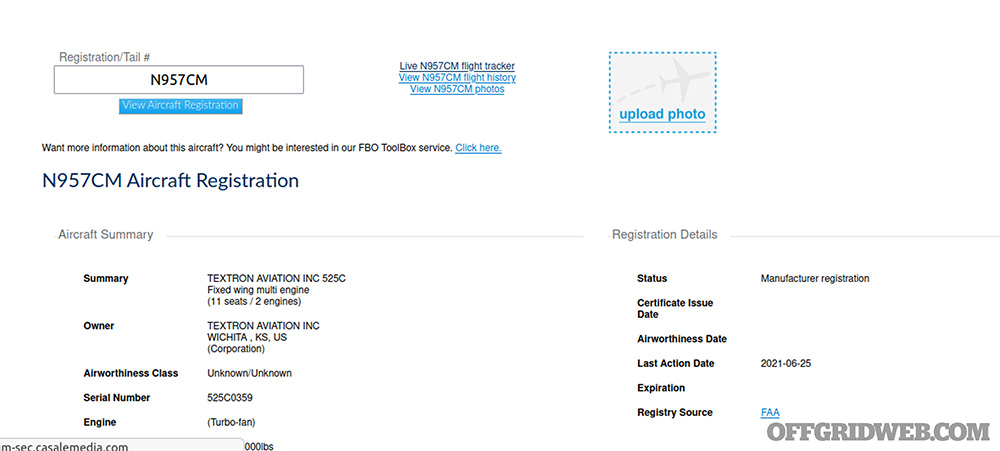
This is interesting in itself, as this appears to be a corporate or chartered plane that has requested tracking be turned off with FlightAware. Looking up information on the tail number, however, we can see some information about the plane itself:
Above: Aircraft registries are publicly available information, categorizing this information as Open-Source Intelligence (OSINT).
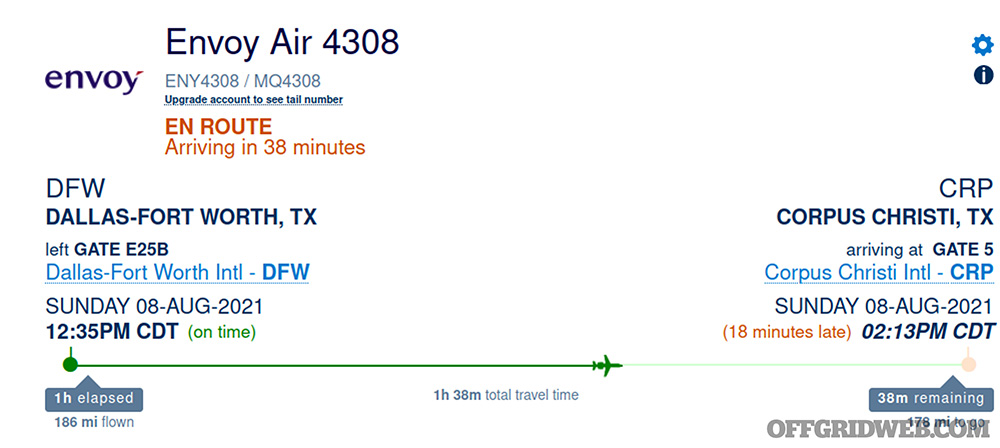
Were I to choose a commercial flight, I might see information like this:
Above: Commercial flight information is readily available.
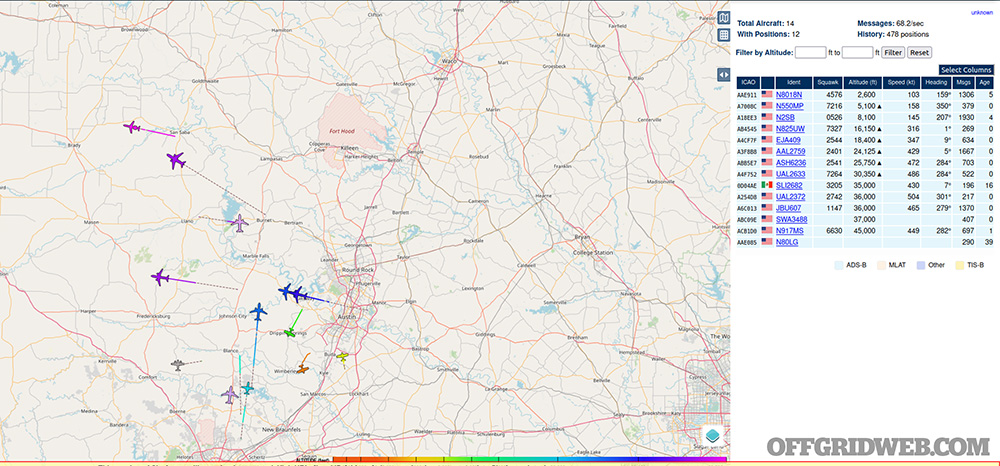
The software will log all the messages it receives and these can be viewed on an interactive map locally as well:
Above: Mapping flight data over time can give good visual insight into aircraft that may be loitering overhead or circling around a metro area.
Getting this set up can take some doing. See the resources block for a link to a script to get things set up.
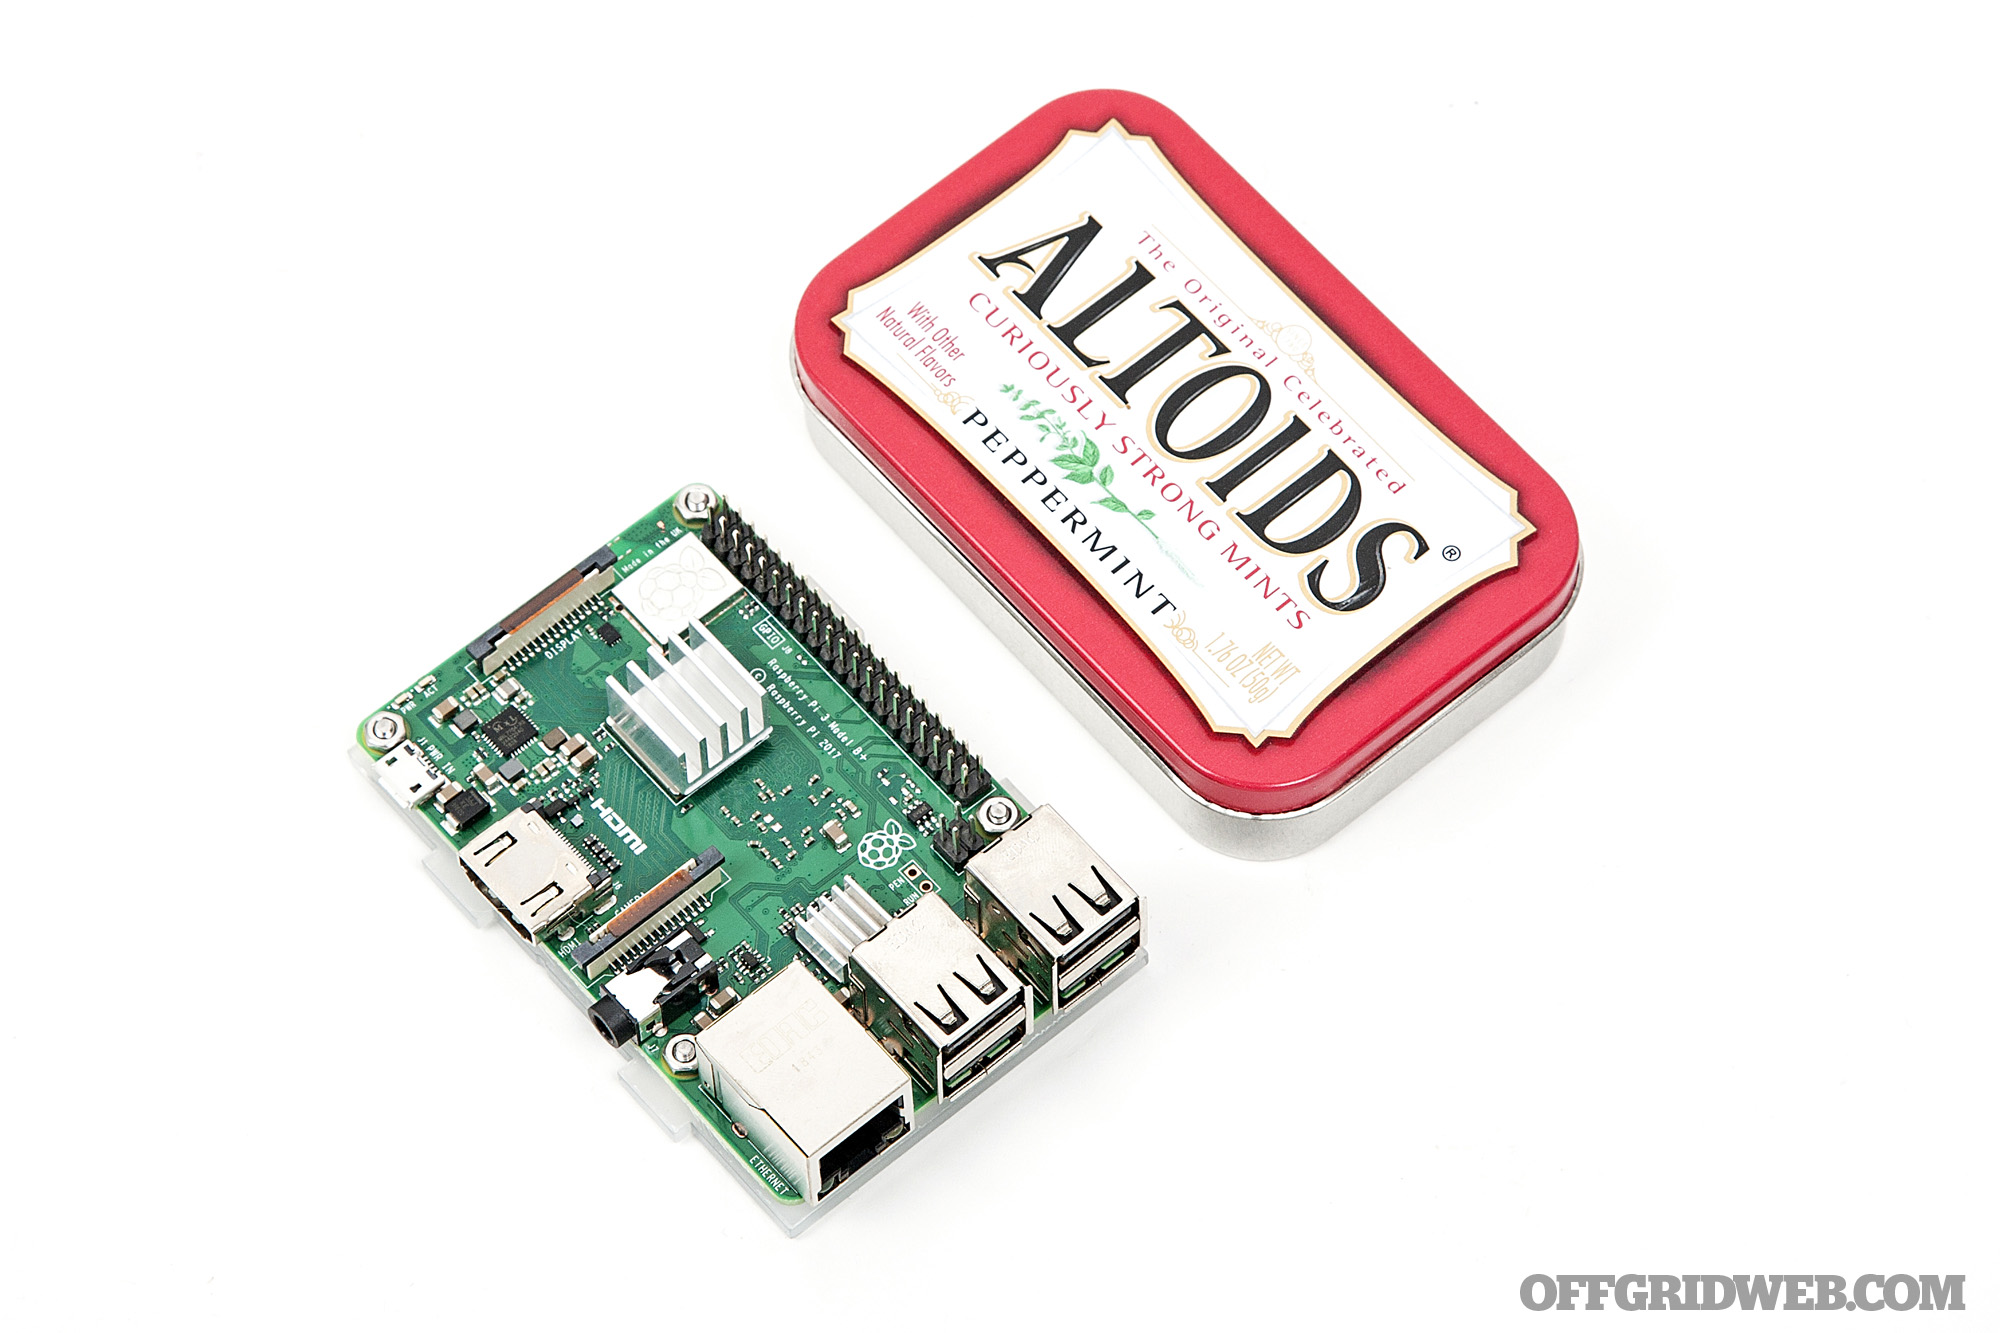
What you’ll see and how interesting it is will depend on your area of operation, but the more data you have, the easier it’ll be to detect anomalies. For best effect, you may wish to dedicate resources to long-term monitoring and recording of this information. Many people use the inexpensive yet powerful Raspberry Pi mini-computer, such as the one pictured below, for this purpose.
Monitoring and Decoding Trunked and Digital Comms
Once upon a time, many people — be they average citizens, journalists looking for a scoop, or ne’er-do-wells looking to see if they’d been caught — had police scanners. These were basically just standard radio receivers designed to receive portions of the radio spectrum designated for police and fire. Wide-band receivers like the ubiquitous Baofeng UV-5R are capable of receiving on those bands today. However, there has been a move in recent years toward the use of digital, trunked communications for these purposes. In some cases, those communications are even encrypted.
While the encrypted communications are out of our reach (or at least out of scope of this article), trunked and digital communications can be received and decoded with an SDR, whether these be unencrypted police voice or dispatch, commercial digital radio or even amateur-use DMR (Digital Mobile Radio). Considering that commercial, dedicated hardware from brands such as Bearcat can cost well over $500, this is a clear point of value for SDRs.
Not-Quite-Prerequisites
Before getting started, I want to note two things: First, a Premium subscription to RadioReference.com will make the whole process so much smoother, as you’ll be able to connect SDRTrunk to their web services and import all the information directly. Second, when dealing with trunked systems, particularly in or around larger sites with a lot of signals traffic, you’ll have better performance if you add additional SDR dongles to your setup.
Keep in mind, you can still manually enter frequency information without a RadioReference.com account, it’ll just take you a lot longer to get things configured. You also don’t necessarily need multiple SDRs, but considering two to three can be had for under $100, you’re still well under the price of something like a Uniden SDS200 Digital Trunking Police Scanner (MSRP: $803).
Getting Started
You’ll need the following:
- The RTL-SDR hardware from earlier, a HackRF, etc.
- An antenna resonant on UHF and/or VHF frequencies
- The SDRTrunk software
- Java (Oracle or OpenJDK) to run SDRTrunk
There are no unique physical setup requirements — merely connect your SDR hardware to the computer you plan to use for your listening station and connect the antenna(s) to the SDRs. Ensure that the antennas are placed to minimize local interference of reception.
Setting up the SDRTrunk software itself isn’t terribly difficult. It’s written in Java, so it can be run on any popular operating system; this demonstration will use Linux.
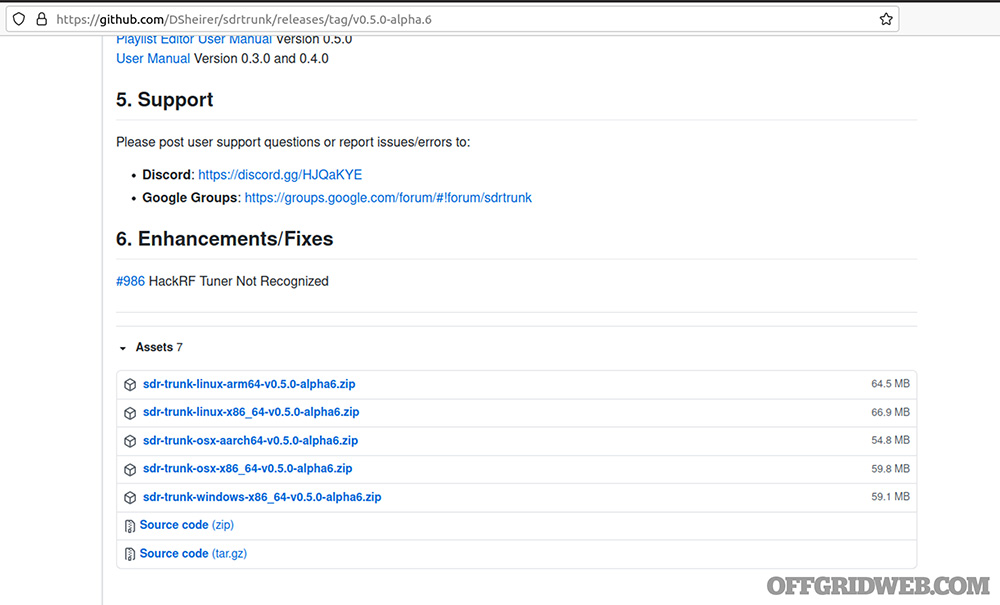
The software itself can be downloaded from https://github.com/Dsheirer/sdrtrunk/releases. Scroll to the bottom and find the correct package. For me, I want the linux-x86_64 package:
Above: Download the package from the “Assets” section and make sure you get the correct package for your system.
After downloading it, unpack the zip file and prepare to run the program:
Above: The zip file can be unpacked and the binary ran in-place. There’s no installer for this software.
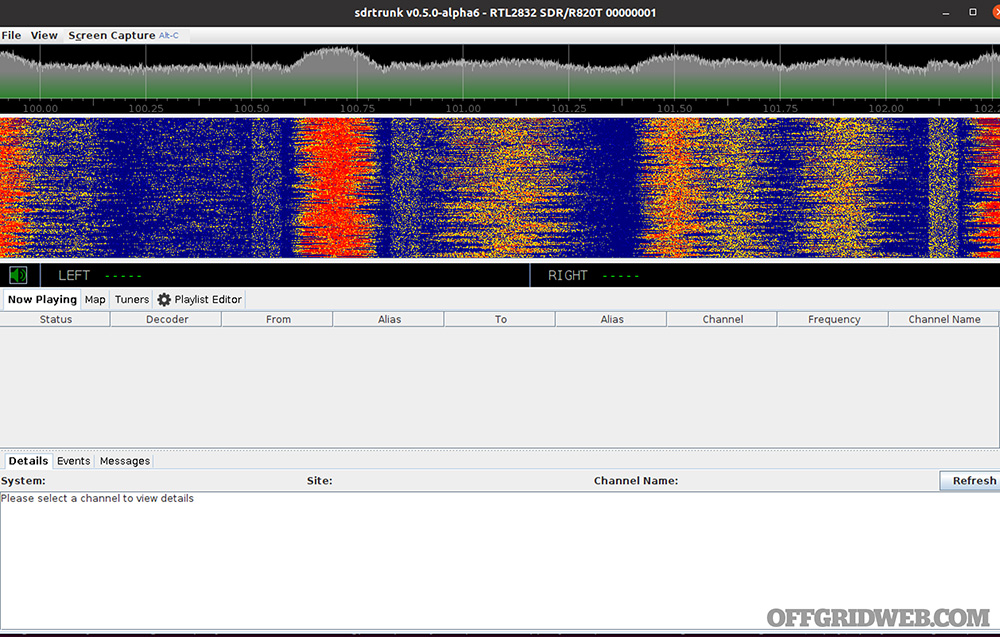
When it starts, you’ll see a screen not all too dissimilar to Gqrx, with a waterfall display and a spectrum analyzer:
Above: The main interface panel looks like many other common SDR applications.
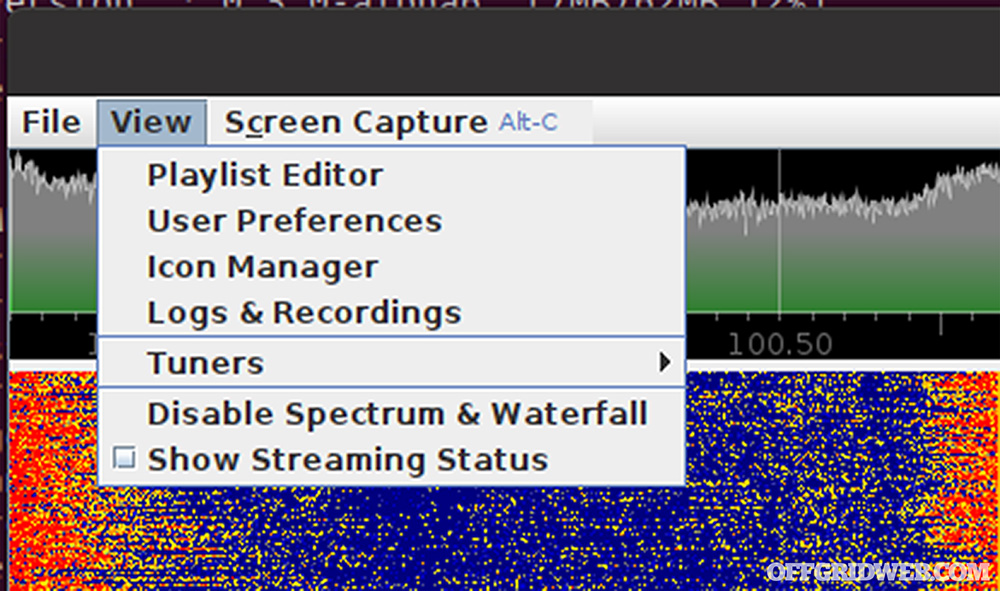
The first thing you’ll want to do is ensure that you have the proper decoder plugins installed. Click view and select “User Preferences:”
Above: Find the User Preferences.
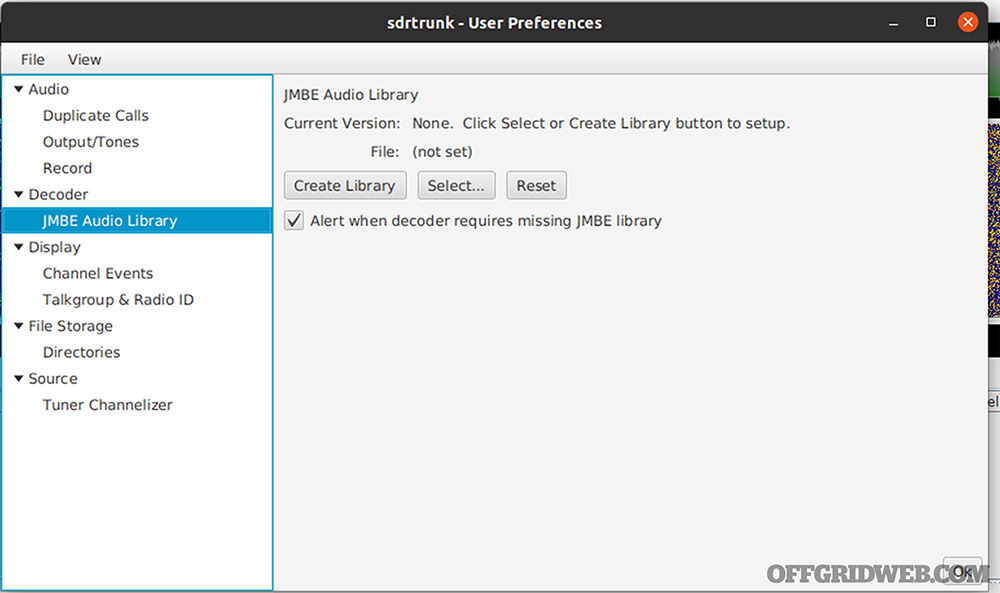
When the preferences menu opens, you will select Decoder > JMBE Audio Library and click Create Library:
Above: We need the JMBE library in order to decode trunked digital radio systems.
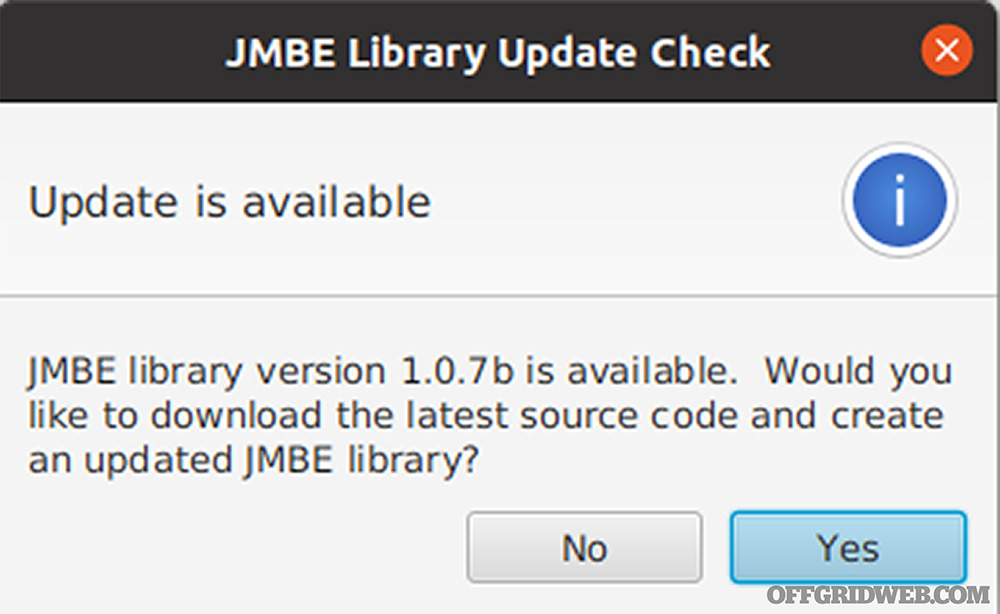
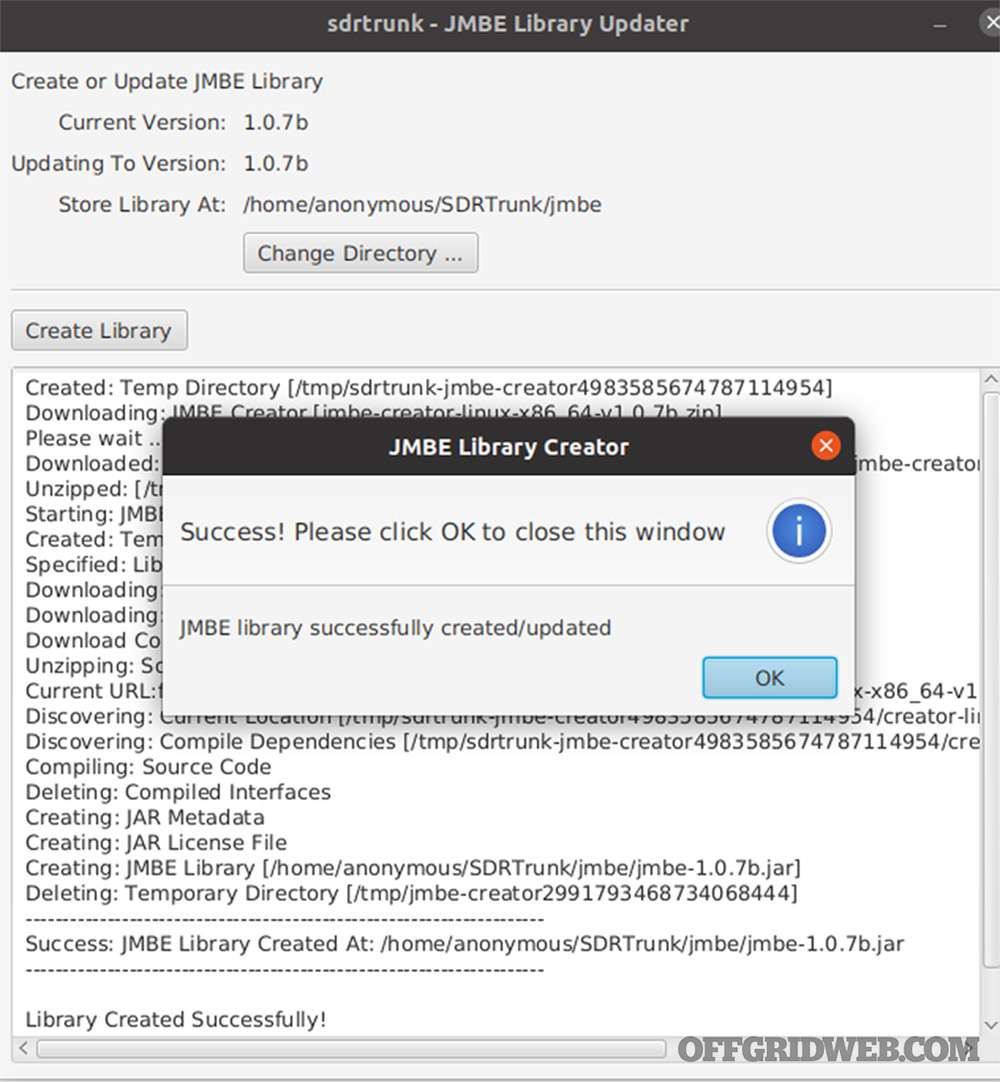
Accept the default values for the next few prompts and you should be informed of your success:
Above: Accept the update.
Next, on the main screen click the Playlist Editor. Play-lists are how everything is arranged and where all the major setup work is done.
Above: Once we have the library installed, we’re good to go.
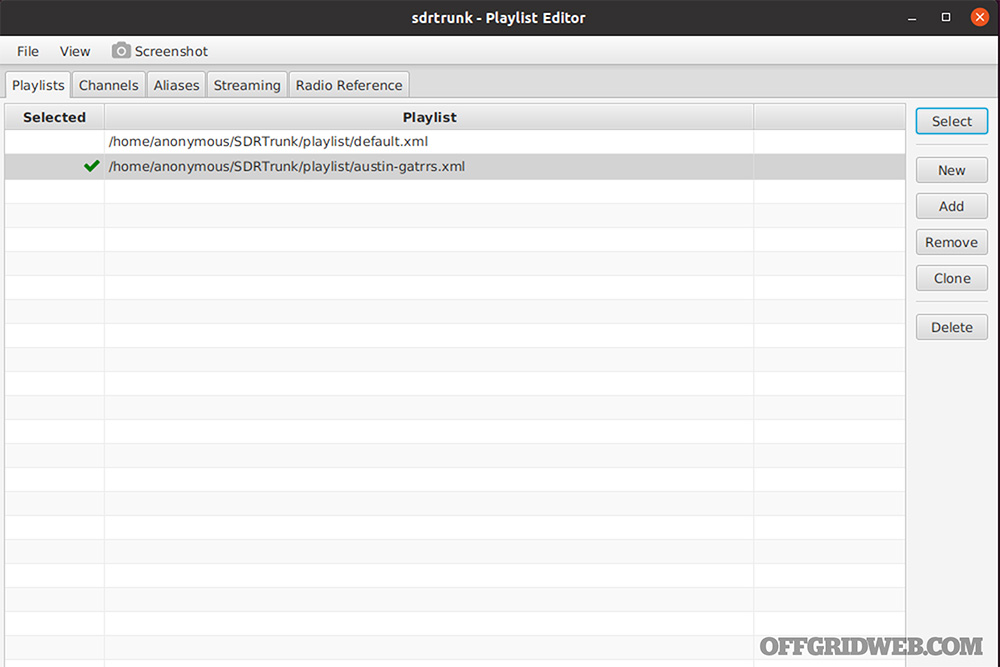
I will first create a new playlist and select it:
Above: Playlists are how SDRTrunk organizes information about the radio frequencies you want to monitor.
Next, select the Radio Reference tab and input your account credentials and sync the connection. Once that’s complete, you’ll be able to use the menu items to drill down to get the imported data for your local area of operations (AO):
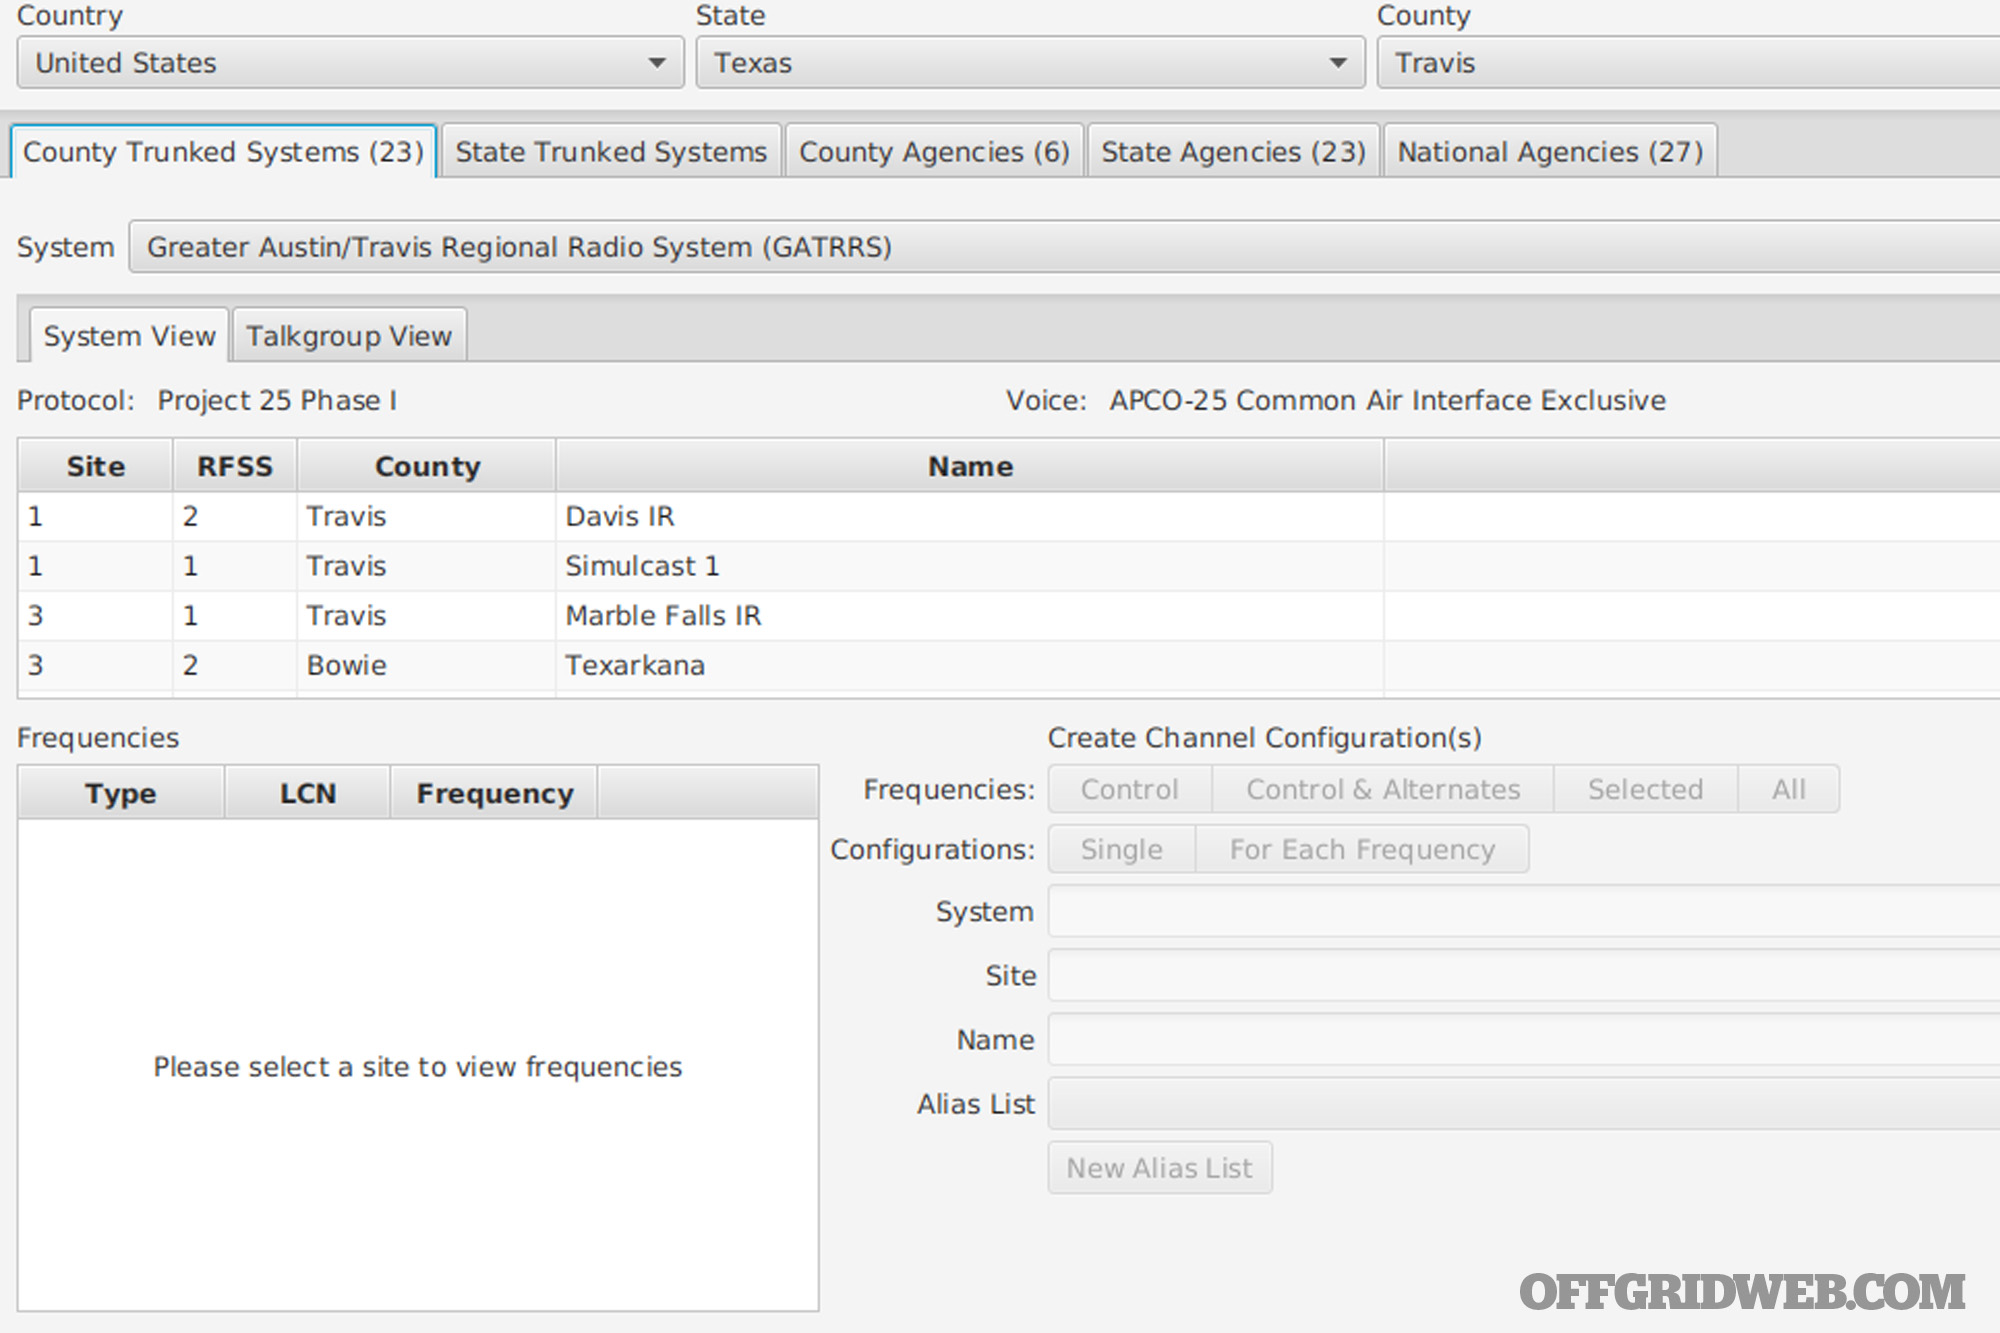
Above: After inputting your Radio Reference credentials, you can download the database. Here, I’m focused on county-wide trunked systems in Travis County, Texas.
In my case, I live near Austin, Texas, and I’m interested in what’s going on around me with regards to city services, etc. The most high-value system therefore is the Greater Austin/Travis Regional Radio System (GATRRS), which covers city and county police, fire and EMS, the airport, city utilities, correctional facilities, etc.
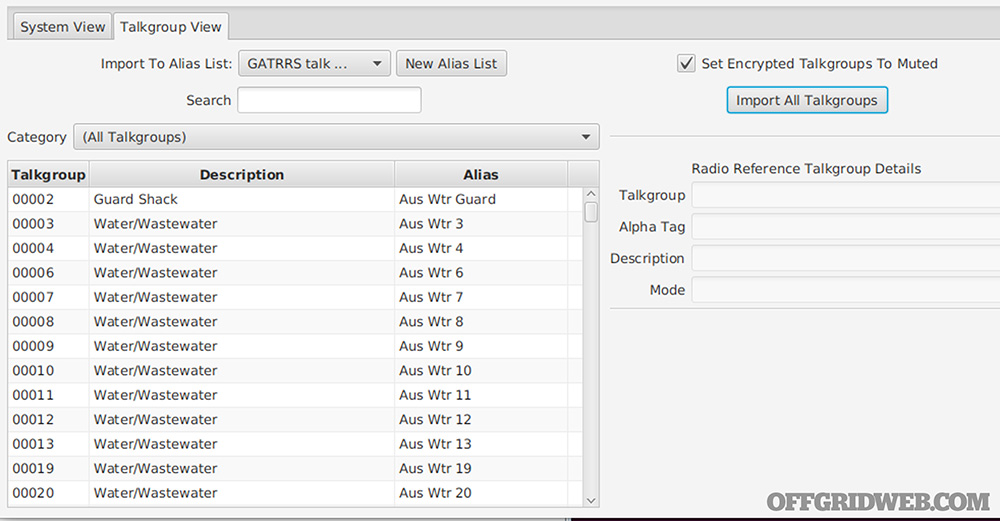
Looking at the GATRRS under County Trunked Systems, I can see it’s divided into System View, which lists various site systems, and Talkgroup View. The talk groups list out the actual channel information for the various city services that ride on the system. To get our playlist working, we need to first create an Alias List with the talk groups and then bind that to a channel setting.
Under Talk Group, create a new Alias List:
Above: Alias Lists allow us to map the names of talk groups to their digital identifiers.
We can then import all talk groups. Here, I’m doing it with “Set Encrypted Talkgroups to Muted” enabled, as there’s no point in blasting randomized noise out of my speakers when listening to an encrypted signal:
Above: Import all the talk groups, or just the ones you care about.
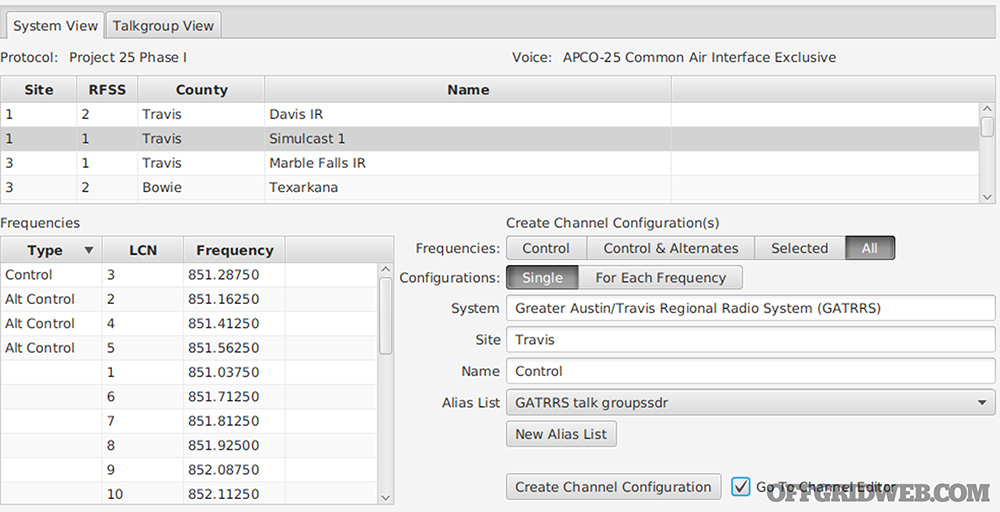
Once we have the talk groups imported to an alias list, we can create a channel configuration. In my AO, I know I can get the Simulcast 1 site, and I want to import all the relevant frequencies, paired with the alias list I just created:
Above: Large systems might have more than one site associated with them. Finding the ones you can receive from your location may be a matter of trial and error.
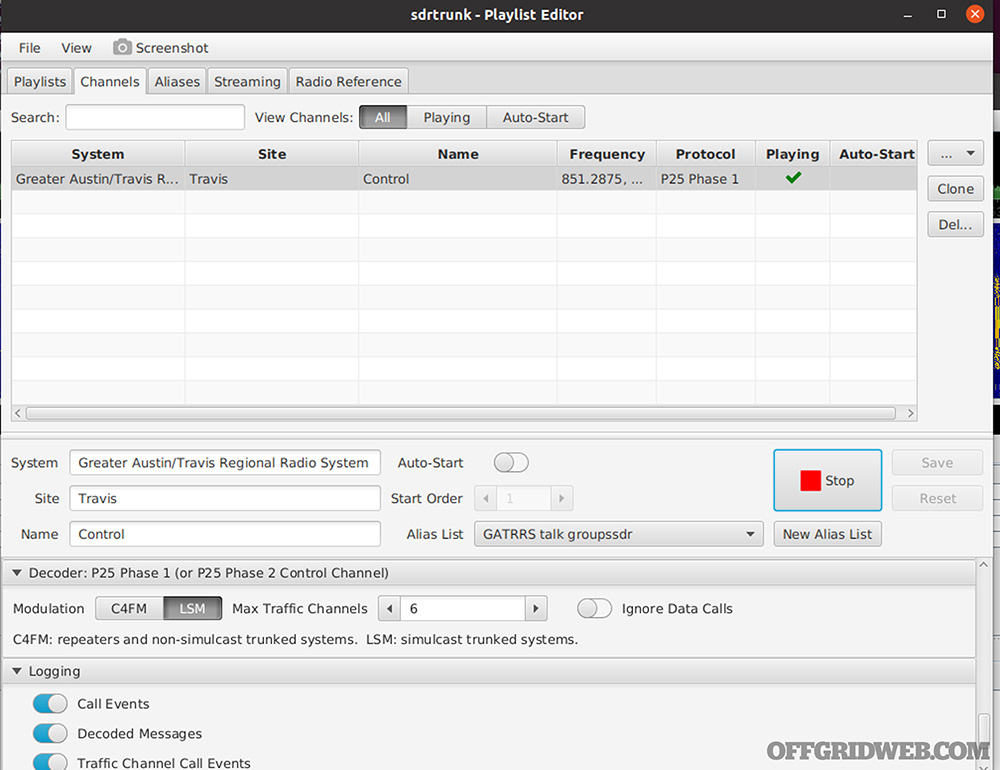
After creating the channel configuration, you get taken to the Channels Editor. Once here, you can make final tweaks to what we want to log or record, whether you want to auto-start the signal intercept, and start/stop signals interception:
Above: The channel editor lets us start and stop interception of channels in our playlist. Multiple SDRs are needed for simultaneous intercept of disparate frequencies.
Once we’re playing, we can close the Playlist Editor and look back at the main window to see what signals are being intercepted and decoded and listen into call audio:
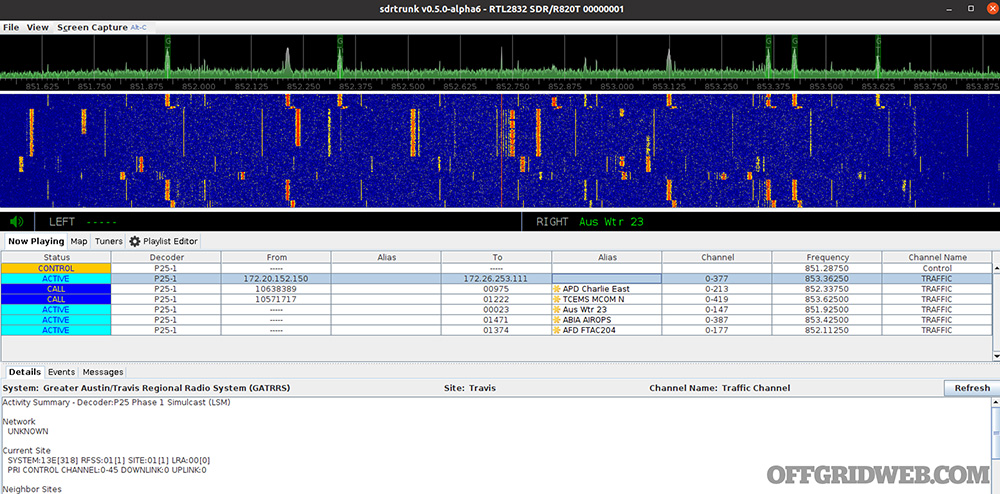
Above: The waterfall and signal analyzer show us the RF picture, while the table below spits out information about the calls that are being intercepted, such as talk groups, etc.
And thus, for a modest investment in time and treasure, we are able to receive current raw signals intelligence regarding the state of city and county services in our area of operation, which can be of enormous tactical value in a variety of emergency circumstances, in addition to “peacetime” situational awareness.
Mobile Operations
Another example of the flexibility of SDRs is the platforms they can be attached to. Full-size computers and laptops are a given, as are small single-board computers like Raspberry Pi, Beaglebone Black, etc. However, one possibly surprising addition is Android platforms, such as tablets and phones. This provides a lot of flexibility for mobile operations, especially for those who already use Android, for whom the only item necessary is a USB-B to USB-C adapter (pictured). In a potential bugout situation, not having to haul extra electronics with you may be key.
Analog Broadcast
The functionality explored in Issue 45, such as listening to amateur radio repeaters, broadcast FM, or HF signals can be done with the program RF Analyzer, which is available from the Google Play store, or from the F-Droid store. Using it requires installing the “SDR Driver,” also available in the app store.
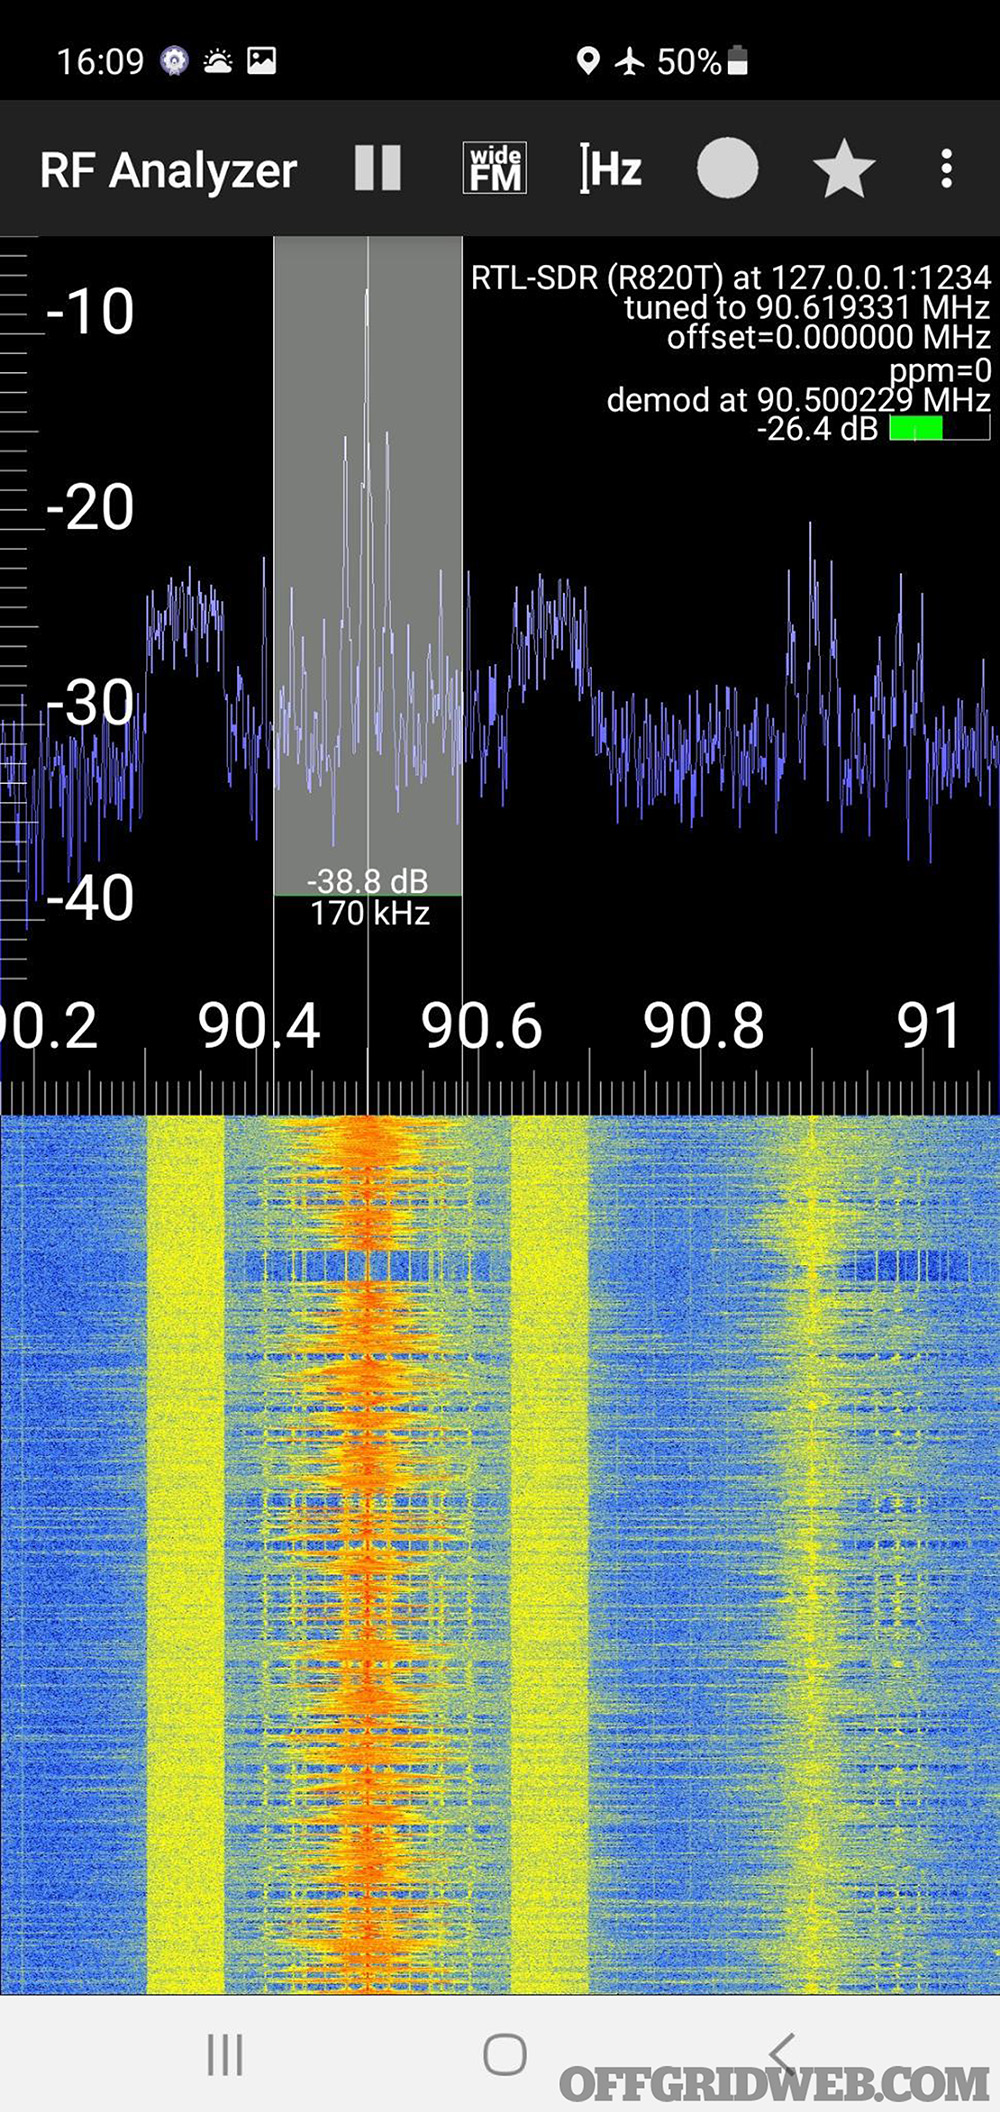
Once both are installed and your SDR is connected to your device, start the RF Analyzer app just like any other. Find the frequency you want to listen to, select the appropriate demodulation, and you’re good to go:
RF Analyzer supports both the Rtl-SDR and the HackRF One.
Above: RF Analyzer has many of the same capabilities of programs like Gqrx, but runs on Android devices such as mobile phones or tablets.
ADS-B
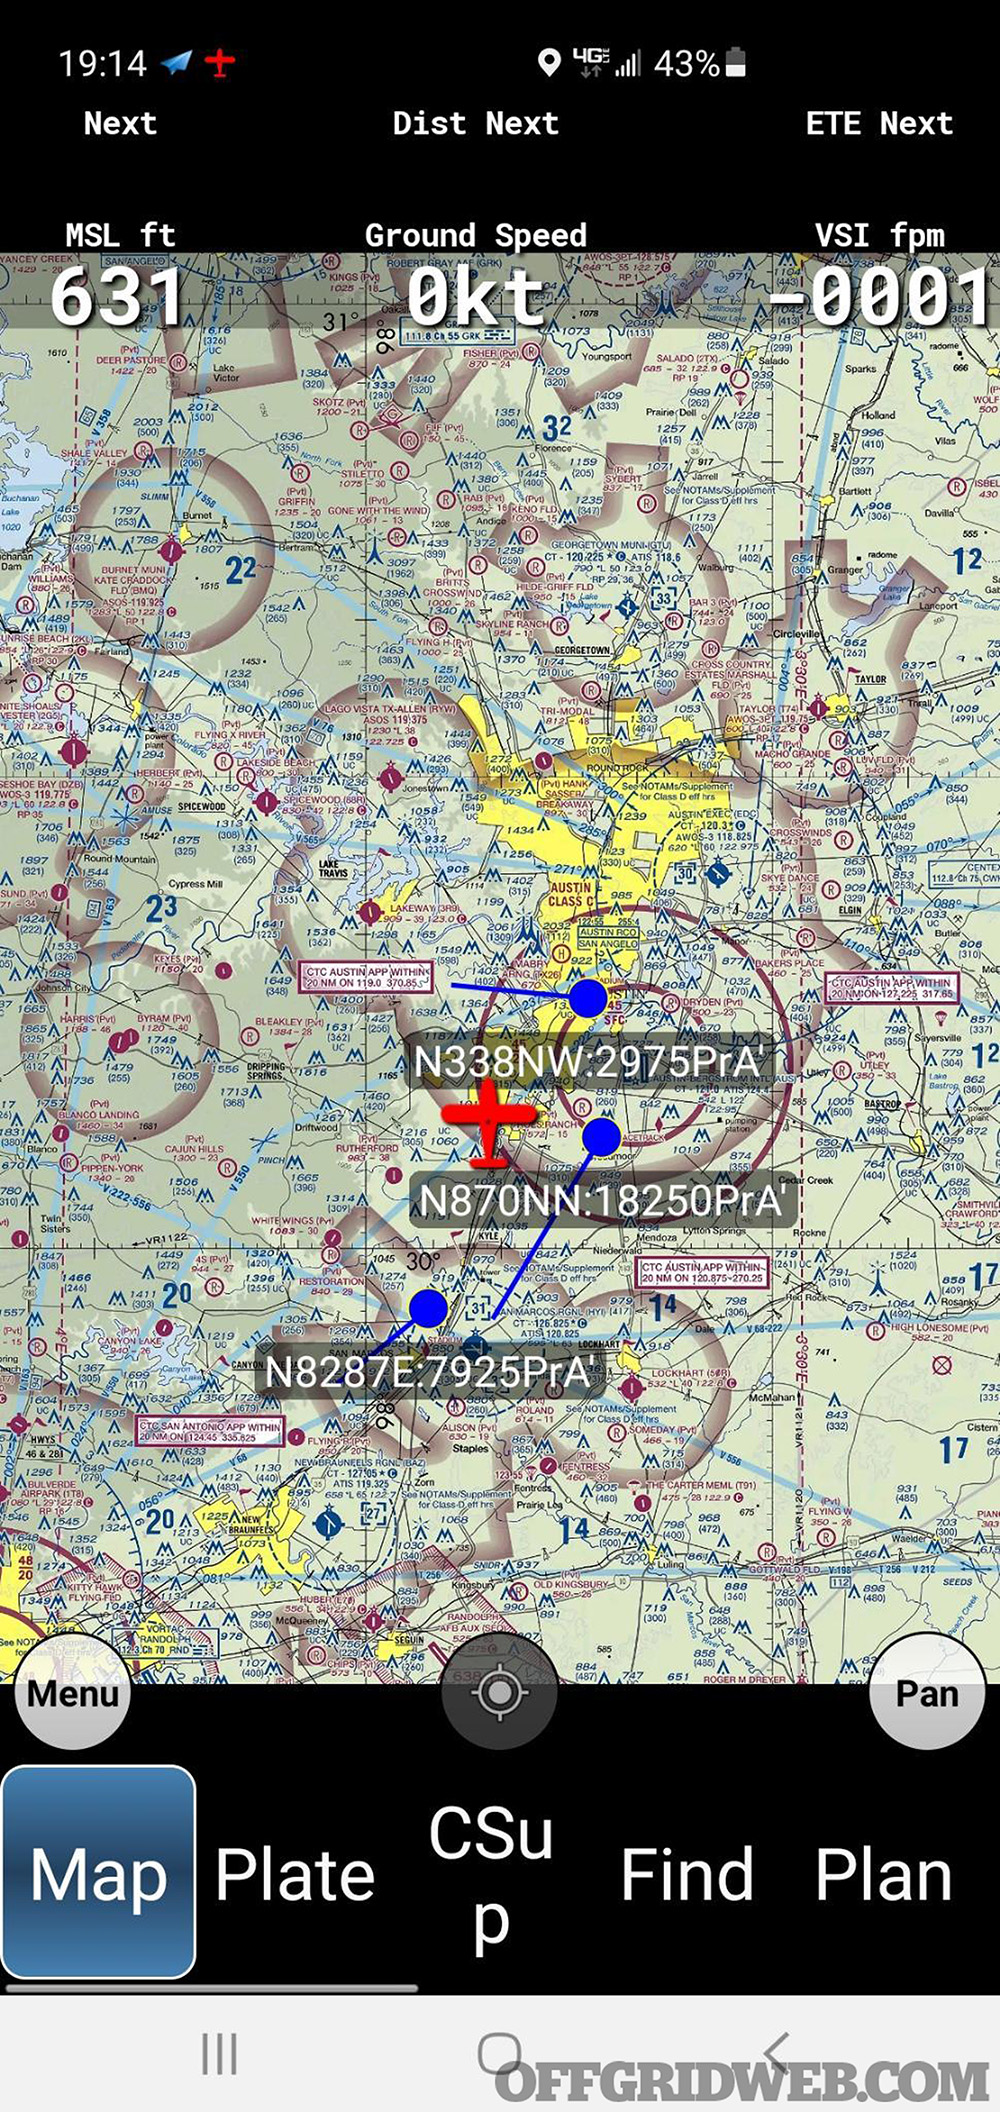
If you’re forced to bug out, or if you just get bored on vacation, monitoring air traffic might come in handy while you’re away from home as well. Fear not — there’s an app for that, too, as they say. The Xradio ADS-B Receiver app can be downloaded from the Google Play store, though once downloaded it’ll require various other data files to be downloaded after the fact by the app in order to provide mapping information and other functionality. Once the app is installed and the SDR is connected, run it and select the 1090 signals. You’ll see something like this:
Above: X-Radio ADS-B provides a handy way to map ADS-B received with an SDR and an Android device.
Conclusion
As you can see, SDRs allow you to do so much more than just listen to analog radio traffic. You can track and identify aircraft flying around your property, gather tactical-level intelligence from public safety or utility services in your area of operations, or even connect them to your mobile device if you have to cut and run. All this flexibility, combined with their low cost, make them an excellent addition to your communications preparedness kit.
In a future article, I’ll show some more advanced uses for SDRs for gathering signals intelligence useful to preparedness.
The post Emergency Applications of Software Defined Radio (SDR) appeared first on RECOIL OFFGRID.


