Last week we took a look at one of the best dual-tube night vision goggles on the market. This week we go off on a tangent. In this week’s Friday Night Lights I will share some beginning steps my friends and I have made using ATAK (Android Team Awareness Kit). While it is not strictly night vision related, it is tangentially related. Especially if you have an ATAK drone and a laser. What am I talking about? Let’s find out.
Drones @ TFB:
- Friday Night Lights: DJI M2EA – Personal Thermal ISR Drone
- Friday Night Lights: Mavic 2 Enterprise Dual – Thermal Fusion Drone
- [SHOT 2022] Skydio Thermal Drones
ATAK
I will preface this article with the fact that I do not know much about ATAK. Trying to navigate what ATAK can do is a deep dark hole you can lose yourself in. Here is a video by Issac of TREX Arms talking briefly about ATAK and its capabilities.
ATAK Laser
For the past 6 months, my friends and I have been dabbling with ATAK. This has been an evolution of our tricked-out spotting scopes. My friends have laser range finders (LRF) that can range far – L3 Storm, L3 Storm SLX, and Wilcox Raptor S. There is a plug-in for ATAK that allows you to pair/connect some laser range finders to ATAK.

Photo by @vvicmed
It will show up with GPS coordinates and display the LRF’s ability to see and range. My friend Vic has been non-stop diving deep into ATAK and got his L3 Storm to connect.
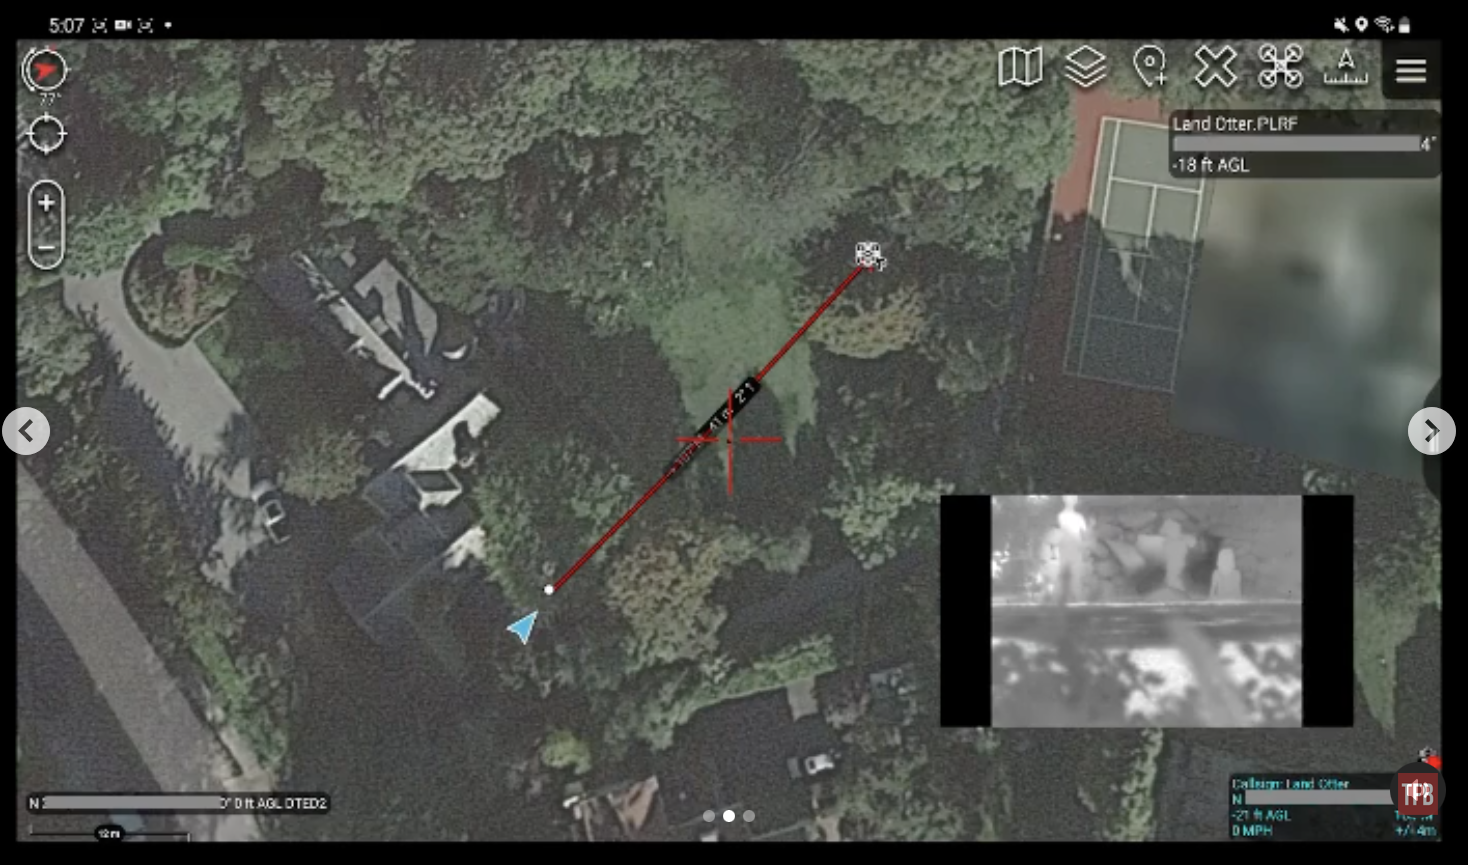
Photo by @vvicmed
This is not that straightforward. The Storm cannot connect wirelessly to ATAK. He had to convert a serial cable to a USB and then plug that into his Android End User Device (EUD). Now he has a custom Bluetooth setup I made so it can connect wirelessly to his Android EUD.
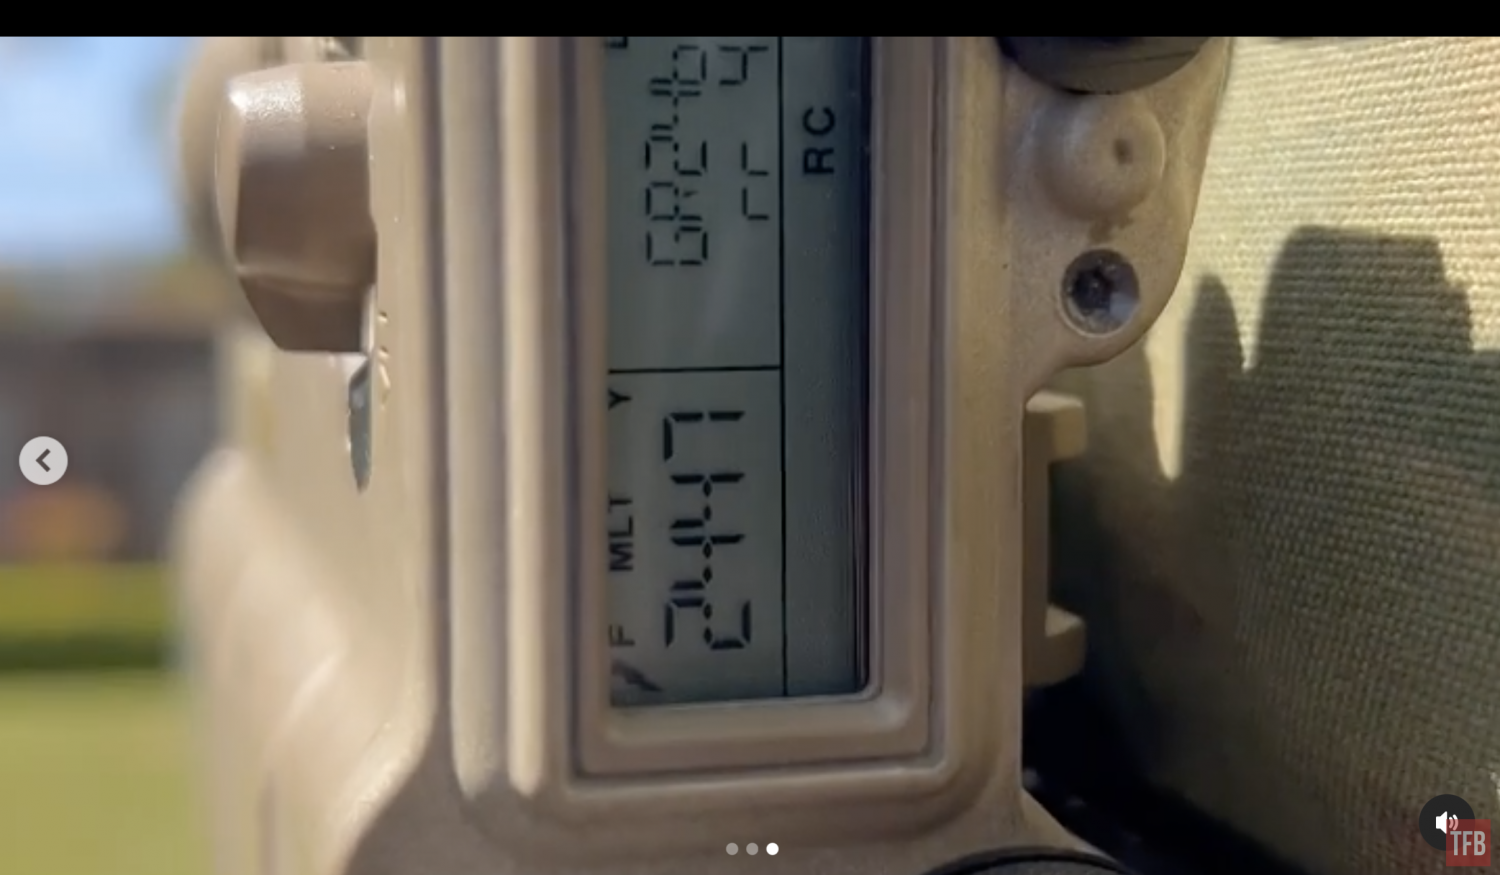
Photo by @vvicmed
When paired up, the map on ATAK will display your location and draw a line of what the LRF ranged. It creates a point you can see at the end of the red fan shape below.

Photo by @vvicmed
Vic even managed to get his FLIR HISS to show up using a third-party app called USB Camera Pro so he can have PIP while using ATAK and his LRF.
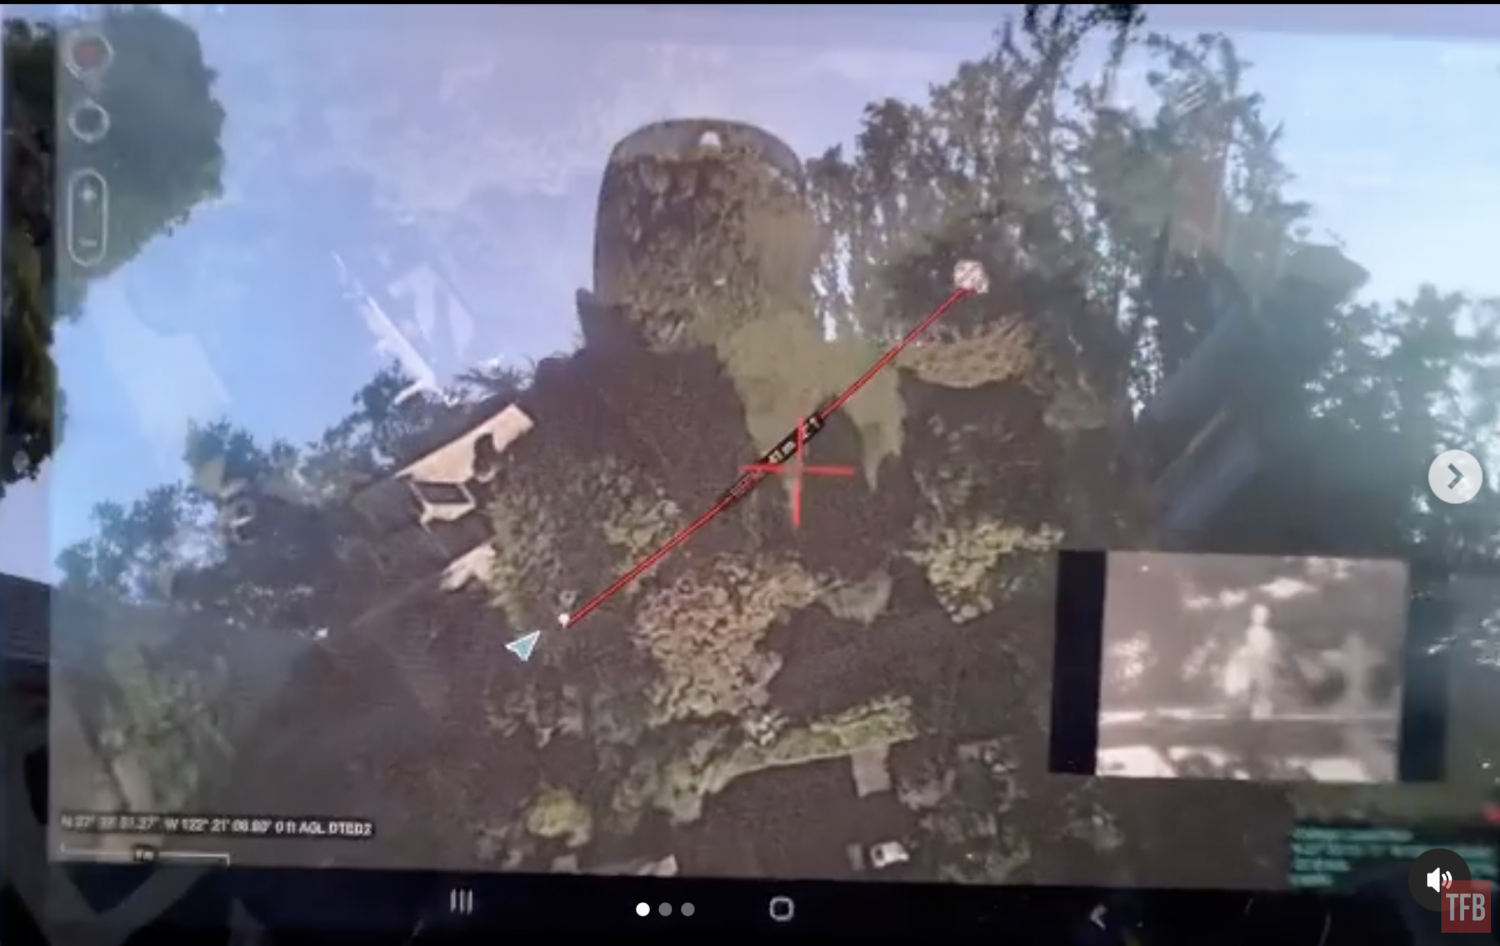
Photo by @vvicmed

Photo by @vvicmed
You may be asking “why would you want to do this?” Simple, to point out objects that require attention and possible investigation in the day but also the night. With his FLIR HISS mounted on his Leupold Mark4 spotting scope, he can look for things at night. Once he sees something of interest, he can lase the target and it will show up in ATAK as a point. If he is connected to a network with other ATAK users then he can share that information and way point.
ATAK DRONE
I do not have a fancy LRF unless you consider the JIMLR and that has problems at the moment. So my goals with ATAK were slightly different but related to what my friends have been doing. I wanted to connect my Mavic thermal drone to make an ATAK drone (not Attack Drone). I had tried using my old Mavic 2 Enterprise Dual and it did connect but it would not show me what the drone camera could see. So I was flying blind. Even if it did work, the Dual is not a very good thermal drone. The thermal image is so poor that it is almost impossible to fly at night. I really wanted my Mavic 2 Enterprise Advanced to work with ATAK. Fast forward to last September, I installed the newer ATAK 4.7 and it recognized my Mavic 2 Enterprise Advanced.
Setting Up An ATAK DRONE
You can do one of two things to run ATAK. You can use an Android device like a smartphone/tablet or you can use the DJI Smart Controller. I opted to use the DJI Smart Controller since I have had issues with using smartphones to fly my DJI Drone. I installed the ATAK APK using a USB thumb drive into my DJI Smart controller. You also have to install ATAK GO which does something to connect DJI controls with ATAK. Once it is set up you can run ATAK off the controller. I open the side menu and open the UAS TOOLs plug-in. It sees my drone and I hit the play button to run the UAS display.
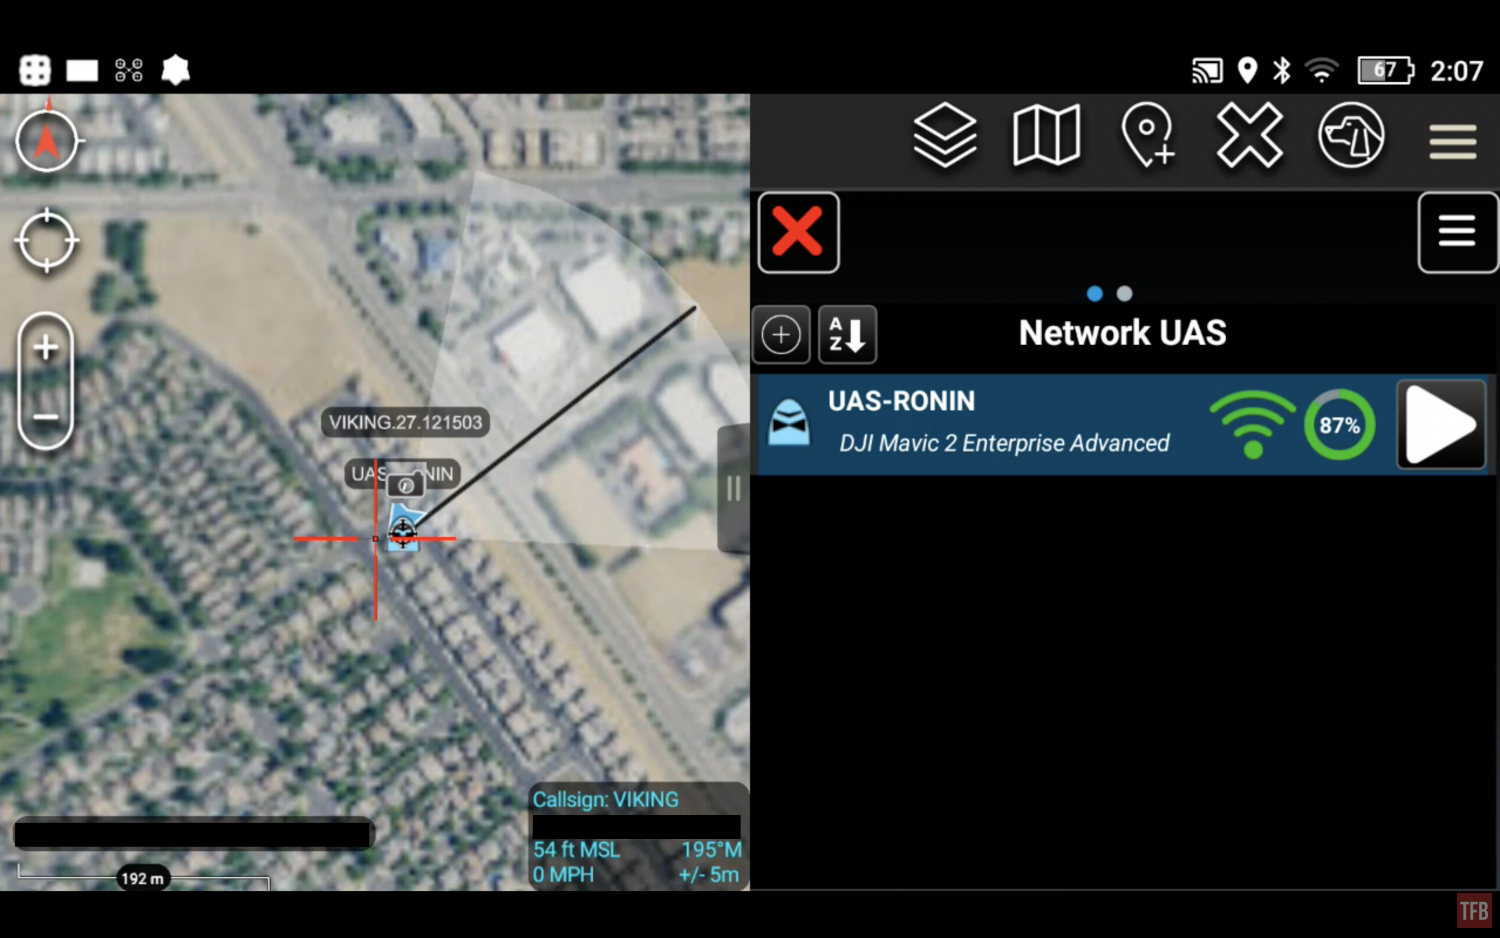
Look at the screenshot below. When you open the UAS Tools Plug-in this screen will pop open. It shows what UAS or ATAK Drones are connected to the EUD or in this case my DJI Smart Controller. If I press the blue bar, a sub-menu shows up. Hit the play button on the far right and it will display what UAS image and controls.
When you open UAS Tool Plug-In, this is what you see when you enter the UAS display. It will show you what the drone can see. It plays starts in VIS camera mode. There is a lot of AI that is programmed into ATAK specifically for the ATAK drone. See the image below. It has AI to perform object detection. It identified an RV and labeled it as a van. Not sure what the criteria and threshold are for object detection but it clearly can show cars as well but it did not “detect” the cars near the van in the image below.
Here is the ATAK Drone with the thermal camera switched on rather than the VIS camera.
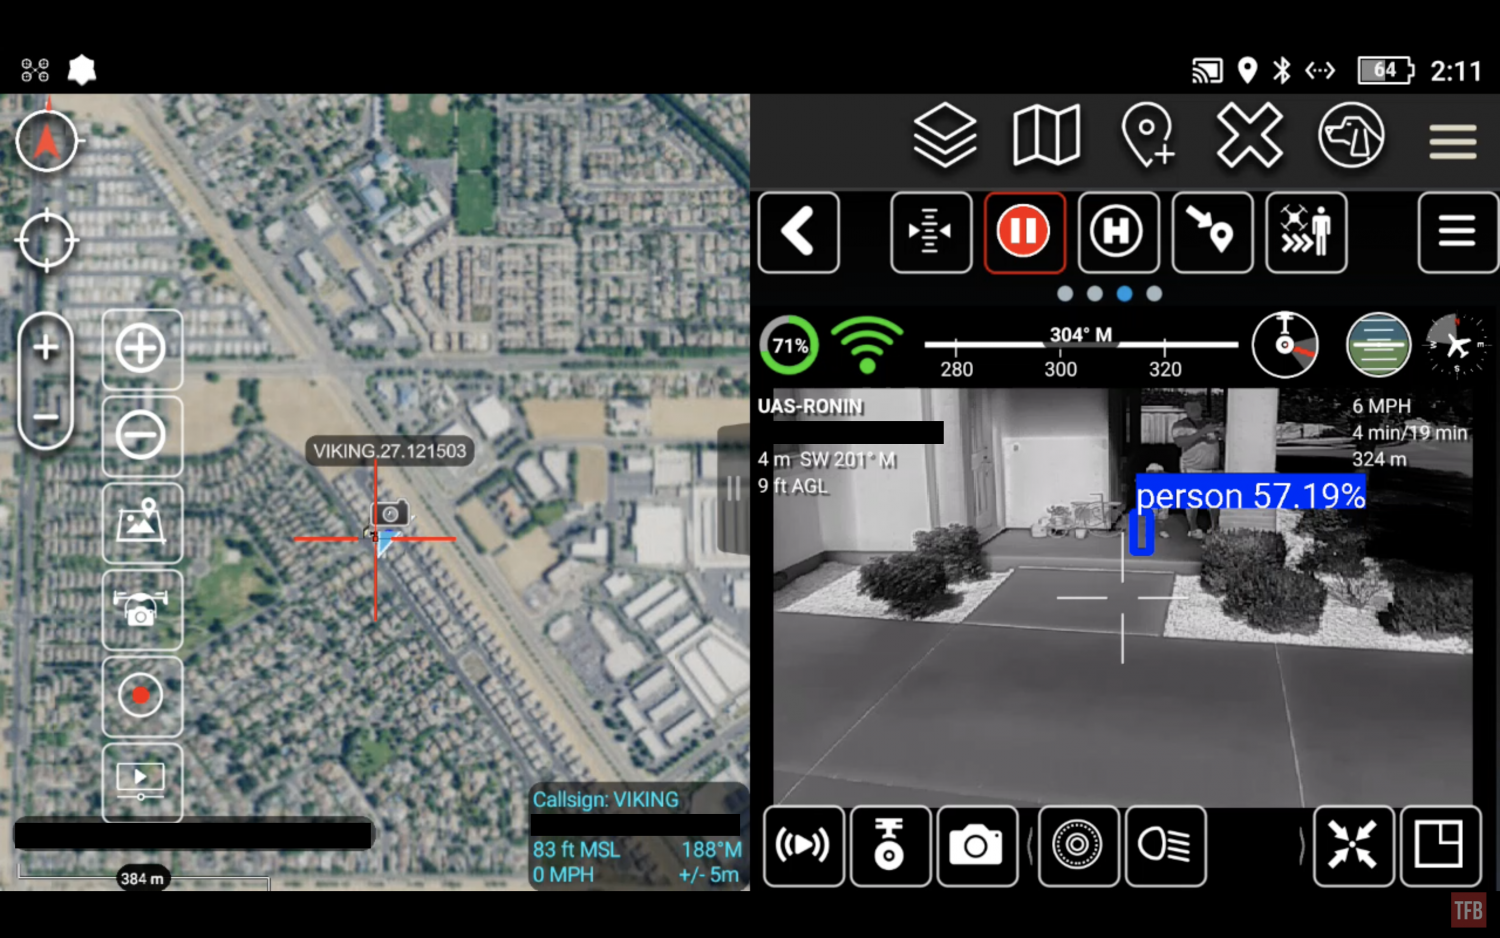
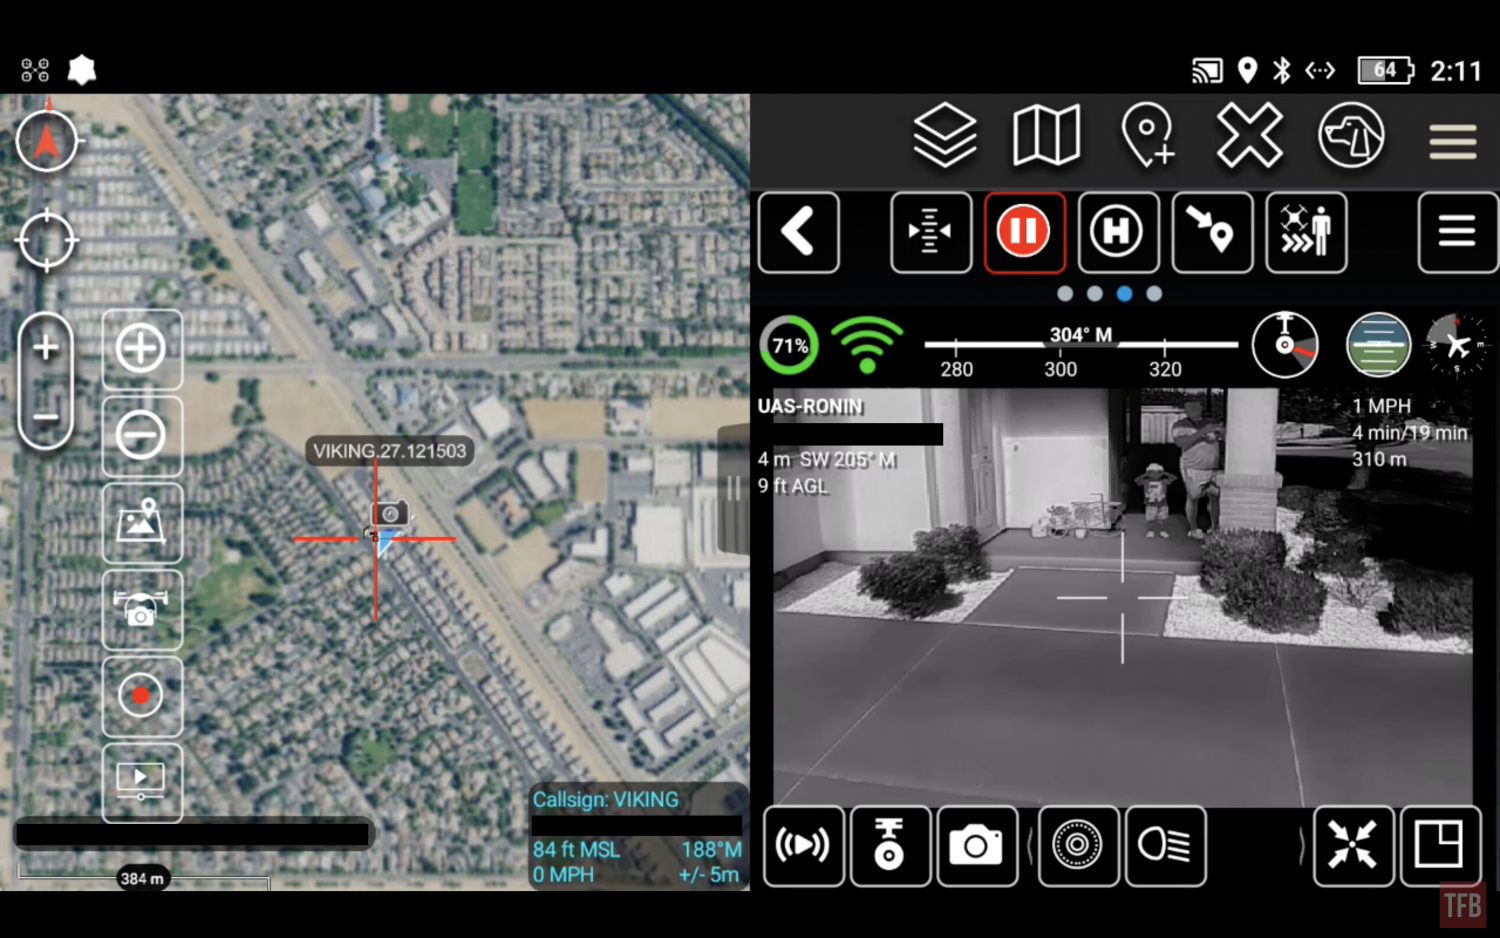
Object detection even works on people. But again, it doesn’t always work.
One issue I had was that the video feed from my M2EA ATAK drone was very slow and laggy. So I decided to shut off all of the extra features that are probably hogging up my DJI Smart Controller’s processing power. I turned off the AI and object detection and that made flying my ATAK drone a lot smoother. Before the lag was so bad that the image shown on the screen was a good couple seconds behind the drone. I could not fly it like that.
The next test I performed was to try to have an automated flight. So far I have been flying my ATAK drone manually using the DJI controller joysticks. I had to figure out how to set a waypoint and then tell the ATAK drone to go there. You saw it in the video earlier. Here is a screenshot. You can see the yellow waypoint I had set. And above the drone image feed, there is a button next to the Home ‘H’ button. That is the “Fly To” command. you press that and then it asks you to point a spot on the map and the drone will fly there.
The drone is not smart enough to not crash into the ground, the side of a mountain, or any other obstacles so you need to make sure your elevation is high enough so it does not crash.
The next test was to connect a laser range finder to ATAK, which my friend Vic already achieved. However, we are having issues networking our EUD, his Android tablet and my DJI smart controller. He was trying to use Meshtastic but it has not been great. So we just connected his Storm LRF to my DJI controller via Bluetooth and it worked with the UAS Tool Plug-in ATAK drone. We tested it by lasing a target 350 yards away and used the “Fly To” command and the ATAK drone flew there on its own.
However, when we tried to go further, the ATAK drone did not like it. A warning came up that it was too far from Home Position (480m was the max distance).
I found this odd since I was able to fly my M2EA manually a mile away to check out a target. Vic helped me do some digging and found that there is a sub-menu in the UAS Tool Home. But it was a bit convoluted getting to it. I mentioned earlier when you start up UAS Tools Plug-In a blue bar shows up when your ATAK DRONE connects to ATAK. Instead of pressing the play button to start the UAS display, you press the blue bar and a drop-down menu shows up.

Photo by ATAKHQ

After pressing the blue bar to open the sub-menu, press the gear icon to enter DJI platform settings.
In this sub-menu, I was able to find the max distance limit and sure enough, it was set to 480m. I reset it to 2,000m
I have been testing the ATAK drone by trial and error. It probably would have helped if I reviewed the UAS TOOLS Plug-In guide. Here are some screenshots from the PDF.

Photo by ATAKHQ

Photo by ATAKHQ
The most important feature I wanted was to change the camera to the thermal lens. You need to press the button indicated above with the number 4. I posted this on Discord ATAK and they posted it on ATAK HQ website.
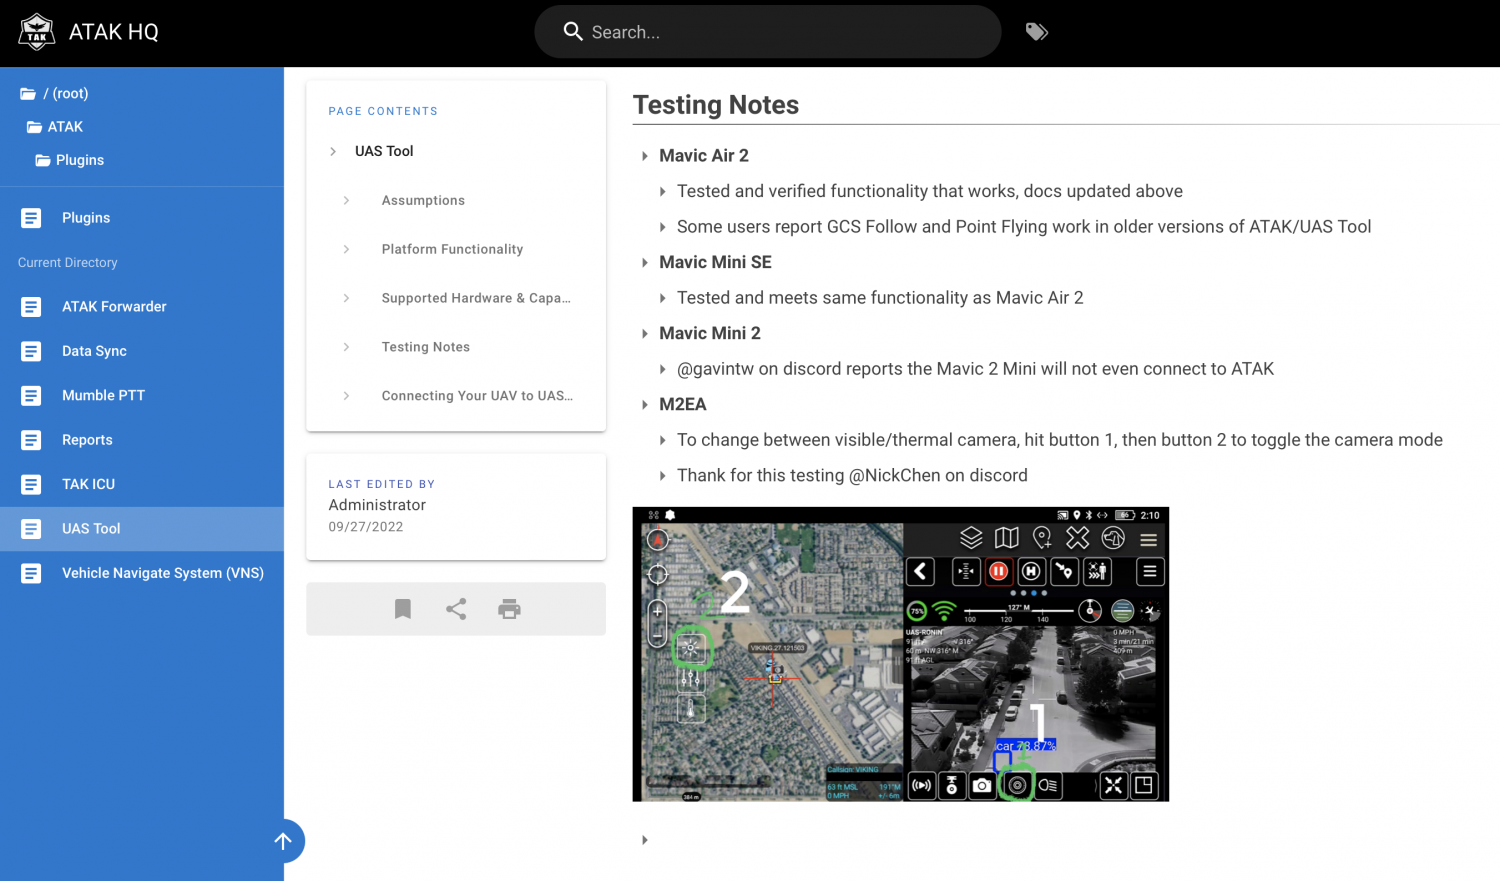
Photo by ATAKHQ
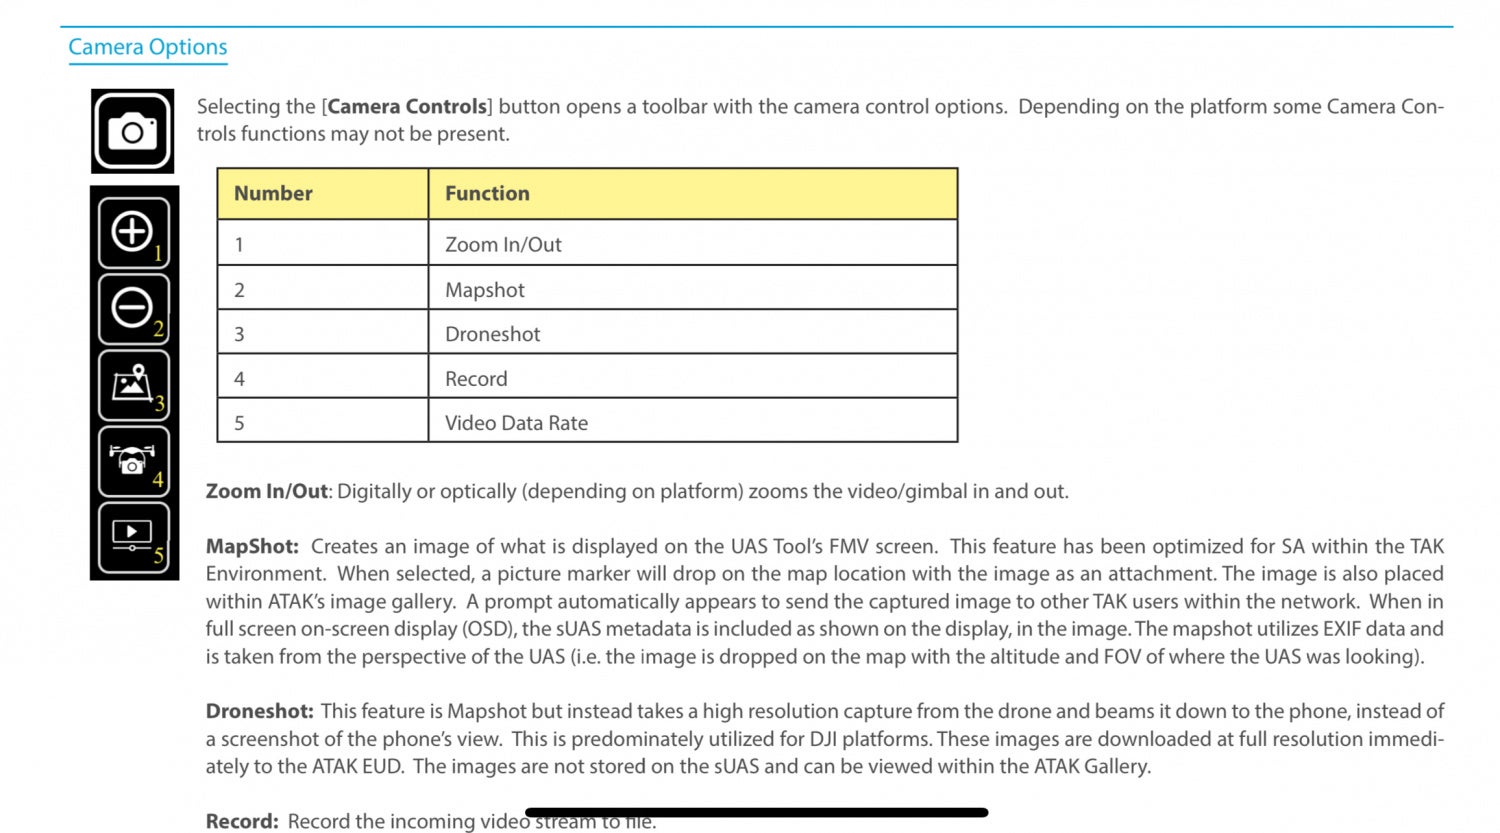
Photo by ATAKHQ
Final Thoughts On ATAK Drone
I envision this setup might be useful for hunting. If you have others with you, they can share locations by pointing at it with their LRF, upload that to the network and send a drone to investigate rather than physically going to that spot to identify if what you were looking at was your game or not.
The DJI Smart Controller is an easy way to simply use ATAK and control my drone but there are limitations. Processing power definitely seems to suffer especially when I use all the features in ATAK. Here is a video by TAK Syndicate.
From the video above, you can see that an ATAK drone can do so much more. It can have augmented reality and show waypoints in the field of view of the drone. You can even remotely control the gimbal with another EUD on the same network. The superimposition of the drone image over the map was exceptionally cool. Last week I was able to figure out how to enable “Video Overlay”. This projects the Drone camera image over the map in ATAK. You can see the parked cars in the thermal image superimposed over the map.
For my use, another limitation is the GPS. I do not think the DJI Smart Controller has an internal GPS antenna. Only when I connect the drone does ATAK seem to update the map to my location. I tested a friend’s TerrapinX and sadly it will not connect, just like the SIG BDX LRF. The bluetooth seems to only work with their respective apps.
Another feature I want to figure out is if I see something of interest with my ATAK drone, how to relay that to someone else. I think I can set a waypoint based on the map in ATAK and use the FOV of the drone as well as landmarks, I should be able to point out something on the map. From there I can relay that information to another ATAK user on the same network. Like if I use this for hunting and I see a potential target, I need to relay that target’s information to other people and ATAK could potentially help with that.
There are a lot more features that ATAK can do and we are just scratching the surface. I think I figured out a way to possibly drop a package from the drone through ATAK. Aside from drone-related goals, my friends and I need to figure out a simple method to network our devices. Unfortunately, navigating Discord or Reddit is rough. Often solutions only work for that particular user’s setup and when we try to replicate it, it does not work since we don’t have the same equipment. It is frustrating. But this is part of the challenge. If you are an ATAK wizard, please chime in.


