A Complete Guide To Building Your Own Underground Bunker
Whether you call it a survival bunker, an apocalyptic shelter, a nuclear bunker, or a fallout shelter…
Doesn’t matter…
What matters is:
It’s a place you can hide & survive during TEOTWAWKI.
A place with clean air, bottled water, and food in times chaos.
And you DON’T need to be a billionaire (or head of state) to have an underground bunker.
TOPICS IN THIS GUIDE… ↓(click to jump)
- Complete Bunker Build Video Series
- Small (affordable) Root Cellar
- Starting YOUR Bunker Project
- Finding The Perfect Bunker Spot
- Planning: Excavation & Structure
- Which Bunker Materials Are Best?
- How To Conceal Your Bunker
- Some Key Additional Inclusions
- The Best Family Bunker Plans
Want a free FireHawk Tactical Flashlight?
Large Apocalyptic Bunker Project Video Series
The best ways to learn HOW to build an underground bomb shelter is to watch someone else do it.
However, few fellow survivalists are willing to record and sharing their builds.
But I did find one excellent bunker-build video series.
The Plan
This series starts off with a very basic plan.
And while having a plan is key, don’t need every detail figured out to get started:
↓ Apocalyptic Bunker Project Part 1 – The Plan
The Dig
Next up is excavation.
Otherwise known as, digging a massive hole in the ground.
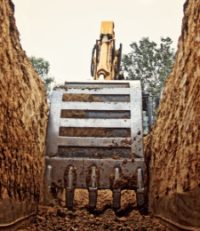
You need heavy machinery to dig a hole this size.
Otherwise, you’re going to spend years digging by hand:
↓ Part 2 – The Dig
Making The Bunker
Once your hole is dug, start framing your bunker.
In the following video, Colin uses 4mm steel plates.
Now, these are are sweet – but expensive!
If you can afford steel sheets and tubed steel, go for it.
Otherwise, pour a concrete slab and cinderblock sides.
↓ Bunker Project Part 3 – Making The Bunker
Concrete
Colin pours concrete around his bunker to stabilize and encase the entire structure.
They also reinforce the concrete using rebar throughout.
Once the concrete cures, the survival shelter will be rock solid.
Finally, hide the entire structure.
They do this by back-fill over the top with gravel, some soil, and sod.
And THAT’s how you build an underground bunker from scratch.
↓ Part 4 – Concrete
Finished Project
Once the bunker is built, it’s time to furnish it.
Here’s how Colin decked out his bunker:
↓ Backyard Underground Bunker
Apocalyptic Bunker Q&A
Colin answers a few common questions about his build.
This includes:
- building permits
- how he dealt with human waste
- upgrading his air ventilation
- and plans for more backup electrical
↓ Bunker Project Q&A
And here’s a recent update on his bunker build:
↓ Tour/Update 5 Years Later
This video series was done for entertainment purposes.
And it also did and excellent job teaching us step-by-step how to build our own backyard bunker.
And for that, I want to thank Colin Furze for sharing!
Want a free 78 item prepper checklist?
Click here to instantly download this Complete Checklist PDF. No purchase necessary.
Small (affordable) Root Cellar Bunker
What if you have room in your backyard but don’t have the funds to dig a large bunker?
Look into building a backyard root cellar.
It’s smaller and easier to build.
No, you won’t have a “living room”.
But it’s underground and can protect you from a nuke.
Store your food and water in this smaller footprint bunker.
Add a sleeping pad, some gas masks, and you are all set.
It’s a worst-case scenario fallout shelter for us regular Joes.
If this sounds interesting, take a few minutes to check it out.
The idea is called Easy Cellar.
And it’s the best ways to build a small backyard bunker that won’t break the bank.
↓ Easy Cellar: Build A Small Backyard Bunker
Get Started On Your Underground Bunker
As I mentioned earlier: this is no cakewalk side project.
Building an underground bunker is an intensive construction project.
One that requires forethought and planning.
To be successful, work everything out in detail before you begin.
Blueprints, permits, contracts, and floor plans
They’re all recommended before breaking ground.
As prepared survivalists, planning is what we do.
Then, all that’s left is to get down to planning and building.
The first step is to get a permit.
Believe it or not, you can’t just start digging a massive hole in your yard.
Often not without permission.
And in populated areas, it’s for a good reason.
There are pipes, electrical wires, gas lines, and underground utilities.
If you live in a dense neighborhood, you may not be able to get a permit.
You probably need land with acreage.
It doesn’t have to be a lot of land.
But a half-acre is a bare minimum.
Even if you own the land, get a permit!
Otherwise, you’re likely breaking some law or another.
Once you have it, figure out where you’ll put your bunker.
Want a free 78 item prepper checklist?
Click here to instantly download this Complete Checklist PDF. No purchase necessary.
Finding The Perfect Bunker Spot
This step raises some important questions:
- What kind of soil is on your property?
- Are there natural gas pockets below you?
- How deep is bedrock?
- Is there water below? If so, how deep?
So selecting the right spot for your bunker is key.
Consider the right soil composition.
And find a place you can access quickly.
Also, the time of year when you break ground matters.
The ground freezes in winter in a cooler regions.
While breaking ground in winter is possible, I don’t recommend it.
It will take longer and increase the effort spent on the project.
Note: As pointed out by a helpful reader…
Spend serious time figuring out the exact depth of your water table.
“I ran into a few of these underground shelters built in the cold war period that were filled within a few feet of the top. A death trap for any child who finds its entrance. Good clue if your home has a sump pump the water table may be high enough to think twice about the underground shelter.”
– Grampa
Excavation & Structure Planning
To excavation in a timely manner, use heavy machinery.
Of course, you could use a shovel the old-fashioned way.
Not my idea of a good time.
Digging by shovel is only an option if you’re in no rush.
Otherwise, get your hands on a backhoe.
You can rent excavation equipment or hire contractors.
Either way, excavation costs will be a significant chunk of your bunker-building budget.
Plan For It.
Air Filtration
Filtered air is your best friend in an underground vault.
Fresh air is critical to stay for an extended periods.
Especially if the disaster event is nuclear and you’re dealing with the fallout.
As you’re excavating, leave room for air vents.
This will provide fresh air, and it will keep the bunker cool in hot weather.
Buy your air filtration system in advance.
That way, you know the specs and can stock up on air filters.
It would be a shame install a fancy air filter only to run out of filters.
Invest in some high-quality gas mask and filters as well.
That way, if you’re forced out of your bunker when the air is unsafe to breathe.
Make sure to disguise vents at the surface.
Clean Water
Some people install a water tank in their bunker.
While this is a valid in theory, it presents problems in practice.
Foremost, the tanks will eventually run out.
And you’ll need something to refill it.
Further, large containers are bulky and hard to conceal unless buried.
Which adds to the cost of excavation.
Ideally, you can tap into the water table and draw and filter from within the comfort of your bunker.
Since you are already underground, digging further to make a well makes sense.
But it will require more permits, permission, and funds.
If there’s running water nearby, channel it (or use a solar-powered water pump) near your bunker.
Or you could devise a rainwater harvest system to replenish.
No matter how you do it, clean water is essential to survival.
If you still want a large water tank, by all means, go for it.
But they work better as a backup form of water supply.
If electricity and water systems shut down, you’ll need a fresh supply.
Food Cache
Having a food supply is obvious, but it’s so important, don’t skip it.
Dig an extra room for food is a good idea.
Underground bunkers are the perfect place to store your emergency food cache.
They’ll stay cool; just keep them dry.
They’re also out of sight, thus making them difficult to rob.
Every bunker needs an abundant supply of non-perishable food.
Canned goods, dehydrated meals, rice stored in Mylar bags, dried pemmican,
Or anything with a long shelf life.
Escape / Egress
If you don’t dig an escape route… you’re digging yourself a grave.
If a single entrance/exit gets blocked by debris or dead bodies you have a tomb.
An alternative escape routes are essential!
Yes, two doors are harder to keep track of than one.
But it is worth the extra effort.
Want a free 78 item prepper checklist?
Click here to instantly download this Complete Checklist PDF. No purchase necessary.
Choosing Your Bunker Materials
The materials you use is up to you (and your budget).
You can choose thick tempered steel like a bank vault – but THAT will cost an arm and leg.
Here are some other options:
Metal
Using thick sheets of metal welded together.
Support it by tube steel.
It’s strong, it’s moisture resistance, not susceptible to infestation, and is freaking expensive.
If you can find a good deal on 4mm metal sheets, go for it.
Otherwise, you’ll have to with a a more budget-friendly option.
Wood
NOT ADVISED!
Wood is cheap, easy to get, easy to work with, and sturdy.
But it’s prone to weathering and rotting if not treated.
Lumber starts decomposing once wet,
This will structurally compromise your underground bunker.
Even pressure-treated wood will break down over long periods.
And eventually becomes susceptible to infestation.
Bricks/Blocks
Using bricks (or cinder blocks) to support the walls and floor is effective.
Bricks are cheap compared to other materials.
They’re sturdy, don’t decompose, and are easy to install.
Bricks are great insulators as well.
Meaning they keep hot air in during cold weather and cool air in during warm weather.
Concrete
Concrete is the best material for your survival bunker.
It’s durable, cheap, and quick to pour.
So installing doesn’t take forever.
Most modern homes use concrete as their foundation.
And it’s also the choice for bunkers.
If you invest in a long-term bunker, use concrete.
It provides safety, security, and durability with the smallest price tag.
Once the structure is in place, your bunker looks like a bunker.
Now cover it with a waterproof shed before burying it.
Water and moisture are your greatest enemies.
So do everything to keep them away from (and out of your bunker).
Concealing Your Underground Bunker
- You’ve excavated your bunker
- You set the foundation
- Built the structure
- And covered it with dirt
Now what?
Well, it still sticks out.
Your backyard’s still all torn up.
You don’t want it to stay that way.
Concealing your bunker is important for several reasons.
First, you don’t want your neighbors to know, right?
Second, if strangers figure out you’re storing ammo, food, and survival gear in your bunker, they will steal it.
Being incognito is always better than sticking out like a sore thumb.
So how can one effectively disguise a large, constructed underground bunker?
Use landscaping.
Cover the bunker with local dirt and plant fauna.
Blend it in as much as possible.
Use rocks and bushes to disguise your air vents.
As for the door, ideally, you have an underground hallway connecting your bunker to your house.
If this isn’t possible, your entrance can present a challenge.
Bunker doors are hard to disguise because they must be sturdy.
Vault-like, even.
Some people put the entrance to their bunker inside an old shed.
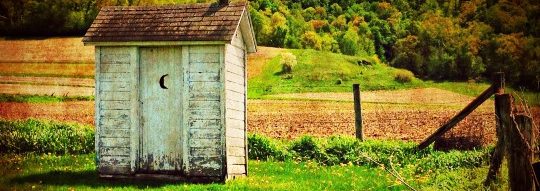
Or in the back of an innocuous-looking outhouse.
If you built your bunker underneath your home hide a trap door under a carpet or couch.
Get creative.
The better disguised, the better it will protect you in a crisis.
You can’t rob (or attack) what you can’t see.
Want a free 78 item prepper checklist?
Click here to instantly download this Complete Checklist PDF. No purchase necessary.
Additional Bunker Inclusions
There are no limits to what you can put into an underground bunker/
Only limits on what you can fit into it.
There are also some legal restrictions on storing chemicals or fuels underground.
So before you cram some Sarin gas canisters, check the law.
It would suck to have your bunker supplies confiscated by governments.
That being said:
The list of legal things to add to your bunker is too long for one article.
So I have narrowed it down to the most practical provisions.
Electric Generator
Electricity makes survival so easier.
It’s one of the most useful tools that our race has ever devised.
With it, we:
- illuminate entire cities
- wash dishes easily
- watch TV
- refrigerate food
- listen to music
- and cook food without open flames
These conveniences send an electrical generator to the top of this list.
With access to electricity, you’ll get through any emergency with less adversity.
Unfortunately, even with an extensive air filtration system a propane generator will produce gas fumes.
And in a confined space like a bunker, THAT can be dangerous.
For that reason:
Wind or solar power generators are best to power your bunker.
But these make disguising your bunker more challenging.
Of course, you could also build your bunker to use electricity from the power grid…
But if that goes down, you’re SOL.
Medical Supplies
Keep a healthy supply of medicine and equipment in your bunker.
It’s an absolute must.
People get sick; wounds take a long time to heal.
Infections can kill people.
So put together a comprehensive emergency medical kit.
Don’t turn your bunker into a hospital.
But without basic medical, your bunker is incomplete.
Weapons & Ammo
Use common sense.
I’ve seen bunkers turned into a one big gun safe room.
That’s cool, but it’s overkill.
Don’t sacrifice essentials like food, medicine, and water for more guns.
Entertainment
Entertainment is nearly as important as medicine.
Entertainment keeps one’s sanity.
Surviving an emergency does nobody any good IF they go crazy in the process.
Store:
- board games
- a deck of cards
- a shelf of books
- painting supplies
- dominoes
- video games
- movies
- and many mental diversions
- Having something to occupy your mind is a lifesaver. Believe me.
You can’t afford to lose your marbles like a madman in solitary confinement.
Best Family Bunker Plans
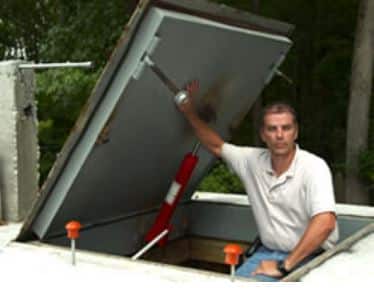
Here’s what you’ll learn:
Secret construction sources to get your materials at the lowest price.
This can make or break your chances of building an affordable survival bunker.
Crucial site preparation tips!
Without this information, your efforts could result in frustration and lost money.
Design and layout planning tips and advice from a qualified expert.
These design tips will help you choose the right layout.
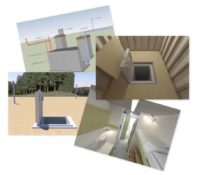
Learn how to prepare your site correctly.
Electrical layout and installation plans.
I’ve topped this off with full diagrams to make this as simple as possible.
As you can see, this is an extremely extensive bunker product.
You will not find this level of detailed information anywhere else.
Final Thoughts
Okay, so it’s not easy.
That much we’ve established.
But building your home survival bunker is one of the best ways to protect your family.
Because we don’t have access to the Secret Service, the US military, or billions of dollars.
↓ The Government’s Secret Underground Nuclear Bunker
But that doesn’t mean we can’t have our own bunkers.
Underground shelters can be affordable.
It just requires a lot of forethought and planning.
And shelters are not just for “doomsday preppers.”
Underground survival bunkers are useful for:
- tornadoes
- riots
- volcanic fallout
- nuclear war
- etc.
Honestly, the reasons are endless!
Not to mention, underground bunkers make fantastic survival supply storage spaces.
It’s like having a walk-in closet for your survival food, medicine, weapons, ammo, and water.
It will keep those items safe now and ready for any extreme emergency.
Why Trust Skilled Survival…
Go here now to review a full breakdown of:
- Who We Are
- Our Credentials
- Our Mission
- & Product Recommendations…
Here are a few highlights of our teams credentials & certifications:
- Certified Member of a Mountain Search & Rescue Organization
- Plant Emergency & Safety Leader for a Major Food Manufacturer
- Member of the 10TH Mountain Division Hut Association
- Certifications: Avalanche 1, WFR, CPR
- Official Gear Tester for Numerous Outdoor Gear Companies
- Countless Multiday Backpacking trips into Remote Wilderness
- Bachelor’s Degree In Mechanical Engineering
- Bachelor’s Degree In Civil Engineering
- Bachelor’s Degree In Biomedical Engineering
“It takes 20 years to build a reputation and five minutes to ruin it.” – Warren Buffett
We’re fully aware that trust is NOT something you GET but is EARNED.
And we’ll continue to earn YOUR trust through our forthright and honest approach with each new Blog Post, Guide & Product we create…
Will Brendza
P.s. Do You Live In A ‘Danger Zone’ County?
Find out now using my Danger Zone County List & Special Report it’s absolutely FREE.
In minutes you’ll know EXACTLY where you stand and if you should be worried or not..
So click here to get my FREE Danger Zone County List & Report….
Click on the image to get the List & Report for FREE and find out if YOU live in a ‘Danger Zone’ County…”
The post How To Build An Affordable Underground Survival Bunker appeared first on Skilled Survival.


