Is it 15 lbs? 20 lbs? 37 lbs? Not sure?
How far is your planned Bug Out?
5 miles? 11 miles? 23 miles? Just keep moving until you find somewhere safe…?
If your route takes you more than a couple miles then the weight of your Bug Out Bag matters…A Lot!
So let’s figure out what your target Bug Out Bag weight should be.
As A Way To Introduce You To Skilled Survival, We’re Giving Away Our #78 Item Complete Prepper Checklist. Click Here To Get Your FREE Copy Of It.
But First We Need To Agree On What A Bug Out Bag Is Really For?
The biggest opportunity for shaving weight off your Bug Out Bag is to remember what it’s for.
72 hours…
When planning your Bug Out Bag and its contents, it’s easy to forget its ultimate purpose.
It’s addicting to keep putting more and more items into your pack. Adding everything you can think of, for any possibility.
Do that… and you’ll end up with a back crippling 50 lbs. pack.
A Bug Out Bag should provide you with the bare essentials to survive for about 72 hours while on the move – (72 hours is a very rough average; your Bug Out could be much shorter or longer depending upon your Survival Plan).
It’s should be designed to provide just enough stuff to survive a swift journey from point A to point B.
Allowing you to get the Hell Out Of Dodge.
Exclusive Bonus Content – Skilled Survival’s 104 Item Bug Out Bag Checklist – the only bug out checklist worth using. Click Here To Get Your FREE Copy Of It.
Helping you arrive safely to your prearranged designation according to Your Family’s Survival Plan.
So it’s vitally important to remember this fact…you’re going to be walking a long way with this MONKEY on your back and A HEAVY PACK WILL SLOW YOU DOWN.
With a heavy pack, you will fatigue much quicker, especially if you are not in peak physical condition.
Unless you’ve personally experienced backpacking for 3 days straight and walked at least 8 miles each of those days…then you can’t truly understand just how difficult a task you have ahead.
Heavy packs are painful!
If your bug out bag is too heavy, you will quickly regret it.
You will be forced to decide what to keep and what to ditch. I’d much rather decide that Right Now…Today…Not Mid Bug Out.
Having a Bug Out Bag that is:
- Light
- Smartly Packed
- Ready To Go
Is not an option, it is a necessity. You must keep this in mind at all times because you can’t carry everything…
Even if you’re building an INCH bag (I‘m. Never. Coming. Home.), you should still watch your overall pack weight.
The More Survival Skills You Have…The Less Gear You Need
Before we get into some specific tips to help, lighten your bug out bag weight…it’s best to determine if you need all that gear in the first place.
Learning key survival skills such as building shelters and fires, will make heavy tents and stoves an unnecessary bug out burden.
Leaving behind these two pieces of gear alone can shave up to 5 – 8 lbs.
Being prepared and having a large stash of food and water sounds great, but if you can’t carry it, then it’s ultimately of little use.
So instead, I’m talking about learning Water Procuring, Shelter Building, Fire Starting, and Food Finding Skills without lots of “extra” gear. More on this later…
Your Choice of Bag Matters
“30 lbs in a poor fitting bug out bag sucks. 30 lbs in an excellent fitting bag sucks much less.”
So let’s discuss your choice of bag for a moment.
When choosing your bug out bag pack, the most important factor is not your overall height, but the length of your torso.
You must have a bag that fits you.
It must fit your torso comfortably and sit on your hips properly.
You should measure your torso with a tailor’s tape (avoid guesswork here).
You want to measure from your hip to the bone at the base of your neck, the spot where your neck meets your shoulders (otherwise known as that place your dad always said he would separate your head from the rest of you when you misbehaved).
This determines your torso length.
You also want to measure your hips. You want to measure from hipbone to hipbone or from pocket to pocket (all the way around). This is where the hip belt will rest.
Now utilize these 2 measurements (torso and around hips) in order to select a pack that fits.
Having your pack’s hip straps sitting too high or too low it will affect the gait of your walk.
Remember, bugging out will likely consist of
- Hiking
- Running
- Scrambling
- Climbing
If you buy one online, try it on ASAP. If it doesn’t fit right, return it ASAP. This is not a purchase you can’t afford to accept wrong.
Bottom line: Pack smart, light, and make sure your bag fits right.
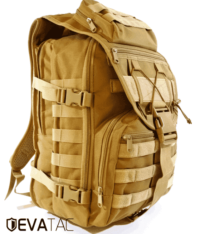
My favorite bug out bag is The Combat Bag by EVAC. You should check out my detailed video review of this excellent bag:
Exclusive Bonus Content – Skilled Survival’s 104 Item Bug Out Bag Checklist – the only bug out checklist worth using. Click Here To Get Your FREE Copy Of It.
So How Much Should A Bug Out Bag Weigh?
“The target weight of your But Out Bag is determined by YOUR weight.”
The basic formula to remember when packing your Bug Out Bag is this:
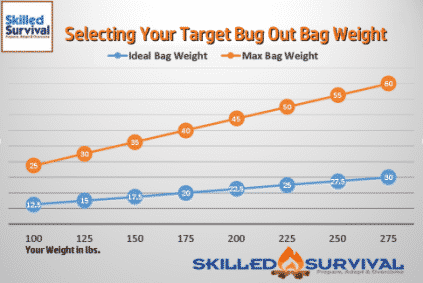
Your ideal target bug out bag weight goal is 10% of your body weight.
The maximum you should attempt to carry is %20.
For example, if you weigh 200 lbs. then 10% of 200 = 20 lbs.
If you are going to aim for the 20% max, then you must be in peak physical condition otherwise, you will fatigue quickly, thus hampering your escape.
In this example, if you weigh 200 lbs. then 20% of 200 = 40 lbs.
You need to estimate realistically your target Bug Out Bag weight and what you can safely carry. In order to help, I’ve put together a simple chart for you to use as a guideline.
Find your weight in lbs across the bottom and then you can find your recommended “ideal” and “maximum” Bug Out Bag Weight.
A note of caution: These recommended Bug Out Bag weight ranges are highly dependent upon your physical health and strength.
Now that we know how much a bug out bag should weigh, we’re shooting for; it’s time to figure out the best ways to make that happen.
1. How Much Water Do We Really Need to Carry
A liter of water is heavy…it weighs about 2.2 lbs., so 3 liters of water equals 6.6 lbs.
6 lbs. may not sound like much but when added to all your other gear, it’s a heavy problem.
You can carry very little H2O if you know how to procure and purify it on the go. However, this is very dependent upon your specific bug out region.
I personally plan only to carry about 1 liter of water at any given time.
If like me, you plan to not carry 6 lbs. of water, you’ll need to prepare and plan. You can either cache water along your route or find water and treat it on the go.
If water is abundant, then learn how to purify it.
If it is not, learn how to find it or cache it.
If you decide to cache water along your route, remember to mark your map where you cached it.
There’s not much worse than depending on your cached water and not being able to find it.
If you decide to procure water from the wilderness, then make certain you have some known reliable sources to treat along the way.
There are several ways to purify water, so practice one or two ways to purify water until you can turn nasty, stagnant water into safe drinking water.
This will allow you to leave most of the water stock out of your light bug out bag.
2. But What Will We Eat?
Now it’s time to review your bug out bag’s food stock.
Recall, you can exist for about three weeks without food. However, you are bugging out and need the energy to stay healthy and mentally alert.
So how are you going to reduce your food supply?
This is where your survival skills will really come into play.
When you are packing using a Bug Out Bag Checklist include one freeze-dried meal for each family member and a few high-calorie energy bars.
This is one day’s worth of food.
This amount of food will allow you to survive your bug out.
No, it won’t keep the hunger away but it will provide enough energy to remain healthy and alert.
Now, the more skills you have, the more food you might acquire.
I recommend you pack in your bags the minimum you need to survive. Now, with some additional skills, you can find some BONUS foods along the way.
If you break camp near a lake or river you may be able to find fish to eat.
All you need is a bit of fishing line, a hook (both very light). You can find a stick near the stream to tie the line onto. Cast it in the water and wait for dinner.
Place the fish next to the fire with the skin left on to cook the fish; this removes the need for a cookstove, fuel, and pots and pans.
Bonus food may also be found in the woods.
If you know how to identify plant edibles or know how to use snares or traps you might be able to find some more bonus food. The snare and traps might work overnight to get a squirrel or two.
Again, having these skills means carrying less heavy food stock. The more things you know how to do and make in the wild the better.
One more trick to help lighten the food load fast is to eat your heaviest foods first.
Your legs are freshest on day one, but your pack is heaviest too. By eating the heavier rations first, you will reduce your pack weight quickest for days 2 and 3.
This gives you the maximum caloric benefit and lessens the weight of your pack each day.
3. Ditch The Tent For A Tarp
Brush up on your survival skills and ditch the tent.
A tent with all its poles and stakes can add several unnecessary pounds to your growing pack.
 So instead of carrying a tent, carry a badass survival tarp.
A light tarp (with lots of grommets) will suffice to create a simple shelter from most elements; it can also be used as a blanket.
Build a shelter with what’s available.
Pine trees with low-hanging branches are a relatively safe shelter from wind and rain. They also have a layer of needles under them, which can provide you with a soft pallet to lie on.
Underneath these trees, the ground is usually soft enough that you can dig up the earth with a stick. This allows you to make a shallow impression that you can line with pine needles to afford you a little bit of comfort and extra warmth.
Rock overhangs or shallow caves have been used for thousands of years by humans to survive. Just make certain the area is empty of unwanted animal guests before committing to it for the night.
If these are not options for you, then you might be able to use some paracord and a tarp to create a simple lean-to shelter.
All you really need for most nights is protection from wind and rain.
Sure it can be a bit frightening sleeping outdoors (without a tent) for the first time, so I suggest you practice this in your own backyard and then practice this along with your bug out route as well.
You’ll soon get used to sleeping under the stars.
One downfall of building your own shelter is it takes time and burns precious calories.
By scouting your route carefully you can mark on your map where you found food items, timber, water, and everything you will need to help you survive.
With survival knowledge and practice, you should be able to craft a decent shelter to protect you and your family from most weather conditions.
I can hear some of you already….but what if there is a Lightning Storm? Tornado? Forest Fire? Blizzard?
Yes, my friends, these are risks, but how are these risks lessened by sleeping in a heavy-to-carry tent? No, they are Not.
Those risks are an inherent part of wilderness survival.
Actually, it’s much better to hunker down in a shallow cave or overhang if a tornado roars by, instead of a tent out in the open.
Now, if it’s winter when you are bugging out, the heavy snow around the base of a pine tree can form a sort of igloo to provide protection and warmth for your family.
Exclusive Bonus Content – Skilled Survival’s 104 Item Bug Out Bag Checklist – the only bug out checklist worth using. Click Here To Get Your FREE Copy Of It.
4. Sleeping Bags Are Overrated
Another place to save on your “go bag” weight is to ditch your sleeping bag.
If you’re bugging out and you’ve got summer temperatures, you are not going to need a sleeping bag.
You can use your tarp which weighs much less. If you’re worried about being warm enough, add a light liner and it will be just fine for the warmer temperatures.
If you are in mountainous terrain or frigid winter temperatures, you can also trim weight by choosing to use a bivvy bag. It’s made from the same stuff as the Emergency Blanket that EMS attendants use for hypothermia victims.
A bivvy bag has been made to cover the body fully, from head to toe. Additionally, it helps trap your body heat.
If you are concerned that it will not be warm enough, you can certainly wear all your clothes while inside with the emergency blanket as well.
Using both the bivvy bag and the Blanket will still shave a few pounds off your light Bug Out Bag. It also acts as a windbreak against cold, rain, snow, and wind.
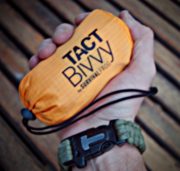
Stretched out, the TACT Bivvy is 7 feet long and 3 feet wide.
Once it’s rolled up it shrinks down so small that it fits in the palm of your hand and weighs only 6.2 ounces.
It is a lot less bulky and lighter than carrying around a traditional sleeping bag.
5. Are Your Extra Clothes Are Holding You Back?
Attack your clothes stock.
Your clothes selection is dependent upon your location and climate. You should re-evaluate your Bug Out Bag clothes stock at least every six months (I do it at the beginning of each new season).
During these times, you will want to make sure you have the right seasonal selection of clothes that you can swap out when you need to.
Also, it’s wise to invest in durable, high-quality clothes (like tactical pants), instead of having to carry lots of extra low-quality spares.
Another way to save some weight and space is to roll your change of clothes into a skivvy roll.
What is a skivvy roll and what goes into it?
A skivvy roll is a couple of basic spare clothes items that you roll into a small tight ball.
First, to save space and bug out bag weight, the only pair of pants you need are the ones you wear.
After that, you need a change of socks, underwear, and a shirt. So that’s what you put in your skivvy roll.
Lay your t-shirt flat and place your underwear folded in half in the middle of the shirt, right below the neckline. This makes it easier to roll.
Fold the right side of your shirt to the middle, and then do the same with the left side. Take a pair of crew socks, anything larger or smaller will not work quite as well, cross them toe to heel over the sleeves of your folded shirt.
Once you have the socks in place, begin rolling from the collar down the shirt to the bottom. The tighter you roll, the less space you will take up.
When you are done rolling, you should have two ends of the socks sticking out on either side. Take one end and fold it over the roll. Then take the remaining sock end and fold it over.
This is your Skivvy roll.
A family of four with clothes rolled in a skivvy roll will barely weigh one pound.
Here’s a quick video by a fellow survivalist “The Sensible Prepper” making a skivvy roll.
6. Leave Your Camping Lanterns Behind
You don’t need a heavy camping lantern.
A good survival flashlight will come in handy and fits in your pocket so that you can leave the camping lanterns behind.
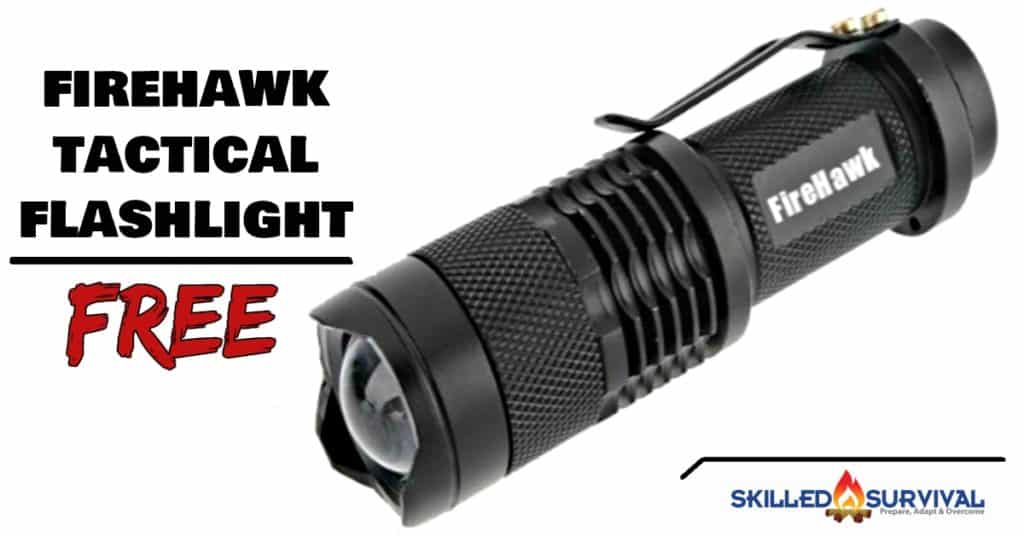
For A Limited Time Only: Get a FREE FireHawk Tactical Flashlight For Visiting Skilled Survival! Just pay s&h. Click Here To Learn More.
At night, you can also use the light from your fire.
Some people advocate ditching everything unnecessary and I typically support this notion…except when it comes to fire starters.
Carry at least 3 different types of fire starters. A lighter, waterproof match and a Ferro rod. These are small, lightweight and the ability to create fire quickly is much too important a survival skill to forgo.
You also don’t want to waste your precious energy and calories trying to start a fire with sticks (although it’s an excellent skill to have).
Without fire-starting gear, you could be in for a long, cold, miserable, and dangerous time. Survival is dependent upon taking advantage of given opportunities.
As an added note…if you walk through an area that is littered with kindling, you should take a little bit with you. It’s lightweight, fires are important and you never know if there will be any kindling at the next stop.
Exclusive Bonus Content – Skilled Survival’s 104 Item Bug Out Bag Checklist – the only bug out checklist worth using. Click Here To Get Your FREE Copy Of It.
7. Firearms: Keep It Light
In my opinion, hunting much too heavy to justify for a bug out. Recall, that the point of a bug out is to get from point A to point B as expeditiously as possible.
Hunting takes both time and attention away from what’s really important and that is moving quickly. It doesn’t make a lot of sense to carry around 10-20 pounds of firearm gear on the off chance of taking a shot at something.
However, I do keep a loaded pistol with me for self-defense. When it’s “go-time”, things are not going to be pretty.
It’s possible that civil order has broken down and replaced by survival of the fittest (or smartest). I don’t intend to be a poor bastard who left his gun behind…just in case.
8. Cache “Extra” Ammo Along The Way
Being ready to defend you and your family for 72 hours is one thing, carrying enough ammo to take a village by force is another.
The less ammo you carry means traveling faster and reaching safety sooner.
It’s a very personal choice to decide how much ammo you should carry.
However, next to water, any extra ammunition you carry is going to be the most cumbersome gear in your pack.
I suggest you cache some ammo along your route. That way you can decide to add that ammo to your pack along the way (if needed) or leave it behind.
9. Packing Right Makes It Feel Light
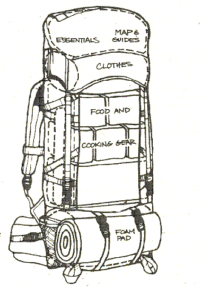
Anyone who has carried a heavy pack understands that you want the heaviest items closest to your spine. The further away something is from the fulcrum the more it pulls.
Putting the heaviest things close to your body reduces undue stress.
Keep as many heavy items in the pack as close to your back. You don’t want to hang a bunch of water and ammo to the outside of your light but out bag (furthest away from your body).
As an example of this principle in action, try carrying something heavy with your arms fully extended out in front of you. Not easy or comfortable.
Instead, you’d rather bring that heavy object in close to your body (hugging the object) since this is much easier to carry.
Having the heavy items further out in the pack makes it harder on your shoulders and back to carry.
Also, pack the stuff you don’t need as frequently on the bottom and the items you will be reaching for often at the top. This allows you to find items quickly.
Another way to cut pack weight and still keep what you need is to put it in your pockets.
You are still carrying the weight but by moving it out of your pack and onto you, it will reduce the stress your back takes.
Also, remember dual-use items take up less space and weigh less for the same amount of utility. Often survival is about creativity.
Being creative will help you survive.
Exclusive Bonus Content – Skilled Survival’s 104 Item Bug Out Bag Checklist – the only bug out checklist worth using. Click Here To Get Your FREE Copy Of It.
10. Go Hard Core
So you’ve trimmed your pack weight significantly by following the previous 9 suggestions, but you know there is still more you can do.
Well, your right…and these 10 hardcore tips are the little, unknown, meticulous, fractions of ounces that you can attempt to trim (if you are HARDCORE).
None of these tips by themselves will make a noticeable impact but all done together, they’ll add up and reduce your overall bug out bag weight.
- Cut Off Any/All Extra Straps, Zipper Tags, or Fabric Not Needed On Your Bag
- Remove Any Labels or Stickers From Both Bag and Gear
- Trim Unnecessary Edges Off Of Your Map
Replace your Spoon and Fork With A Titanium Spork
- Saw Off The Handle Of Your Toothbrush
- Replace Toothpaste With Toothpowder
- Transfer Any Liquids (sunscreens, soap, etc.) Into 1 oz. Bottles
- Use Ziplock baggies (very light) Instead Of Sacks To Keep Items Together
- Buy Titanium Gear When Possible
- Drill Holes In Everything You Can (Utensil Handles / Toothbrushes / etc.)
To Go Ultralight, You Need To Practice, Practice, Practice…
Now, let’s get back to the Survival Skills conversation we started earlier.
I have a simple question for you and you must be prepared to answer it without hesitation…ready?
“If you ditch your tent, stove, extra water and extra food are you prepared to survive without them?”
Are you 100% confident in your survival skills?
I’m talking about actually performing a practice bug out with limited supplies. You don’t want to assume you can do it when you and your family’s lives are in danger.
If you’ve really spent time in the wilderness, you are acutely aware that protecting yourself from the elements is very important.
It’s a high priority to understand how vital your mental state is during a survival encounter. The mindset of a person during a survival conflict can decide whether you endure the situation or give up and die.
So while you are out practicing your bug out (you’ve done this right?), take some time to look at every different natural formation and ask yourself how it can be put to use to build a shelter.
Building a shelter for yourself and your family not only protects them from the adverse weather but also gives you a mental boost. A shelter is mentally akin to fire; they both give us hope and a sense of achievement.
When immediate shelter needs to be found, crawl under a spruce tree, or find some form of natural cover. These will allow you to block the wind and begin conserving warmth.
Unless you hike often, you probably are unaware of just how quickly a lovely warm day can deteriorate into a dangerous weather situation.
Keep in mind when the temperature drops due to wind and rain. A seventy-degree day can quickly become a forty-degree day, which can quickly cause hypothermia.
Under certain conditions finding proper shelter and warmth can make the difference between life and death. When you begin to lose body heat your movements become impaired as hypothermia begins to set in.
Imagine trying to light a fire while with a Ferro rod while you begin losing motor function in your fingers…it’s not pretty.
You need to be fully prepared to adapt to any situation and be prepared to protect your family without “extra”, heavy gear.
If you practice while your life is not in danger, your reflexes will kick in when it is in danger.
You will learn exactly what to do.
Knowledge of what natural resources are available in your area or along your route will help build confidence in your emergency survival skills as well.
Exclusive Bonus Content – Skilled Survival’s 104 Item Bug Out Bag Checklist – the only bug out checklist worth using. Click Here To Get Your FREE Copy Of It.
In Conclusion
If you’re serious about bugging out; you should care about your bug out bag weight.
The best way to lighten your load is to leave the unnecessary equipment out of our light bug out bag. You can do this by using practiced survival skills or caching key items along the route.
Or even better…do both.
However, both of these choices require pre-planning and practice.
So, if you plan and practice, then you will KNOW that you can handle your bug out bag weight and have everything you need for a quick and successful bug out.
Sadly, there will be those who bug out with an extremely heavy pack AND no practical survival skills. Those people will be putting themselves and their families in extreme danger.
A heavy pack will slow them down and fatigue them. They will be forced to ditch items mid bug out in order to “make it”.
Then they will be left without items they are unprepared to survive without.
Bottom Line: Don’t Be Like These Guys.
Remember: Prepare, Adapt and Overcome,
“Just In Case” Jack
P.s. Are you ready for the tough times ahead?
Find out now by taking my short Readiness Score Quiz – it’s absolutely free.
Once complete, you’ll know exactly where you stand on the “fragile” vs.” resilient” spectrum.
So click here to start the Quiz….And don’t worry; the questions are so easy a 3rd grader could answer them.
Click on the image to begin the Quiz and find out once and for all if you’re part of “The Fragile Masses” or “The Resilient Few.”
The post Bug Out Bag Weight: It Can Add Up Fast appeared first on Skilled Survival.


