


The classic leather shooting sling is a bit of an anachronism today. Most rifle slings today are nylon with QD flush cup mounting and quick length adjustments that can be made on the move. The M1907 is the exact opposite; it is leather, is a pain to adjust, and shines in stationary marksmanship situations. It also looks extremely good on a classic rifle. Let’s take a look into assembling and using this old-school sling.
More Slings @ TFB:
- Introducing the New Blue Alpha Padded Rifle Sling
- TFB Review: ANR Design’s New Link Sling
- GrovTec Introduces The New Gen 3 Sabre Tactical Sling
- TFB Review: Blue Force Gear Standard AK Sling
- Blue Force Gear’s New Vickers SMG Sling
This particular sling is the Brownells Competitor Plus sling with numbers. I bought it on sale several years ago. Brownells has not been contacted about this review.
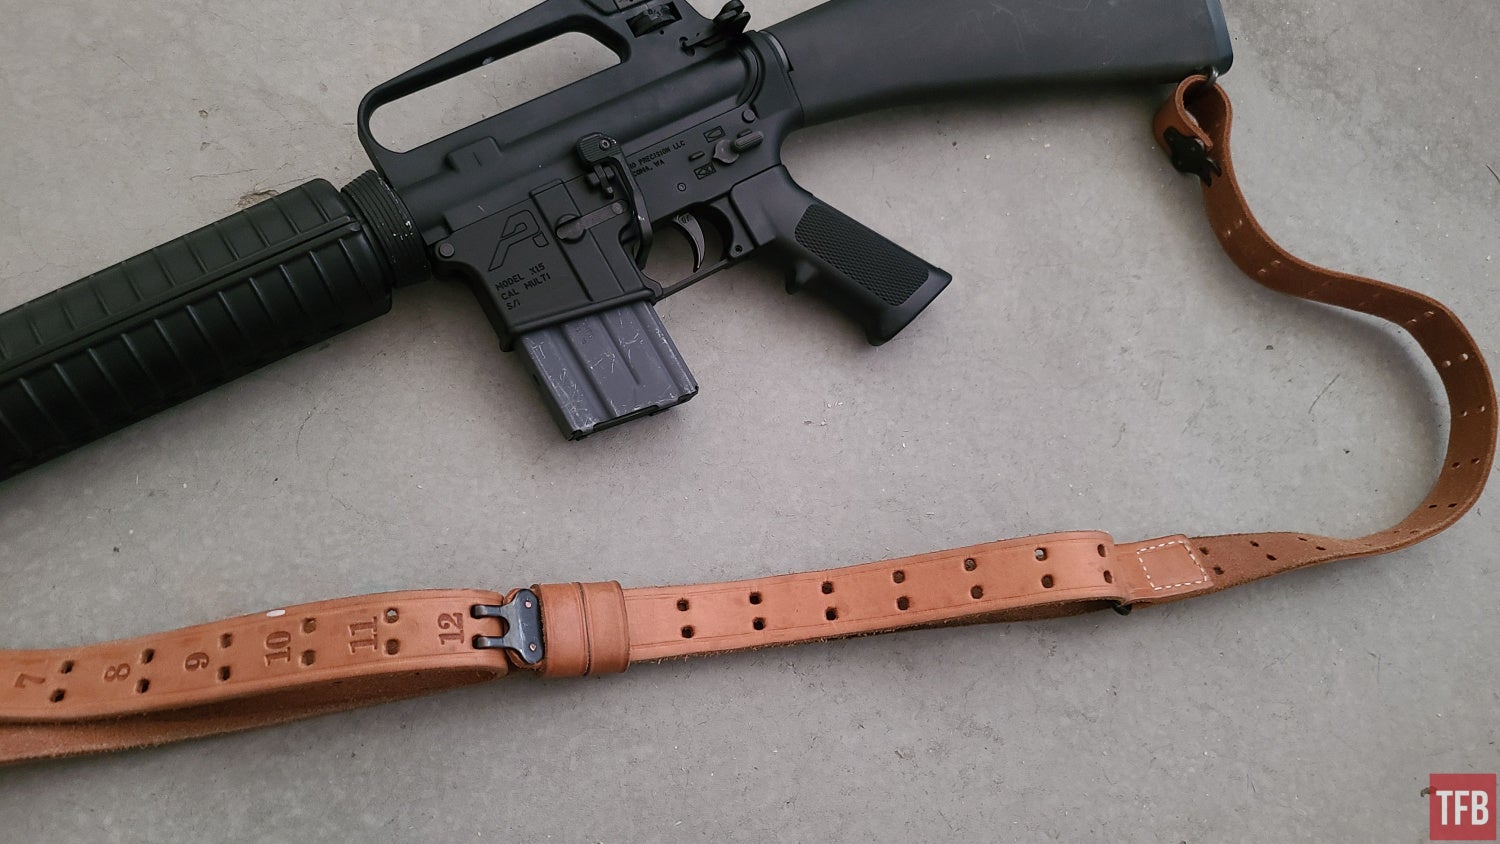
The Brownells Competitor Plus sling has numbers to help keep track of preferred adjustments
What Is A Shooting Sling?
Slings originated as a simple strap to carry a long gun when it was not in use. The strap would sit over the shoulder and take a load off the shooter’s arm. Shooters soon realized that the sling could be wrapped around the support arm to increase stability.
The next logical step was a sling that was designed as a shooting support. Generally, this is accomplished by creating a loop within the sling that goes around the support arm. How exactly that loop is formed ranges from simple to complex. One of the more complicated models is the M1907 sling, which was used by the U.S. military during both World Wars. It also made appearances in “gun guy” movies like Black Hawk Down and American Sniper.
How To Install The M1907
There are several methods for setting up the M1907. We will only cover one method, and I am not sure if it has an official name, but it works well. The sling has three main parts: a long strap, a short strap, and a pair of “keepers.”
Step 1: Lay out the sling parts as shown
Both keepers are located in the middle of the long strap.
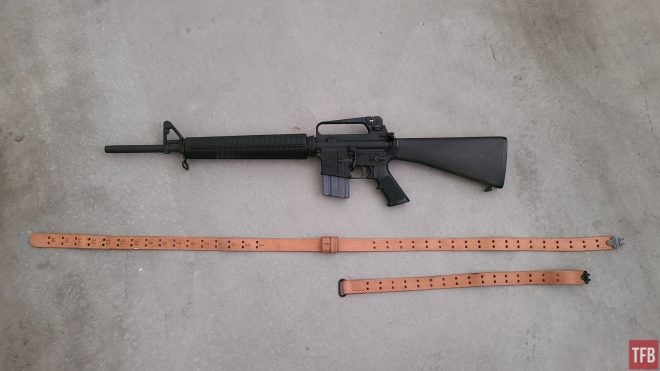
Lay out the parts of the sling as shown
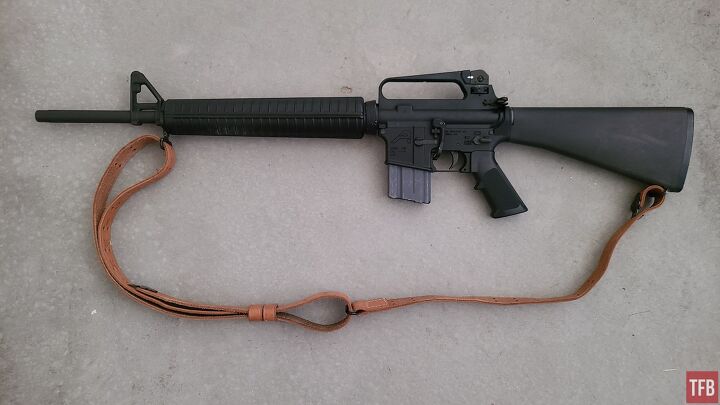
Step 2: Feed the front end of the sling through the sling loop
Note that the long end of the sling feeds through the sling loop from the front and that both metal hooks face down. The short piece is on the outside of the long strap.

The long end feeds through the front sling loop from the muzzle side. Note that the hooks are facing the stock.
Step 3: Feed the hooks of the long strap back through the keepers
Make sure the short strap remains attached to the long strap.
The hook of the long strap feeds up through the two keepers
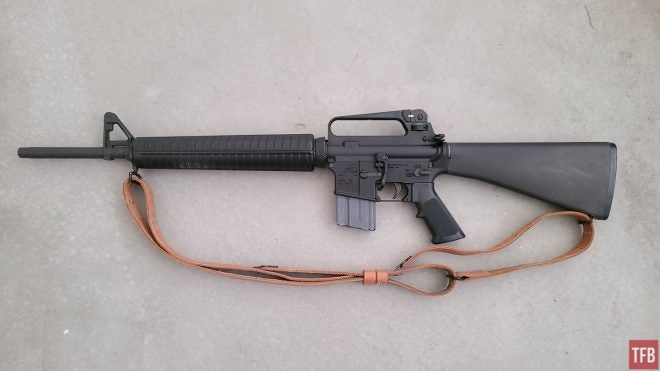
Step 4: Attach the hooks on the long strap to the holes of the long strap, and feed the hooks on the short strap through the sling loop
On a sling with numbers, the hooks should probably be around 10+/-3 depending on body shape.
The front hook attaches to the holes behind the sling loop, and the hooks of the short strap go through the rear loop
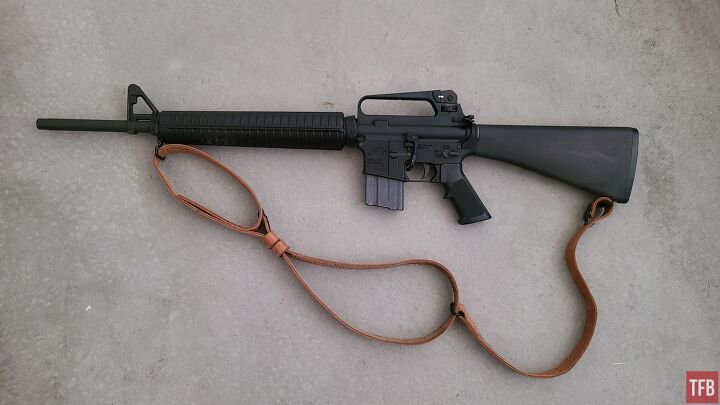
Step 5: Attach the hooks on the short strap to whatever set of holes provides the sling length you want
It can attach to the short strap or long strap, depending on preference.
Overall length can be shortened by moving the rear hook to any set of holes towards the muzzle
The M1907 Sling On The Range
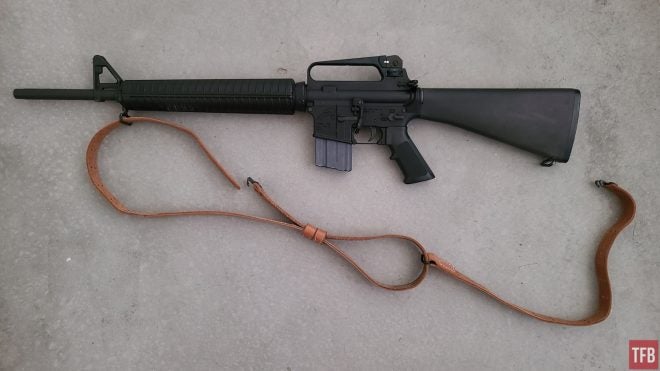
Slinging up can be intimidating at first, but it does get easier with practice. The first step is adding slack to the rear of the sling. Some shooters prefer to unhook the rear hook entirely, while others simply attach the rear hooks to one of the rearmost set of holes on the short strap.
The sling configuration for carrying over a shoulder
The arm loop is formed by pulling slack down through the keepers on the outside strap, down from the front sling loop. Turn the loop one-half turn to the outboard side (to the left for a right-handed shooter) and slide your arm through. Alternate pulling up on the inside of the sling to tighten the loop, and pushing the sling over on the bicep so that it does not point too far inwards. This process takes practice but can become quick once the proper settings are known.
The large loop created by the keepers is where the shooter’s arm is placed
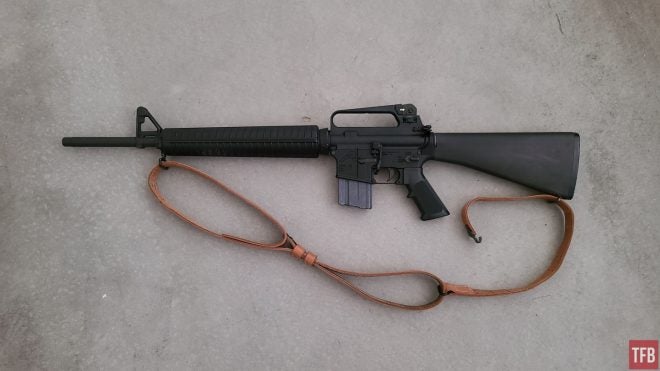
When properly adjusted to the shooter, the front hook will be pulled back into the keepers. This creates a solid, tight stop that allows plenty of sling tension. The shooter’s arm then swings out and around the portion of the sling under the handguard.

This is how it should look when the sling is correctly tightened on the arm
Conclusion
The 1907 sling is timeless. It just looks right on classic rifles. But it also is a useful marksmanship aid if there is enough time to get it set up. No, it will not be replacing the Blue Force Gear slings on my carbines but it can be found on several of my older guns. For a touch of class or a bit of help in certain shooting positions, the M1907 can be a great addition.
We are committed to finding, researching, and recommending the best products. We earn commissions from purchases you make using the retail links in our product reviews. Learn more about how this works.