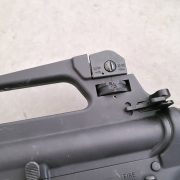
A2 sights were a controversial design choice when they replaced the old A1 versions. They added complexity and made it possible to change the sight setting without a tool. While some users have maligned the A2, it is a very capable sight for the average civilian shooter.
More AR-15 Articles @ TFB:
- M1AR15: M1 Garand Iron Sights On An AR-15
- Vickers Guide: AR-15 (Volume 2) Second Edition Now Available
- Is a Daniel Defense AR-15 Worth the Money? The DDM4 V7 Review
- TFB Review: Palmetto State Armory AR-15A4
- Can a Basic $450 AR-15 Keep Up With My $1,500 Rifle?
Nomenclature
Before we dig into the details, let’s discuss the design of the A2 sight and its components. Generally speaking, the sight adjustment that handles the up-and-down movement of the impact point is called elevation. The Left and right movement is called windage. Rather than some sort of diagonal movement, changes are made along the X- and Y- axis. The elevation knob of the A2 sight sits inside the carry handle below the aperture. The windage knob is on the right side of the carry handle.
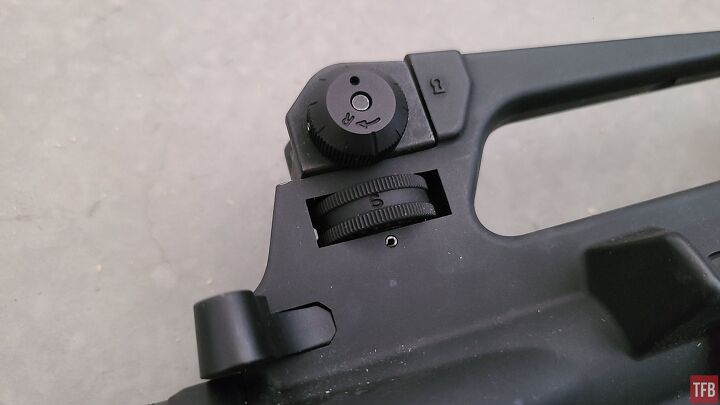
Windage knob (top) and elevation knob (bottom)
The elevation and windage knobs have click adjustments. As they are moved, there are audible and tactile clicks that can be counted. The amount of movement on the target produced by each click can vary based on the specific model of sight being used and the distance between the front and rear sights. A2 sights on a 20″ barrel with a rifle gas system will be smaller per click than A2 sights on a 16″ barrel with a carbine gas system.
One final sight adjustment is located in the front sight. The front sight post itself moves up and down as another method to change elevation. This change requires a small tool to depress a detent before the sights post turns. The sight tower reminds the shooter how to move the zero with a small “UP” engraving and an arrow to the left.
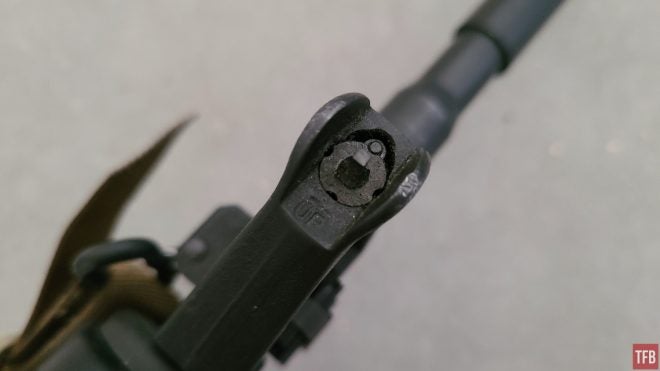
Front sight elevation adjustment
The other major component in the A2 sight system is the aperture. This is the hole in the rear sight that the shooter looks through. The aperture has two settings, the large “0-2” side which is for close range and night shooting, and the much smaller standard aperture. I almost never use the 0-2 side. Some competition-oriented sights will have an even smaller aperture than standard, as well.
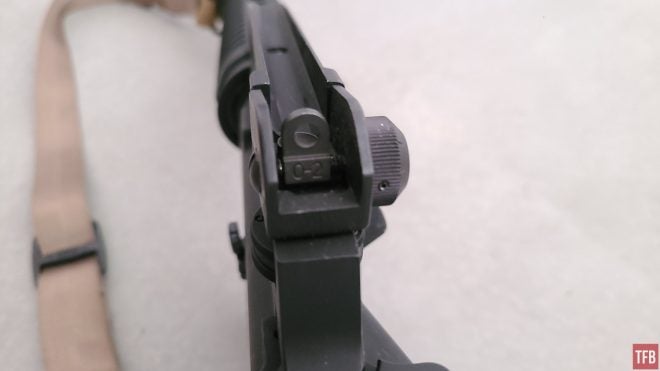
The large low light/close quarters aperture is labeled “0-2”
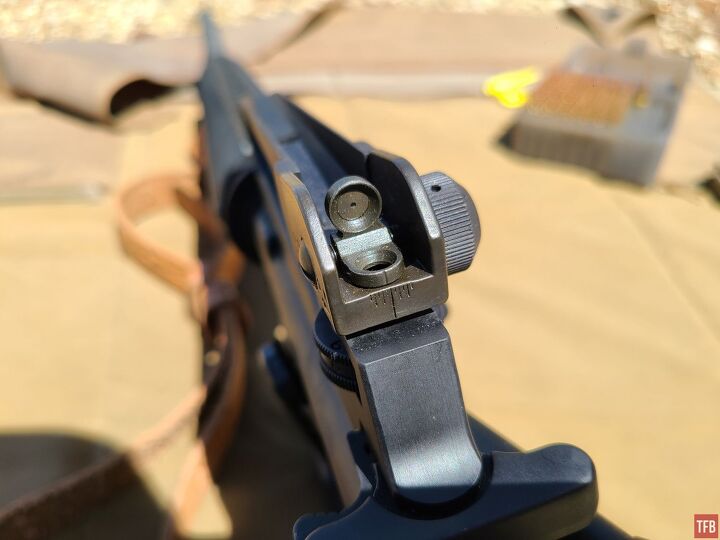
Reduced rear aperture on a competition A2 upper
Battle Zero
There are dozens of methods for zeroing an A2 sight. We will stick to two basic methods, the battle zero and competition zero. The battle zero is a method that reduces the amount of dialing. Its goal is hitting man-sized targets at as many ranges as possible, with the fewest adjustments possible. This procedure is detailed in military field manuals such as Army TM 9-1005-319-10. A target is placed at 300 meters (or 25 meters) and the rear sight is adjusted to the “3/8” (or “3/6” setting for detachable carry handles). The front sight is used to adjust elevation until the group sits in the center of the target. Windage is adjusted on the rear sight. Once this process is complete, the elevation knob can be adjusted without losing the zero. Simply return the sight to the bottom of its travel range, which should be at or near the “3/8” setting. Other variations of the battle zero exist, generally with changes to the zeroing distance. That is a topic for another day, though.
Another sight setting is the “z” found on some detachable carry handles, which is used when sighting in at 25 meters for a battle zero. The rear sight is turned to “z” before shooting. Impacts on paper are then adjusted for elevation with the front sight as would be done with other A2 sights.
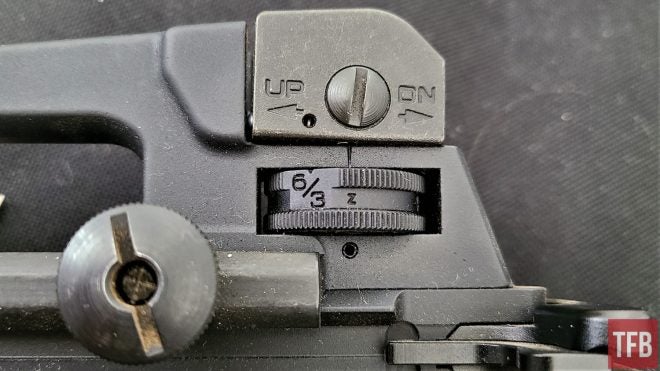
The “z” setting on the elevation drum is used for zeroing, shown here on a Palmetto State Armory upper
Competition Zero
A competition zero, in contrast, is intended to be dialed. The elevation knob should be bottomed out, and the rear sight moved to its mechanical middle. To find the middle of the rear sight, dial all the way to one side then count the clicks until the sight maxes out on the opposite side. Simply divide that number by two, then return the sight to its mechanical center. Marking that setting on the windage with a paint pen is a good idea. A target is then placed at the desired distance, generally 100 or 200 yards. As groups are shot and the zero is refined, the shooter writes down the number of clicks of windage and elevation that are needed at that range. Witness marks with a paint pen are a good idea for this zero, too.
Shooters should note that most competition-oriented A2 sights have clicks that are finer than the military sights. Most military sights have 1 MOA clicks on a rifle-length gas system. Competition sights often have 1/2 MOA or 1/4 MOA clicks. Some of those competition sights will not have numeric markings on the elevation knob either.
On The Range – Battle Zero
The “3/8″ elevation setting on a properly-zeroed gun will be a 300-meter zero with military ammo. The 5.56×45 is a fast round that has little drop out to 300 meters. For all shots inside 300, simply place align the sights and put the front post on or below the target. As long as the target is larger than about a 6” circle, it will be a hit. As distances increase the rear sight can be dialed up. Each number represents how many hundred meters that setting corresponds to. One full revolution of the elevation knob returns to “3/8” which is the 800-meter setting.
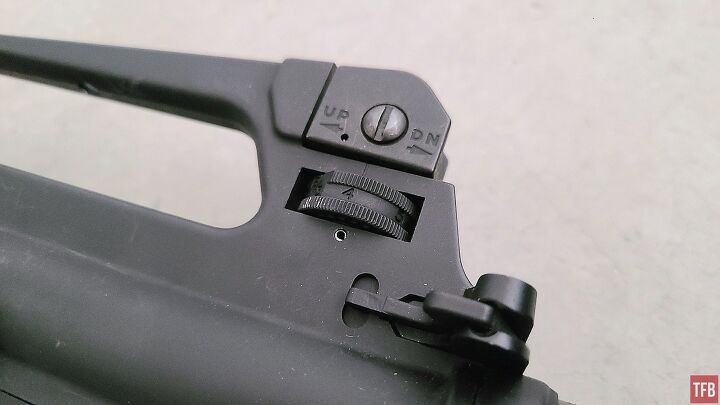
Rear sight dialed up to 400 meters
This style of zero is ideal for more real-world use. The sight is generally left on the 300-meter setting, but it is possible to dial up if the need arises. How useful in combat is an iron sight dialed up to 800 meters? I am not the right person to ask, but it does seem rather optimistic. But having the ability to dial in 400 or 500 meters and maintain a good sight picture without holding over does not hurt the odds of hitting at those ranges when compared to a more basic sight. The elevation returns to its zero easily after being dialed because it hits a hard stop at the bottom of its range.
Windage can still be dialed if desired, but holding off is usually the better idea. The windage knob does not have a solid mechanical stop when returned to the zero position, so it requires a little more effort to keep track of the setting.
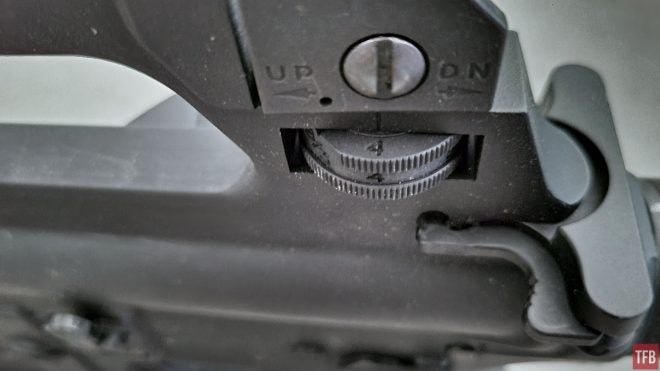
Elevation settings are marked on the top and sides of the knob
On The Range – Competition Zero
Simply hitting a torso-size target is not good enough for this intended use. The goal of this zero is precision, so the appropriate correction is dialed in for each range, as well as for the wind condition. This is not meant for rapid adjustments that are just “good enough” to score hits. When firing is finished, the sights are returned to their mechanical zero points so they are ready for future use.
A competition zero relies heavily on a data book. It is the only authoritative source for that particular gun with its load of choice. The advantage of this style of zeroing is precision. A well-loved log book with information on drop and windage with specific ammunition at different ranges in different weather conditions can produce very accurate fire. A log book can also track different types of ammunition, should the need arise to change loads.
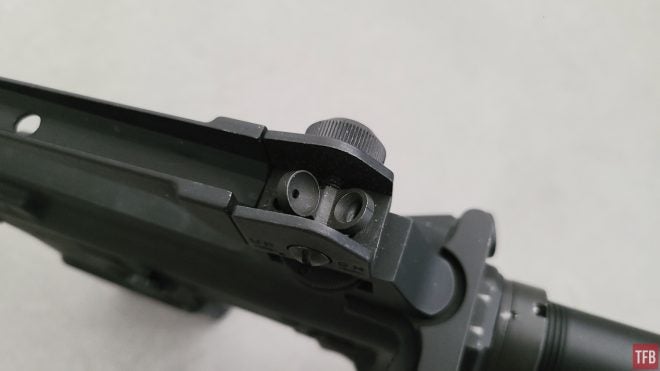
Standard and low light aperture size comparison
Conclusion
Almost any quality optic is more functional than iron sights. But among the iron sights fielded on American rifles, the A2 sights are among the best. The A2 sight is still very capable, whether you want to LARP with an M-16A2 clone or compete in rifle matches. If you want to try your hand at shooting with irons, these are the ones to get.
We are committed to finding, researching, and recommending the best products. We earn commissions from purchases you make using the retail links in our product reviews. Learn more about how this works.


