How to Make Hide Glue

0
A traditional skills that can be of great use in a wilderness living or long term survival situation is the making of glue from naturally available resources. There are numerous methods that will produce different types of adhesives. In this article I would like to focus on one of those methods, the making of hide glue. The process is time consuming, but not difficult. The product is a fairly high quality glue, although it is water soluble. The process starts by taking some raw hide. If you do not have access to raw hide, the easiest place to get it is at the pet supplies section of your store. Most dog bones are made of rolled up raw hide, just check the label. Here I am using beef hide dog bones. The hide will probably be very hard, so you can put it in boiling water to soften it up. 008 
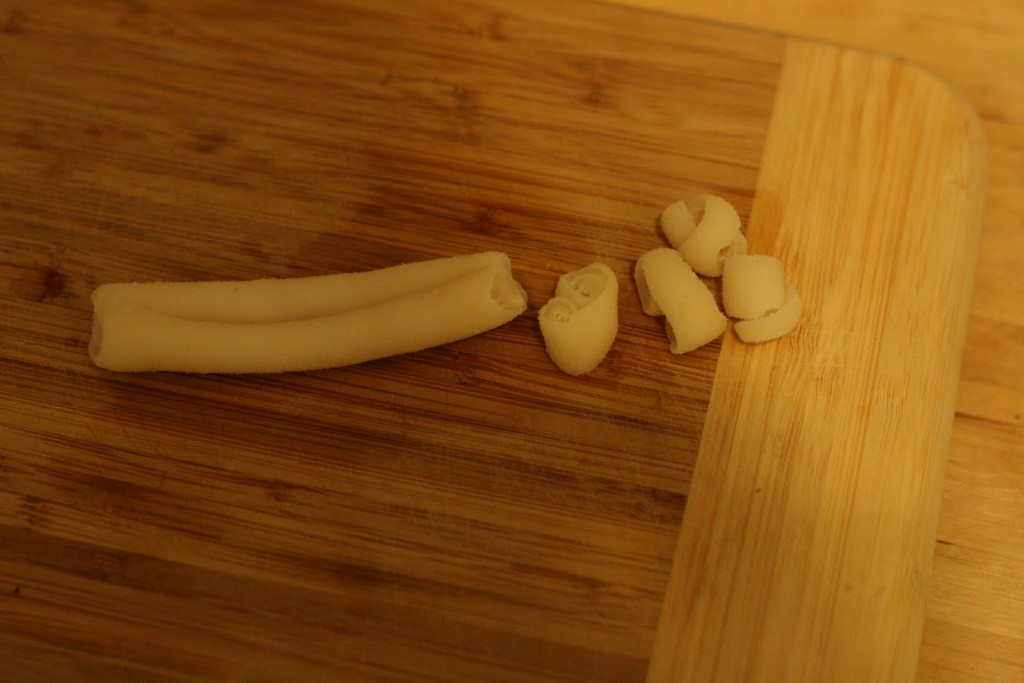
When it is soft, take it out and cut it into small pieces. 009

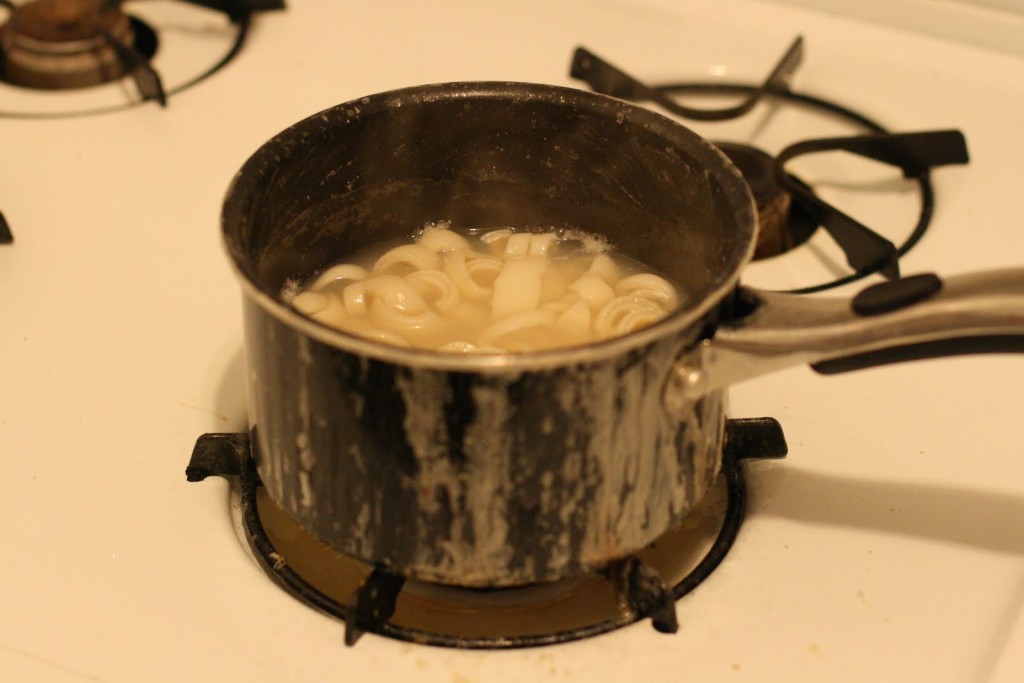
Put the small pieces back in the water and continue boiling it. Make sure the hide is always covered with water. The boiling will take hours, so you will have to periodically add more water so that the hide stays covered. Here I boiled it for three hours. The substance that you see on the side of the pot is overflowed liquid. When it dries, it becomes the glue.

011

Then strain out the hide pieces, or remove them with a spoon. Continue to boil the remaining water to reduce it down. I boiled it for another twenty minutes. Make sure to stir the liquid so it does not burn. By this point it should be getting fairly thick.

027

There is no specific required thickness. The more water it has, the longer it will take to dry once applied, but if it gets the job done, it is thick enough.

025

To preserve the glue, pour it onto a flat surface. I used a plate.

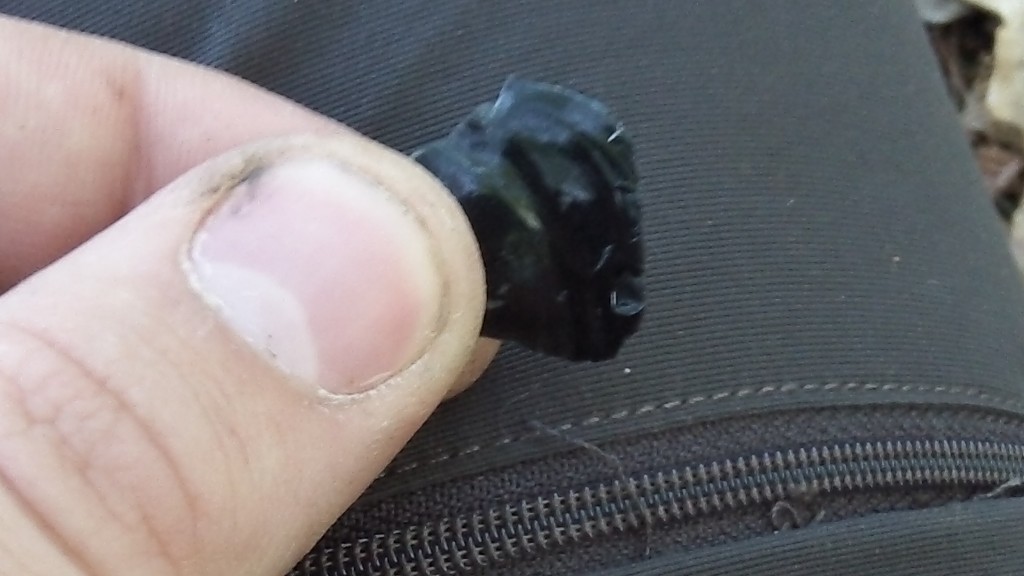
After about an hour, you should get a product which feels like rubber. 039

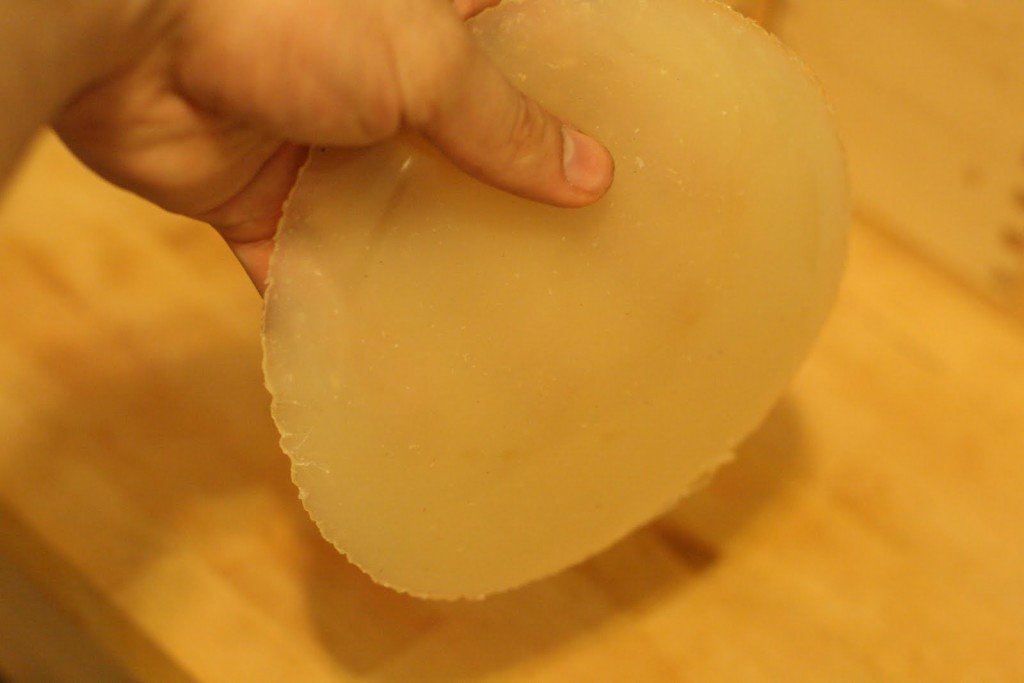
Cut it into smaller pieces and put it into a container. They should last quite a while, but since they are an animal product, eventually it will go bad. If you want to preserve it longer, spread out the liquid even thinner (less than 1/16th of an inch) and let it dry completely. The dried glue should be completely hard rather than rubbery. That way it should preserve longer.

047

To use the dried glue, just heat it up. You may want to add some water when heating it so it doesn’t burn.

That’s all there is to it. The glue will hold very securely when dry. Its most prominent historical use has been in the making of composite bows.

Stick Fish Traps

survival bushcraft fish trap This is a great old Native American fish trapping technique. It’s best used in tidal waters rivers or creeks. The concept is to funnel finish into an area where it’s hard for them to find the way back out, it’s the same concept behind a minnow trap or soda bottle funnel trap Drive stakes side by side into the bottom in shallow water to create a square or fenced in area of sorts in the water. Make sure the open end of the funnel is on the downstream side where the water is being forced into the opening. Other materials can be used to construct this trap such as rocks, but this is the most effective and allows for building it in slightly deeper water. One trick is to build it starting at one side of the bank and extending out using trhe side of the bank as a barrier and forcing fish towards your trap bushcraft fish trap   It’s a great and simple trap that allows you to catch the fish by hand or spear them once they are in your trap. You’ll be amazed at how effective this survival fish trap really is, even small ones work pretty well.   fishtrap  

Horno Oven

0
A mud-brick oven, or horno, is a great way to bake things while in a primitive living situation. It also offers a nice solution for bringing fire into the shelter. A fire is built withing the oven. The bricks or rocks heat up and retain the heat for hours. A few pies or two pizzas can be made in a properly heated horno (in this hungry camper’s experience). By heating the oven, the shelter may be heated for quite a while without the risk of smoke exposure through the night. Just heat the oven and let it burn out. First, lay the foundation with scavenged bricks or stone Leaving space for a door, start building the horno up in beehive shape. Create the doorway Build the rocks up And leave a hole in the top for the fire to breathe and to feed fuel through. Fit the door onto the opening Fill in all the spaces with mud and clay. This will seal the oven and prevent heat from escaping Firing the oven will help the mud and clay dry faster and allow the finding of any holes in the mud layer as smoke will billow out. Get a roaring fire going for about forty-five minutes to an hour and the oven will be ready to bake a few items at least. Covering the smoke hole with a rock after firing will allow retention of more heat. Be sure to seal up the door when cooking. Any number of methods are employed to cook with this oven. Some cultures scrape out the coals and cook with the radiating heat, other cultures will cook using both the coals and the radiant heat.

Birch Basket

0
The birch basket is an expedient way to make a water-tight container. One may never need take the bark from a living tree except in dire circumstances for often times birch is available on the ground with the wood rotted out. The birch basket, or any other type of bark that you may find capable of folding such as cedar, will provide excellent containers to carry water, supplies, collect maple syrup, or boil water in with rocks. First, find a down birch log and score a cylinder out on the log. Cut the scoring through and remove a cylinder. Next is to remove any wood that has managed to stick to the bark to fully reveal its pretty pink-red color. Cut a diagonal slice from each of the corners. This will all the bark to be folded. Begin to slowly fold the sides upwards to meet with a second side. Wrap the edges and punch a whole with either an awl or a knife when the two sides are joined. Fit a twig through to secure the folded bark together. Proceed to do the same with all sides. From here, any tears or holes in the bark may be mended with pine pitch. To further add stability and shape to the basket, a rim may be sewn on. This basket is simple to make and is a quick solution to not having a container to boil water in during a survival situation.

Hoko Knife

0
A hoko is a simple yet practical knife being easily made in the bush. The first one was found in an archaeological dig near the Hoko river in Washington. A green stick is used so that the sharp stone flake may be hafted easier. Here, a live branch from a Northern White Cedar is used. The bark is removed as it makes excellent cordage and will be used to hold the hafted rock flake in place. Split the stick halfway down The sharp rock flake is placed between the split portion of the stick The outer bark is then used as cordage to tie above, below, and across the stick so that the rock flake is held securely. The hoko is now made and is a great tool for adding control over rock flakes for skinning or wood working with larger flakes.

Making Char Cloth

0
Char cloth is a simple tool used by many who enjoy the use of flint and steel fire making. The charred cloth readily receives sparks from flints and steel or ferro rods. It is then placed in a tinder bundle and blown into flames. Char cloth is natural material that is created through a process known as pyrolysis, meaning it is burned without oxygen to produce a carbonized piece of material. What you need: 100% cotton cloth (In this case I used an old t-shirt) a metal tin (Altoids tins work great) cutting tools (scissors and/or knife) a fire Take the metal tin and poke a hole in the middle. This is where gases will escape from when you place the materials in the fire. Cut up the 100% cotton material into about one inch x one inch squares Place the cloth loosely in the tin. If they are packed too tight, they may not burn properly or may burn too much. Close the tin and place it in a fire. It doesn’t take too much heat or too long to produce results. The gases expelled through the hole in the middle may ignite, this is fine. After the gases are no longer coming out, which you will know as they are visible and tend to ignite, remove the tin from the fire and allow it to cool. This entire process doesn’t take very long, perhaps ten minutes plus time for the tin to cool off. When the tin is opened, a black and fragile material should be inside. This material is known as char cloth. Char cloth readily takes a spark and allows the transfer of a coal to a tinder bundle and be blown into flame.

Mess Kit Philosophy

When it comes to backpacking the most important thing is using gear that you enjoy and know how to use. From my experience in minimalistic camping and bushcrafting, I have found that bucket style mess kits, or as our English friends call them, “Billy cans” seem to work the best compared to the traditional boyscout or USGI mess kit for minimalistic camping. By all means, it is best to use what you like and know how to use, but here are some reasons why I have fallen in love with the bucket systems. When we look at many of the true survivors in the world, the primitives and refugees found throughout the world, we see that the cooking pot is  primordial to survival. The Billy Can system lends  all the abilities of the cooking pot in a condensed version offering, what I feel as, more advantages than that of the smaller capacity BSA style mess kits. Here in the North woods, for more than half the year, water is unavailable except through means of melting ice or snow. The bucket system allows more ice and snow to be melted than the shallow pans and pots of the traditional BSA style mess kits. This makes acquiring an essential resource to our survival much easier. Not only for snow and ice, but for the collection and boiling of any amount of water for drinking purposes. Once, while debating the advantages of the Billy Can systems, someone retorted with “Yes, but you cannot fry a fish in a bucket!” My first thought about this was mostly a knee jerk reaction. Of course, you can’t fry a fish, if only I could do that! But after the initial shock of the idea passed and some thinking on it, the advantages of the bucket system became obvious once more. While bucket systems don’t lend much to frying, how often do you have butter while in the bush to grease the pan to begin with, preventing sticking and a loss of vital nutrients? Secondly, the bucket system lends to the essence of what eating in a survival situation is about: maximum nutrient uptake. Through the method of frying foods, many nutrients are lost through the mechanics of cooking the food. The bucket systems promote the use of boiling, which will save more nutrients, grease drippings, marrow, and the other good things that would be otherwise lost and hold it in the water. All cook water in a survival situation should be drank as it will then impart these nutrients, extra calories, and hydration unto the imbiber. These simple listed advantages are what I feel weigh so heavy in choosing a bucket system over a BSA style mess kit. They both can serve you well, and as said absolutely use what works best for you, but it seems that the many real life uses of a pot over a pan highly add value to bucket systems and make them indispensable for wilderness living.

Straw Mat

0
The straw mat is a simple and effective method of staying warm in the bush. It can be made out of virtually any dried and nonpoisonous plant. It is may be used as a poncho, a blanket, or an insulating pad to keep the cold earth from sucking the heat through your body. First, one must collect proper amounts of the material. More straw than expected will probably be needed. Here, three large bales are collected and tied off with a root found growing nearby the collection process. Natural cordage can be used for this process, but for sake of expedience and commonly available material, paracord is stripped of its outer shell and the seven inner strands are used to conserve resources. Find the middle of string and lay it out. Take a handful of material and lay it on the string at the middle point. Keep in mind, the more material used, the more insulating but the less available to complete the project. a simple square knot is tied to hold the straw together and create dead-air space. The process is continued down the line. Grab more straw, place it between the two strings, and tie it off tightly, keeping each bundle close as possible to the last. With a bit of work, soon the workings will begin to pay off. About half way finished, the straw mat hasn’t taken too much time at all. When the string runs out, simply wrap another string around the last bunch of straw. Tie it off just as the other bunches. Continue the process until it is of the desired length. It’s now ready to be used as a blanket or insulating ground pad An Otzi style poncho And even rolls up to storage size!

Bracken Fern Fiddlehead

The fiddlehead is perhaps one of the most well-known wild edible. It is very tasty and cooked like asparagus. Usually, when one says fiddlehead they mean the Ostrich Fern fiddlehead. This time, we are instead harvesting the bracken fern, an incredibly common fern in the north woods. The fiddlehead is shaped somewhat like an eagle’s talon with a silver-grey hair covering the stalk. Harvest them when they are about 6-8 inches tall and not maturing, meaning, not yet uncurling and showing their leafs. To cook them, give them a wash and rub the hairs off of them. It doesn’t take too long and the hairs come off easily. The bracken fern must be cooked before being consumed. They can be steamed for 30-45 minutes in two changes of water until tender-crisp or fried with butter or olive oil. They taste and are used much like asparagus. Once they start unfurling, they become inedible as they tend to get more bitter. This is an example of a maturing fiddlehead that I would not consume. They can be gathered in abundance and make for a delicious meal from our own forest and prove to be way cheaper (just a little time and work) than buying them at gourmet prices at restaurants or at the store. Mmm, a great and tasty wild edible!

Harvesting Cattail Shoots

Harvesting Cattail Shoots Cattails are a nutritious plant that are packed full of starches and in a survival situation, that means a good find. The cattail is found throughout most of the US near slow moving or standing water. Almost all parts of the cattail are edible at some time of the year and were depended upon heavily as a main source of food by Native Americans. Currently in the North Woods around late April and early May, the cattail shoots are just coming up and are ready for harvest. They are very tasty at this time of their growth and exceptionally tender. Here is a cluster of old growth cattails and new shoots growing near a lake. 
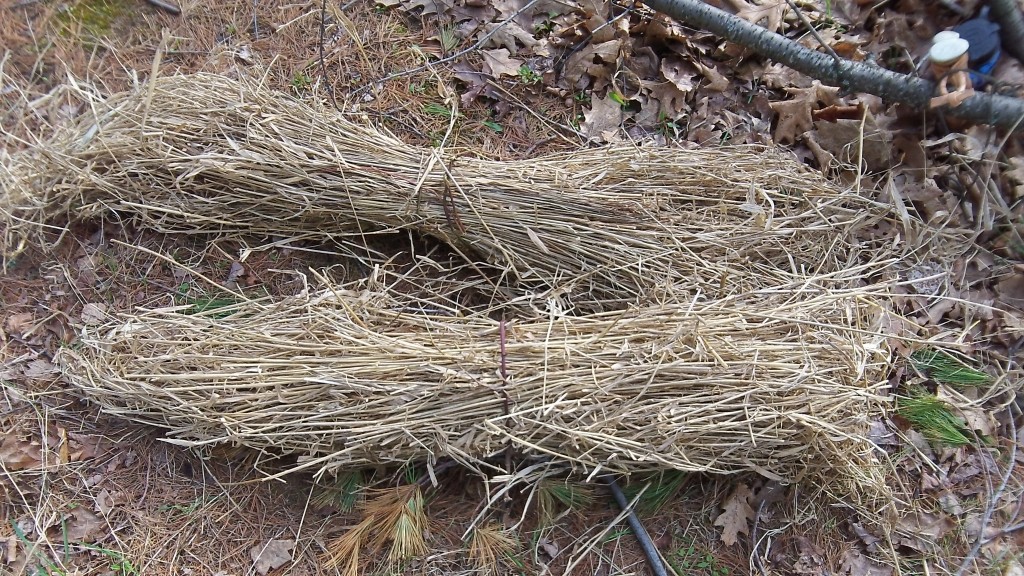
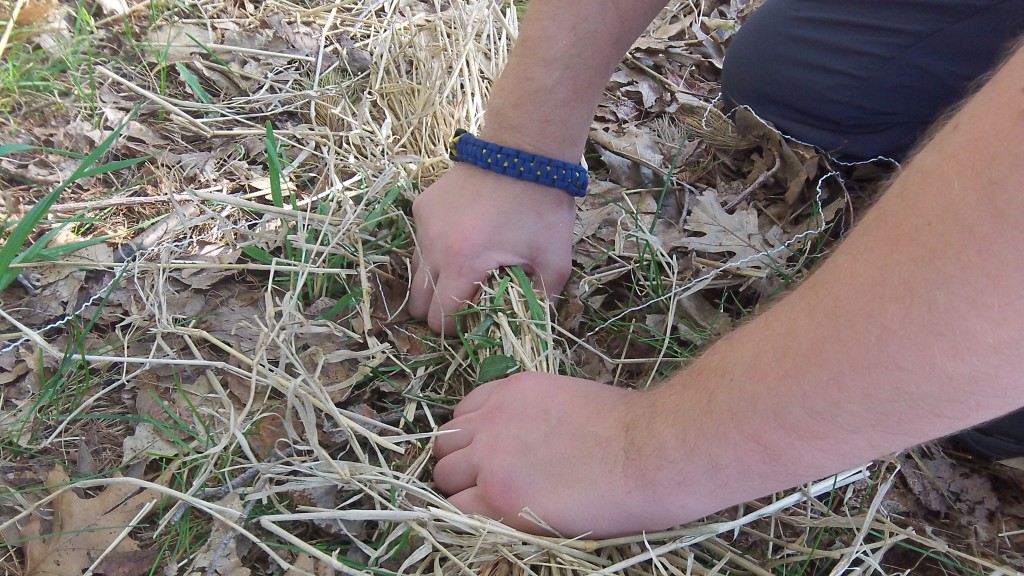
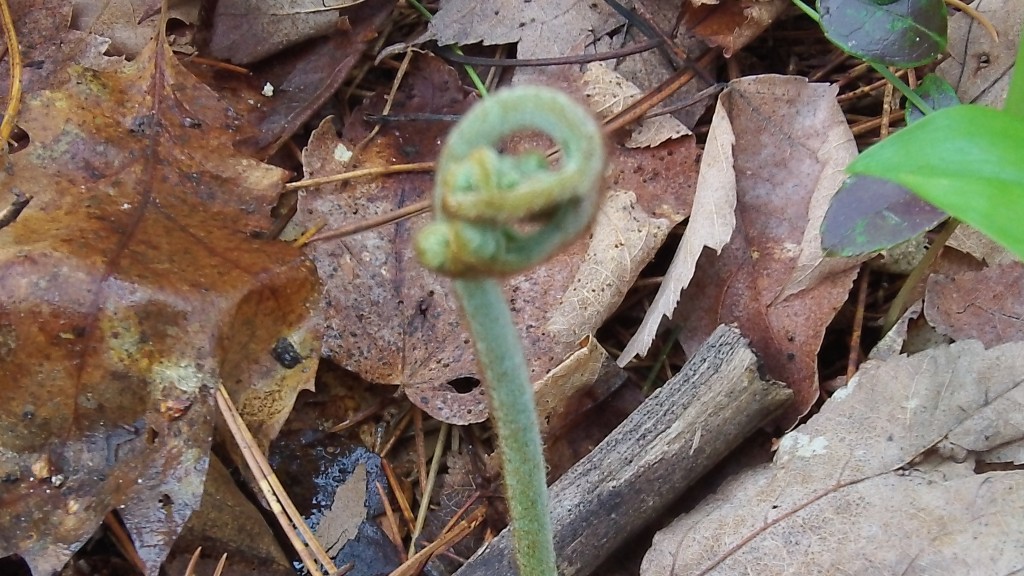
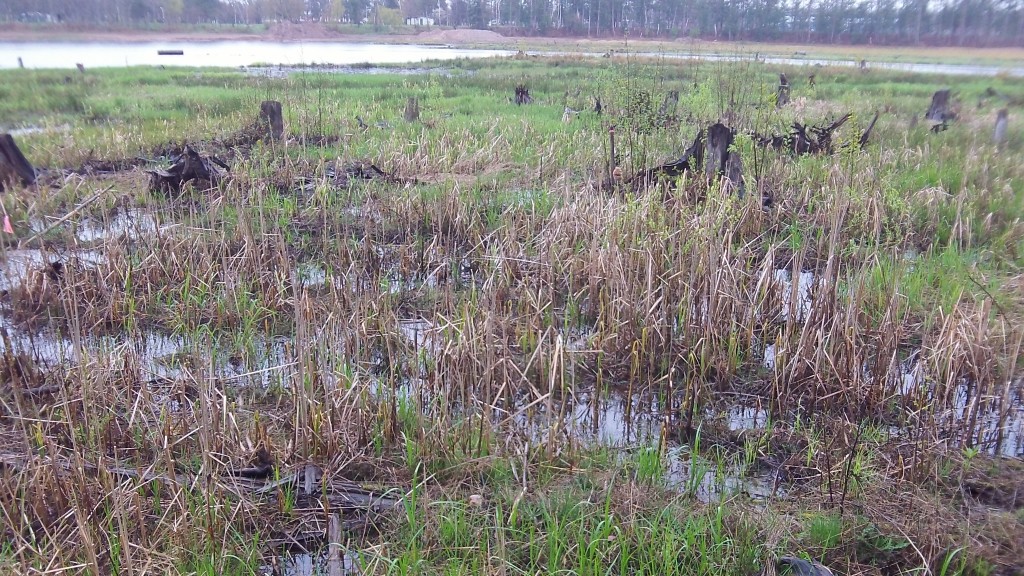
This time of year, we are looking for the younger, new growth plants which are typically the green plants among the dead brown.Here is a young cattail And another young cattail to show you the variation in sizes and to further illustrate that plants don’t always look text-book. The goal is to reach down and dig a bit through the muck at the base of the stalk and pull up the white shoot, starchy bulb, and/or the starch filled rhizome. This early in the season we are focusing on the tender white shoots. With a little bit of swishing in the water, the white shoot should become prevalent and it is this white part that you are after. These cattails are plentiful and quickly gathered. To be a responsible harvester and make sure that there are new cattails for you to harvest later, only harvest a third of the available cattails at the most. The outer leafs are separated from the stalk, leaving the tender shoot to be cut up into chunk sized pieces. They then can be fried up with a little butter or otherwise cooked in the same way one would do with asparagus.