Sprucing up and maintaining your home is often not associated with prepping, but when you stop to think about it, it is your home itself that is one, big container for all of your many preps. If the structural integrity of that container is breached, the contents within will be vulnerable to degradation and loss, you counted among them!
It follows naturally that you will want to keep your home in tip top shape, not allowing any unseen or insidious issues to start damaging it.

Things like windows, doors, and foundation are something that are constantly in sight and easy to remember, but very few homeowners stop to give their attic a second thought, unless they need to access it for some reason.
You might be surprised to learn that keeping your attic in good shape and functioning properly is absolutely imperative to keeping your house standing for decades to come.
Specifically, temperature fluctuations, hot or cold, can seriously degrade the structure of your home and badly damage anything that you might have stored in the attic.
To prevent these temperature swings, you’ll need to insulate your attic properly. This is a task that is well within the reach of a seasoned DIY prepper, and in this article we’ll be bringing you a foolproof step by step guide for taking care of this task yourself.
Your Home’s Attic is an Often Overlooked Section
As mentioned above, many homeowners simply overlook the health and well-being of their attic unless there is a serious crisis revolving around it.
Maybe a raccoon or squirrels have taken up residence up there, or perhaps a family member nearly fell through the ceiling after accidentally stepping between the rafters trying to retrieve Christmas decorations.
Whatever the case, if it is out of sight it is out of mind. What is an attic, after all, except the space between where your ceiling stops and the roof begins?
It turns out that the attic actually has an important function, serving as a compartment, or airspace between the living space of the home and the roof.
This air gets hot when it is hot, and cold when it is cold, and when functioning properly will help insulate the home appropriately while ferrying moisture out of the air.
It can even make for useful, easily accessible but out of the way storage for all kinds of things, and most germane to our purposes many of our preps.
Naturally, you should want to take advantage of this storage space if you can, but more importantly it is in your best interest to keep your attic in good repair and functioning properly so that you do not endanger the home itself and everything that it contains.
Excessive Attic Temperature Spikes Can Degrade Your Home and Your Preps
Most attics are notorious for being uncomfortable. If it is hot outside they are even hotter, reaching stifling, blazing temperatures. If it is cold outside, they are positively frigid.
Most people don’t want to spend any more time and the cramped, musty and uncomfortable conditions of an attic any longer than they have to and naturally this contributes to a lack of inspection and preventative maintenance.
It is not uncommon for an attic to be anywhere from 20°F to 30°F warmer than the ambient outside air temperature when it is hot and conversely anywhere from 15°F to 30°F cooler than the outside air temperature when it is cold. This means a few things for us.
First, our air conditioner or furnace will have to work even harder to overcome the loss of heat or loss of cooler air to the void of the attic if there is not a barrier to block its passage. This will drive up our utility bills precipitously.
Second, anything we have stored up there will be subjected to these temperature extremes, year in and year out. Most materials, whatever they are, will degrade far quicker than they would when kept in relatively cool or room temperature surroundings.
Additionally, these temperature fluctuations can lead to degradation of the wood and other materials that your home is made from, slowly but surely weakening it structurally.
To compound both of these harmful effects, most attics retain a certain degree of moisture, meaning the conditions will be quite literally right for mold, especially when it is warm or hot outside.
Mold infestations are a double whammy, first because they actively eat and rot wood, further weakening your home at an accelerated rate, and second because many species pose a health hazard to people and animals.
It goes without saying that mold blooms on all kinds of materials, from paper and fabrics to leather, have destructive effects.
If you want to keep your house in good repair and protect your stuff that you stash up there, you’ll need to get serious about stabilizing the temperature in your attic.
Insulation and Ventilation to Stabilize Attic Temperature
Your first and best option for protecting your home and your possessions against the atmospheric instability imparted by a poorly maintained or poorly fitted attic is to insulate the space properly.
Insulation provides a barrier that works both ways, hoping to keep your interior space cool or warm as appropriate, while also reducing extreme temperature swings in the attic itself, keeping any possessions stored there in better condition and preventing the harmful onset of mold or other deleterious effects to the materials your home is constructed from.
But insulation is not just a matter of dropping big, fluffy bundles of the pink stuff here and there in your attic space.
Properly insulating an attic entails ceiling all gaps and cracks that air can move through between it and the living space, wrapping or otherwise insulating pipes and other fixtures, ensuring proper ventilation is taking place using passive or active measures and then finally installing insulation of one type or another.
It is difficult, sweaty, and usually dirty work that involves a lot of traipsing around using boards and paneling to reach the areas that you need to reach, but it is not particularly complex, and something that can be attempted by most DIY-savvy preppers.
Execute it correctly and you’ll enjoy:
- significantly lower utility bills,
- a more comfortable interior year-round,
- a home that will last significantly longer,
- and a more suitable space for storing the things you don’t need close at hand, including your precious preps.
That sounds like quite a checklist, and it is, but lucky for you we are here to take you from zero to hero when it comes to attic insulation and teach you everything you need to know to tackle the job yourself. Keep reading and we will get into the nuts and bolts.
Understanding Insulation Type, R-Value, Ventilation, and More
You don’t need too much equipment or even very much in the way of supplies to do the job of insulating your attic correctly, but you do need to know what you are talking about.
Read through the following list of terms to help familiarize yourself with the items and metrics relevant to the task at hand.
R-Value
R-value, or resistance value, refers to how much a given type of insulation resists the “movement” of heat. A higher number means better insulation.
What R-value is appropriate to your attic is dependent upon where you live, the average temperature, and the severity of seasonal changes.
Generally speaking, a higher R-value is always better, but you invariably pay more for the performance when measuring apples to apples. A high R-value is particularly important in cold climates when you want to keep the inside of your home toasty warm.
Make sure you pay close attention to the specifics listed on a given type and brand of insulation, as it may specify the advertised our value is only achieved under certain circumstances or at a certain thickness which could be misleading.
Insulation Types
As with most things, there is more than one way to skin a cat, and by that I mean there is more than one kind of insulation that you can choose from for insulating your attic.
All of the following types of insulation have advantages and disadvantages that should be considered before choosing one.
Some afford extraordinarily high R-values in exchange for being a little messy, or perhaps a little expensive. Others are highly adaptable and durable but messy and require significant technical skill to pull off properly.
But no matter what kind of attic you have and what sort of challenges you are facing, rest assured there is a style of insulation that will work well for you.
Cellulose
Cellulose is a common and popular option for attic insulation and is composed of recycled material in the form of ground up paper with some chemical additives to make it unappealing to insects that would otherwise eat it and also to give it some fire resistant qualities.
A dense layer of cellulose will nearly halt, but not completely block, the movement of air in your attic.
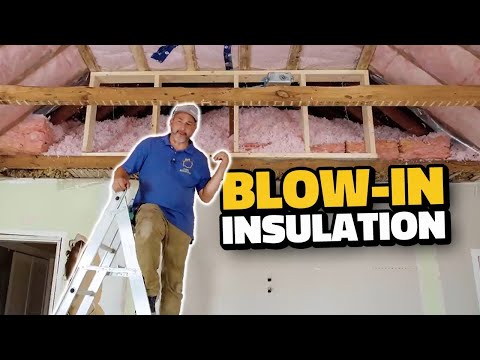
Compared to other common insulation types like fiberglass batting, cellulose provides a higher r value by thickness, and is relatively easy to use or install. Available at many home improvement stores, cellulose must be installed with a blower machine.
Though it appears light and fluffy in pictures, almost like you could spread it out by hand, with a pitchfork or a shovel, this is not the case. It is densely packed and generates tremendous amounts of dust when handled, necessitating blower installation.
There is not much you can do when it comes to dust control except letting it settle, though professionals often use high-end blower machines that will ever so slightly moisten the cellulose material to cut down on dust, and also help it settle into place more densely, slightly improving its insulating qualities.
Mineral Wool Batts
Mineral wool batt insulation is an older type that is becoming increasingly scarce today despite its good qualities.
Extraordinarily fire resistant, highly insulating, and renowned for its sound dampening properties, like all batt style insulation it is sold in giant rolls that are easily unfurled before being sized or tucked into place.
For attics that offer plenty of room to maneuver and evenly spaced joists this is a good option if you can find it and afford it. It is almost completely extinct in most areas.
Loose-fill Fiberglass
Fiberglass insulation is small chunks of incredibly fine glass threads, as the name suggests, and like cellulose is blown in using a big blowing machine with a tube to direct the spray.
Also like cellulose, don’t make the mistake of thinking you can spread this stuff by hand or with a scoop. It just won’t work that way.
Fiberglass has a major advantage financially, as it is very cheap compared to almost anything else on the market and widely available from coast to coast.
Like cellulose, loose fill fiberglass is ideal for filling in irregularly shaped crevices, non-standard joist spacing or in attics where you have very little room to maneuver. Unfortunately, compared to other materials the R-value of fiberglass, even when blown in, is relatively poor.
It is worth noting that older types of fiberglass or notorious for irritating skin, eyes and lungs. Newer fiberglass material is both more effective and less irritating, though you should still utilize appropriate PPE whenever you are handling or installing it.
Fiberglass Batts
Probably the most common and popular option for insulating new construction, and most often the choice for the well-intentioned homeowner who doesn’t know what they are doing, fiberglass batts continue to show up as attic insulation even though there are better options.
Like mineral wool above, rolls of fiberglass insulation are appealing because they are easy to handle and easy to install assuming there is room to maneuver in the attic and joist spacing is standard and regular.
However, r values for fiberglass rolls are poor to middling and it can be surprisingly expensive for what you get.
But rolled fiberglass does have advantages, namely the fact that it is extremely moisture resistant and non-combustible so it does reduce the overall risk of fire should it begin in the attic.
Generally speaking, if you live in an area with a mild climate and have a spacious attic with regular intervals between the joists and no major obstacles, consider fiberglass rolls, but know that there are better options.
Denim
Denim batts, or rolls, are sort of a trendy option in attic insulation at the moment. As you might have already guessed, this insulation is made out of repurposed, recycled and ground up denim blue jeans.
It is comparable in performance to cellulose, and like cellulose is typically treated for insect and fire resistance.
Like other forms of batt insulation, it is a relatively trouble-free installation so long as you have plenty of room to maneuver in your attic and regular spaces between joists to emplace it.
Unlike other forms of rolled insulation, however, it is quite expensive like many other so-called green options. If you are hell bent on using recycled materials, denim insulation might be the way to go but understand you’re going to be paying a hefty, hefty premium for the privilege of being able to pat yourself on the back.
Foam
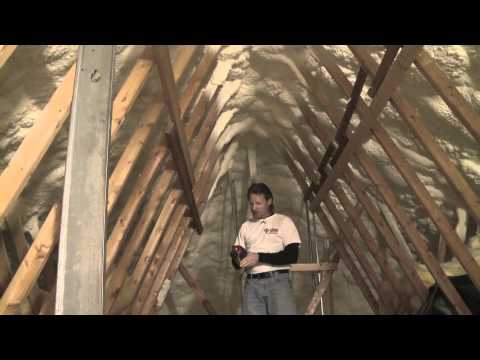
Sprayed foam insulation might be thought of as the ultra high performance option for attic insulation.
These pressurized chemicals are extruded through a foam gun and expand on impact while curing to fill every gap, every crack and every crevice with dense, sound deadening and is superlatively insulating foam.
This insulating foam is so tough and rigid that it is very difficult to remove, and even increases the structural strength of your home!
As an insulating material, it is basically perfect as far as performance is concerned and when properly installed totally seals off any unwanted movement of air, and even increases the functional envelope of your home’s interior space.
However, foam comes with some significant drawbacks. First, it is very expensive. Second, installation is just as much art as science and it is usually not within the realm of the average DIY homeowner.
It also requires laborious prep work to be effective, with every trace of debris and old insulation needing to be removed before foam can be installed, typically limiting it to professional installation for new construction.
Lastly, this foam will entomb anything it touches, and wires, pipes and fixtures covered by it will be rendered virtually inaccessible, causing a potential nightmare down the line if you need to replace or inspect them.
Despite all this, it’s superb insulating performance, high strength and decades-long lifespan all the while remaining completely maintenance free makes the costs and drawbacks worth it for many.
Sealing
Prior to placing any insulation, except expanding foam insulation, of course, cracks and crevices in the attic should be sealed to prevent the unwanted movement of air. This can be done using smaller cans of expanding foam and caulk.
The laborious and annoying, the better job you do ceiling the attic up prior to the installation of your new or supplementary insulation the greater protective value it will provide.
Similarly, pipes and ducts should also be wrapped with their own purpose-specific insulation, taped and sealed according to the manufacturer’s specifications prior to the placement of any attic insulation. Attic insulation should never be used to insulate pipes and ducting in one shot!
Radiant Barrier Panels
Not really a type of insulation, radiant barrier panels supplement the capabilities of your insulation by blocking heat coming through the roof.
Typically taking the form of a dense polystyrene foam board with a foil backing, these rigid panels are installed directly against the roof between the rafters.
If you live in an extremely hot climate or one that is perpetually sun-soaked, consider installing these to help supplement your efforts.
In cloudy or cooler climates, they are not required unless you are really gung-ho about squeezing every point of efficiency out of your insulation job.
Ventilation
Insulating your attic is only part of the puzzle. The other part is properly ventilating it. Attic ventilation, as you’d expect, is the process of allowing fresh air in while moving the old, stale air out and serves to regulate moisture levels while also helping to avoid temperature spikes.
Ventilation is generally a pretty simple puzzle and virtually every home built today will have an attic that is ventilated one way or the other.
It is worth noting, however, that older homes around the country may not be ventilated at all, and it is usually these that will struggle mightily when it comes to controlling mold.
Your home is probably already ventilated and unless you plan on a serious attic overhaul you likely won’t need to change a thing, but for completeness sake the two types of ventilation will be covered here in brief.
Passive
Passive attic ventilation systems do not rely on any electrical apparatus to move air through the space.
Typically consisting of soffit intake vents and then louvered ports at either end of the house or even a ridge vent running along the spine of the roof passive ventilation leverages simple physics to get the job done, with cooler air being drawn in through soffit vents which then pushes the warmer air out the other ports.
Some passive ventilation systems are ingeniously effective, and if you have ever seen those turbine looking vents perched atop commercial buildings or the roof of an older home, you have seen passive ventilation in action.
Passive ventilation overall is entirely adequate for the vast majority of attic ventilation needs.
Powered / Active
Powered ventilation systems, as described on the label, rely on some sort of electrically or mechanically powered fan or other device to physically move air around, usually as a supplement to passive ventilation systems.
Sometimes installed in the roof itself and sometimes at either end of the house under the eaves power ventilation systems are rarely necessary but can sometimes result in a gain in efficiency in the hottest environments.
Unless they are a simple user activated on off system, powered attic ventilation fans require a thermostat in order to trigger when attic temperatures reach a preset level.
If you live in an area with high UV exposure you should consider a solar power attic fan which does not need to be tied into the home’s existing electrical grid.
Now, we have discussed all of the appropriate materials and other tools required to do the job. It is time to suit up and get on with it!
Caution: Insulation is a Respiratory Hazard
Before you begin, understand that most types of insulation are at least mildly hazardous, with several being a rather potent respiratory hazard. Cellulose is notoriously dusty, fiberglass can be mightily irritating, and sprayed foam releases noxious chemicals as it cures.
For any attic insulation job, even the simplest, you want to don personal protective equipment appropriate to the job. A respirator is absolutely mandatory, and you should consider gloves, goggles and a zip-up bodysuit highly recommended.
Though most modern forms of insulation are not quite as nasty to handle as the older fiberglass types you could still find yourself quite ill if you don’t treat it with the respect that it deserves.
Installing Attic Insulation Step-by-Step
You can use the following step by step guide for most types of insulation installation. Note that this guide assumes you are using something other than sprayed foam which is very technically challenging.
If you are going the spray foam route, you may still rely on this guide to help you get your attic space prepped for best results, although the intricacies and subtleties of properly spraying foam or beyond the confines of this article.
For any loose-fill or batt styles of insulation, read on.
Step 1: Gather Supplies and Equipment
As always, begin at the beginning. Gather the needed supplies and equipment required for the job.
For any insulation install you’ll need your personal protective equipment as outlined above, the insulation material, a blower or other machine to handle it if required, work lights, sturdy plywood or boards for safely maneuvering over the joists and a small knife or bag slicer to open the packaging.
You’ll also need a second person to help you. For anything but the smallest jobs in the tidiest attics installing insulation is a two-man affair.
For blown insulation in particular you’ll need one person to operate and load the blower while the second person up in the attic directs the nozzle.
Step 2: Clear and Illuminate Space
Don’t start by just laying down new insulation all willy-nilly. Get the job underway right by first clearing out the attic of any obstructions that you can.
Christmas decorations, old knick knacks, leftover packaging from the previous insulation job, anything and everything that can be cleared out should be cleared out.
You can make your life a lot easier by brightly illuminating the attic. Most attic spaces do not have anything like adequate lighting, usually just a single, bare bulb or perhaps two.
You can run corded work lights or battery powered lanterns up into the attic space to light it up brightly so you can see what you are doing and ensure you will not miss anything.
Take care especially when using incandescent lights that they are not allowed to contact any flammable material as these lights can grow quite hot and will significantly increase the temperature of the space if left on. This can be especially grueling during the summer months.
If you are removing the old insulation, if present, do so now. Old insulation that is uneven, greatly diminished of loft, moldy, mouse eaten or generally in a bad state of repair should be removed.
Note that insulation that is in good shape can be left in place and covered up to increase the R-value of the install overall. This should only be done when deploying loose fill insulation. Foam or rolled insulation should only be installed on a bare surface.
Step 3: Seal Gaps and Insulate Pipes (If Required)
With the space illuminated and all detritus and old insulation removed, it is time to give the entire attic space a once over and seal it as required.
With the sole exceptions of your ventilation intakes and exhausts, every gap, every crevice, every place where a draft makes its way into the attic should be sealed using a general purpose expanding foam for larger gaps or holes and construction adhesive caulk for smaller ones.
It pays to be thorough here even if it is laborious. Even a couple of small gaps that are missed could allow a dramatic draft into your attic, spoiling your efforts to appropriately insulate and ventilate it. Take your time and do whatever you need to do to ensure a thorough sweep.
Also take the time now to wrap and insulate all ducting, pipes or any other thermally conductive material. HVAC ducts especially should be thoroughly insulated for maximal efficiency.
This is another thing that will help get your home heating and cooling bill down month to month.
Step 4: Screen Furnace Vent, Soffit Intakes and Recessed Lights
If you have never done this before, you might be astounded and how much of a mess you are about to make, especially if you are using any sort of loose fill, blown insulation.
The stuff gets absolutely everywhere, and it is all too easy to accidentally blow the stuff you just laid back up into the air using the nozzle of the blower machine.
Aside from being Grade-5 aggravating, it ensures that this stuff will get where you don’t want it to go.
Whatever kind of insulation you are laying, you need to protect certain fixtures in and around the Attic.
Soffit vent intakes, exhaust ports, recessed can lights, furnaces, whole house fans and anything else that requires the flow of air or uses electricity should be protected by shielding or fencing so that the insulation does not come into contact with it.
Recessed lighting and other energized equipment in particular is a significant fire hazard if insulation is in contact with it.
This can be easily done using a variety of materials, but heavy cardboard or foam board stock are popular, easy to work options that can be easily removed when you are finished. For more permanent installation, consider thin plywood or even plastic paneling.
Once you have fully enclosed all of these sensitive installations to allow a little standoff between it and the insulation, you are ready to move on to the next step.
Step 5: Map Out Wire Runs, Lights and Other Fixtures
This step is essential for preventing headaches down the line! So you’ve cleared out the attic, illuminated your workspace and protected any sensitive fixtures or other installations from coming into contact with the insulation.
Now, especially if you are utilizing deep loose fill or sprayed foam insulation take the time to sketch out a map of where all the relevant equipment, wiring and piping is in the attic.
The reason for this is that deeply layered insulation essentially covers up everything in your attic, and can make tracking down that one duct, light, wire or pipe extremely difficult.
Trying to locate any of the above by feel in the future is the leading cause of people accidentally plummeting through a drywall ceiling when they miss a step.
Don’t risk it. Sketch out your map, label it accordingly and be sure to indicate useful references that will help you home in on what you are looking for.
Then make a copy of your map and file one of them with other important documents you keep regarding your house. The other one can be placed inside a Ziploc bag or plastic file folder pouch and hung up handily in the attic.
Step 6: Mark Required Depth (If using loose fill or cellulose)
Blown loose fill or cellulose insulation must be layered to a prescribed depth for appropriate performance based on your requirements and the specifications of the material itself. It is not enough to just cover all of the exposed plywood or even up to the top of the joists.
Depending upon the climate and your requirements, you might need it a veritable mountain of insulation!
To ensure an even, uniform depth of fill you should Mark or install depth gauges throughout the space of the attic where the installation is being laid so you won’t have to guess at how deep it is. This can be done using a variety of methods.
Posts can be marked boldly with a pencil or marker. A paint stirring stick or thin dowel can be erected on a joist using painters tape. Other solutions abound.
Whatever you do, make sure these indicators are spaced widely enough so that you’ll get an accurate reading as you go along.
Step 7: Install Insulation
Now, at last, you are ready to get down to the business of laying your insulation. Whatever type you are using, you generally want to work at the point farthest away from the entry to the attic and lay back towards it.
Make sure you work methodically to ensure a uniform, even application being careful to not get in your own way.
If you are using loose fill insulation you’ll need to coordinate with your partner who is running the machine and loading it with insulation bundles. These machines are often quite noisy, so visual signals or even walkie-talkies with headsets may need to be employed.
As you’ll probably discover, all of the hard work was done prior to the actual placement of the insulation and this part should go relatively quickly. Like so many other jobs, the results are often much improved by thorough, diligent prep work.
Helpful Tips and Tricks
Covering every possible contingency, situation and specific circumstance is beyond the confines of this article and practically impossible.
That being said, long experience has produced these golden nuggets of wisdom that are sure to make your project easier and less aggravating.
Learn from the trials and tribulations of those who have come before you and your attic installation install job will go smoother and quicker!
- Consider closing the attic entryway behind you when laying loose fill insulation. Even if you have extension cords running up for lights and things, the chances of a mishap that will see dusty, flurry-like insulation getting down into your living space are high. This stuff will prove maddeningly difficult to clean up, and you can spare yourself considerable aggravation while preserving your relationships with your family by simply shutting the door to the attic or closing the trap.
- Never, ever try to tiptoe across joists unless you have no other option. I cannot tell you how many holes I have seen punched in ceilings or even serious accidents or someone plummeted through entirely trying to do just that. Instead, if your attic does not have adequate walkway space haul up a thick sheet of plywood measuring at least 6 ft long and a couple of feet wide for you to stand on. You can lie this across the joists to effectively place your own road as you go. If your attic entry is so cramped that this is not possible, you can do the same thing with several thinner boards that you strap together once you have them up in the attic.
- If laying rolled insulation, you might see a net gain inefficiency my first mapping out the length and width of the spaces between the joists in your attic. Then rolls can be pre-cut and assembled with appropriate marks to allow rapid, easy installation once you have them up in the attic. Much time and effort is wasted trying to maneuver large rolls of insulation in a cramped space, much less cut them to width or length.
- If placing rolled insulation, it can easily be cut using a serrated knife. Large, specialized and expensive insulation knives are sold for the purpose but you can use a long, bog standard bread knife from your kitchen for the task just as well.
- If spraying in foam insulation, know that the curing process will result in the generation, or off-gassing, of significant chemicals that are fairly noxious. You should be wearing a respirator for all insulation installations, but make sure you have one that is rated for chemical vapors if installing sprayed foam. Once the job is done, now will definitely be the time to use your whole House fan if you have one installed to forcefully evacuate the air in the attic. Alternately, switch on any powered attic ventilators or place a common electric fan in the attic to help get those gases out in a hurry.
Conclusion
Most attics are forgotten about unless they are causing a problem, but even though your attic is out of sight and out of mind it could be slowly ruining the structural integrity of your home and damaging anything you have stored up there if the temperature is allowed to fluctuate too wildly.
Proper ventilation and insulation of an attic is vital to stabilizing temperature and moisture levels within acceptable limits.
Poor insulation or a total lack of insulation is most often the culprit, and upgrading or installing insulation is easy enough that it can be done by your average homeowner with the right preparations. Use the handy guide we have provided above and your attic insulation installation will go down as smooth as silk!